Lacquered Lamp Shade DIY Tutorial
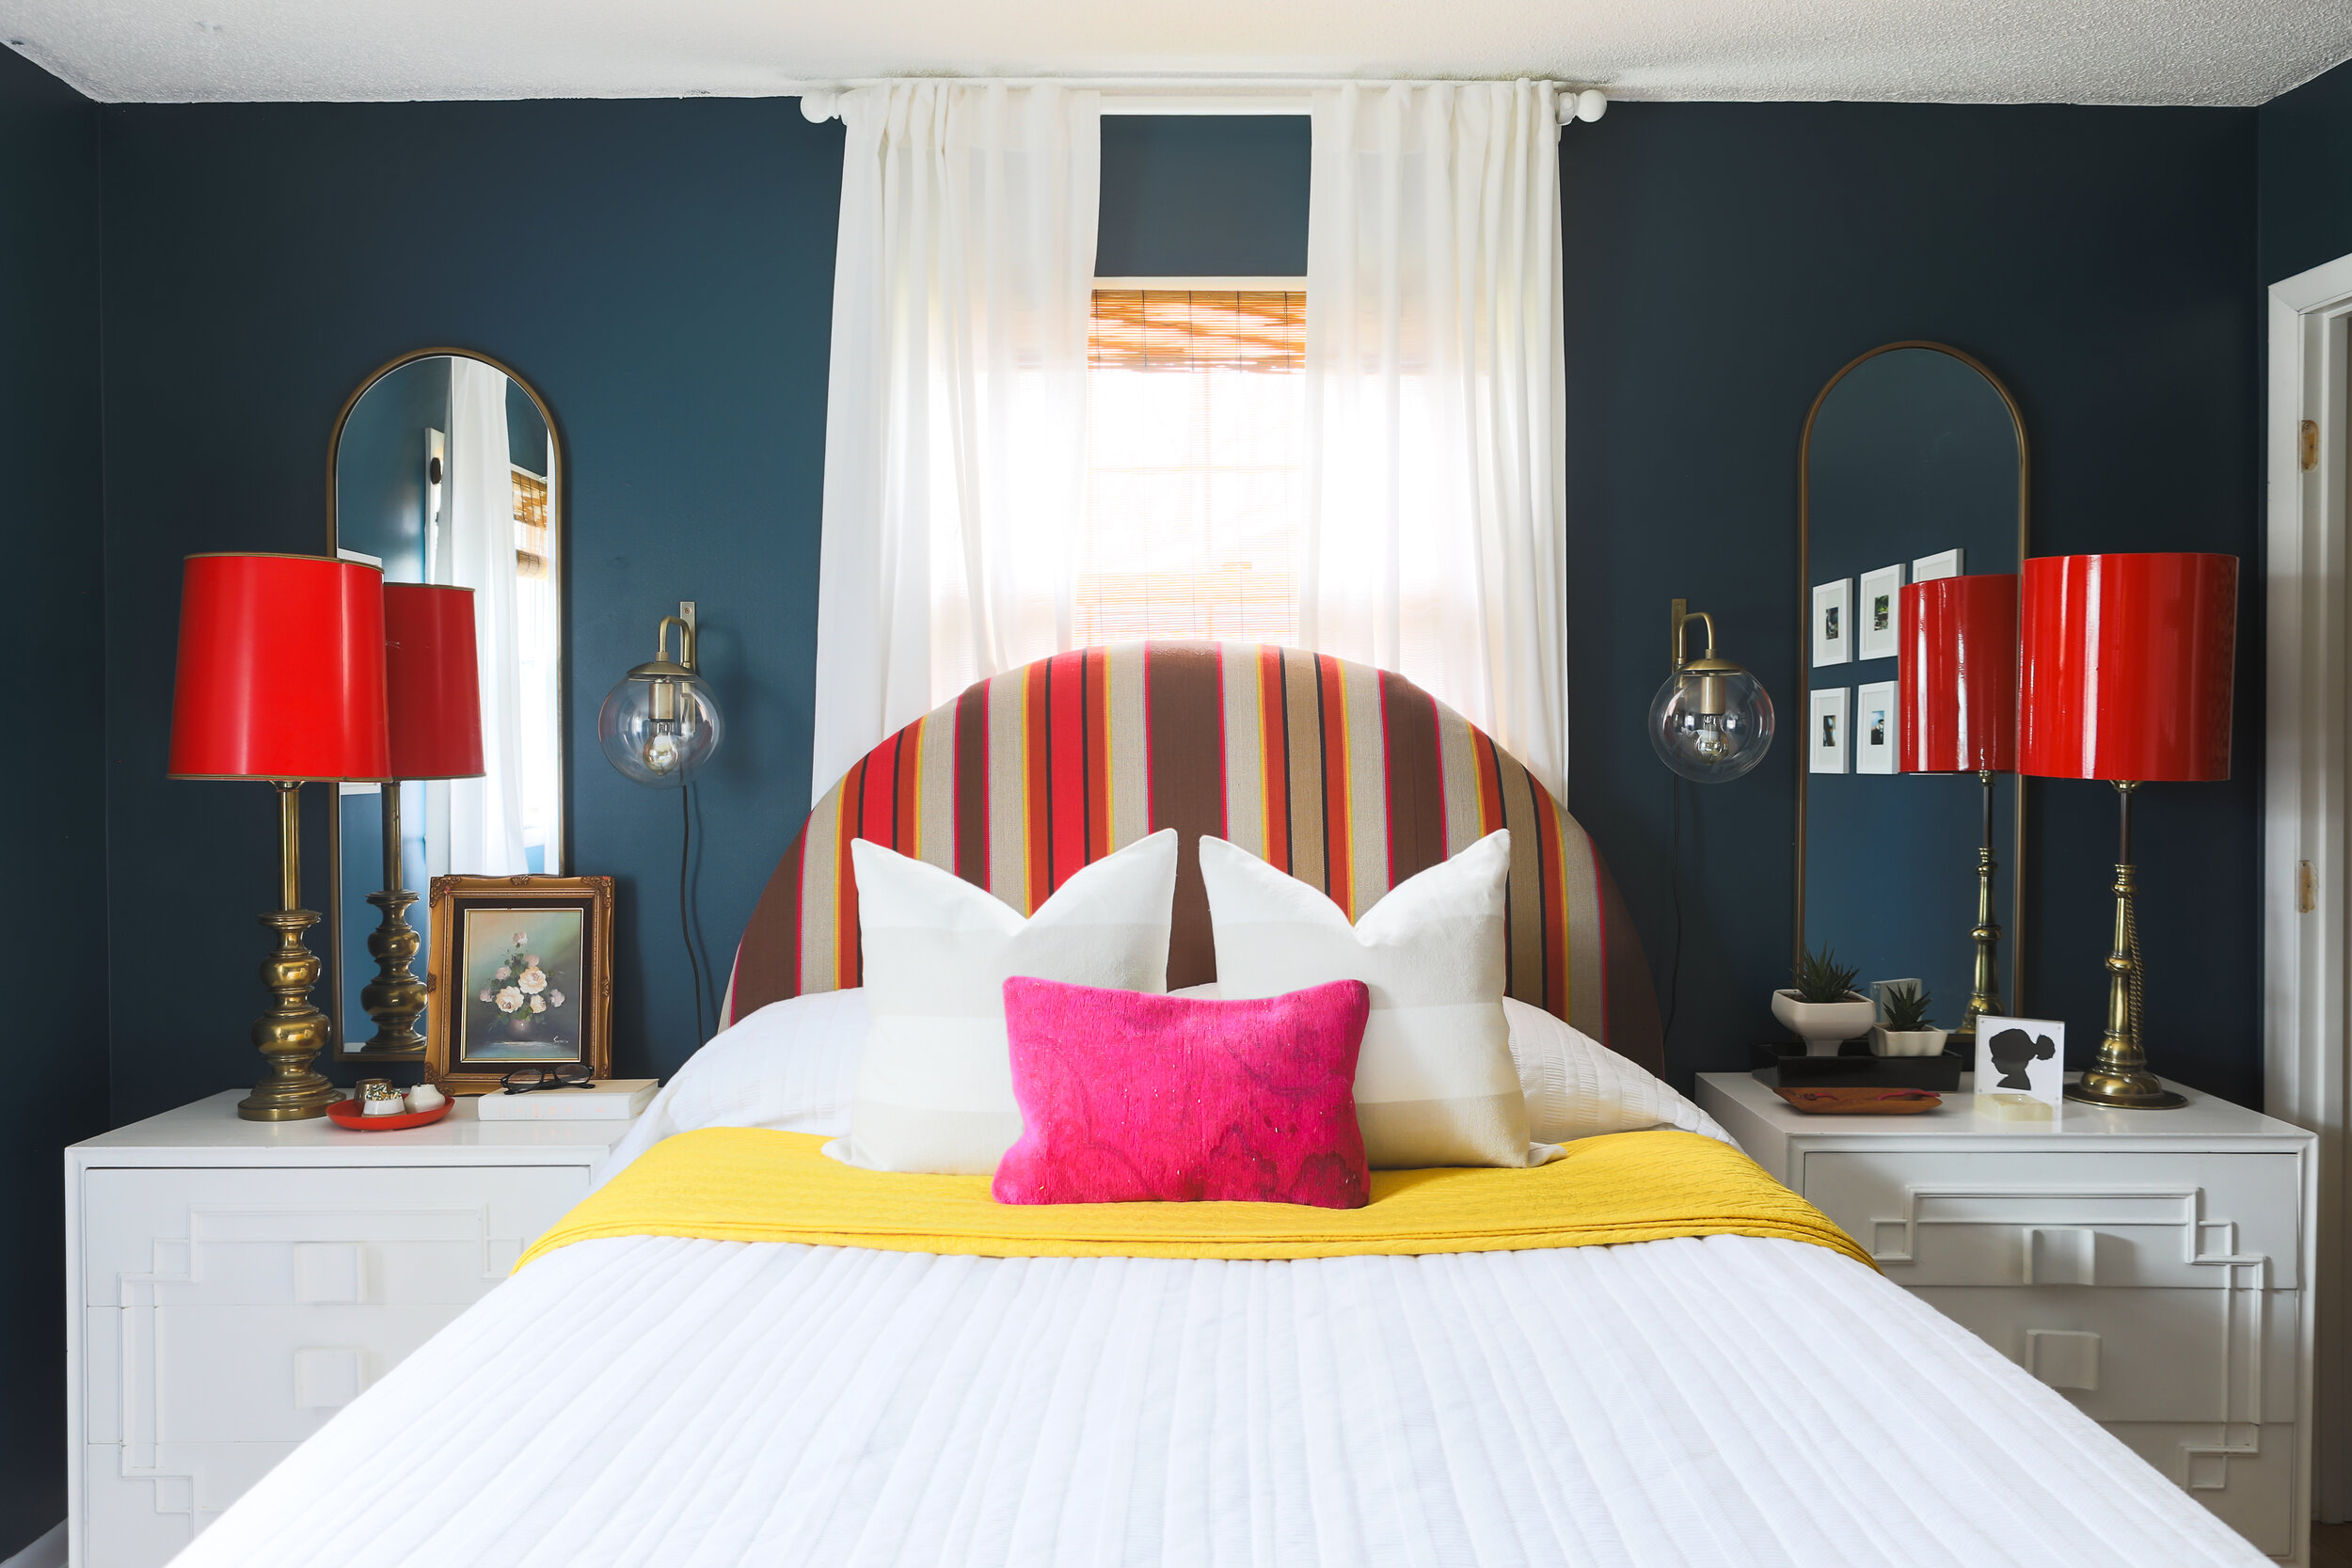
If you remember from my Master bedroom reveal, I found the coolest vintage red lamp shade that really got me inspired for the entire room design.
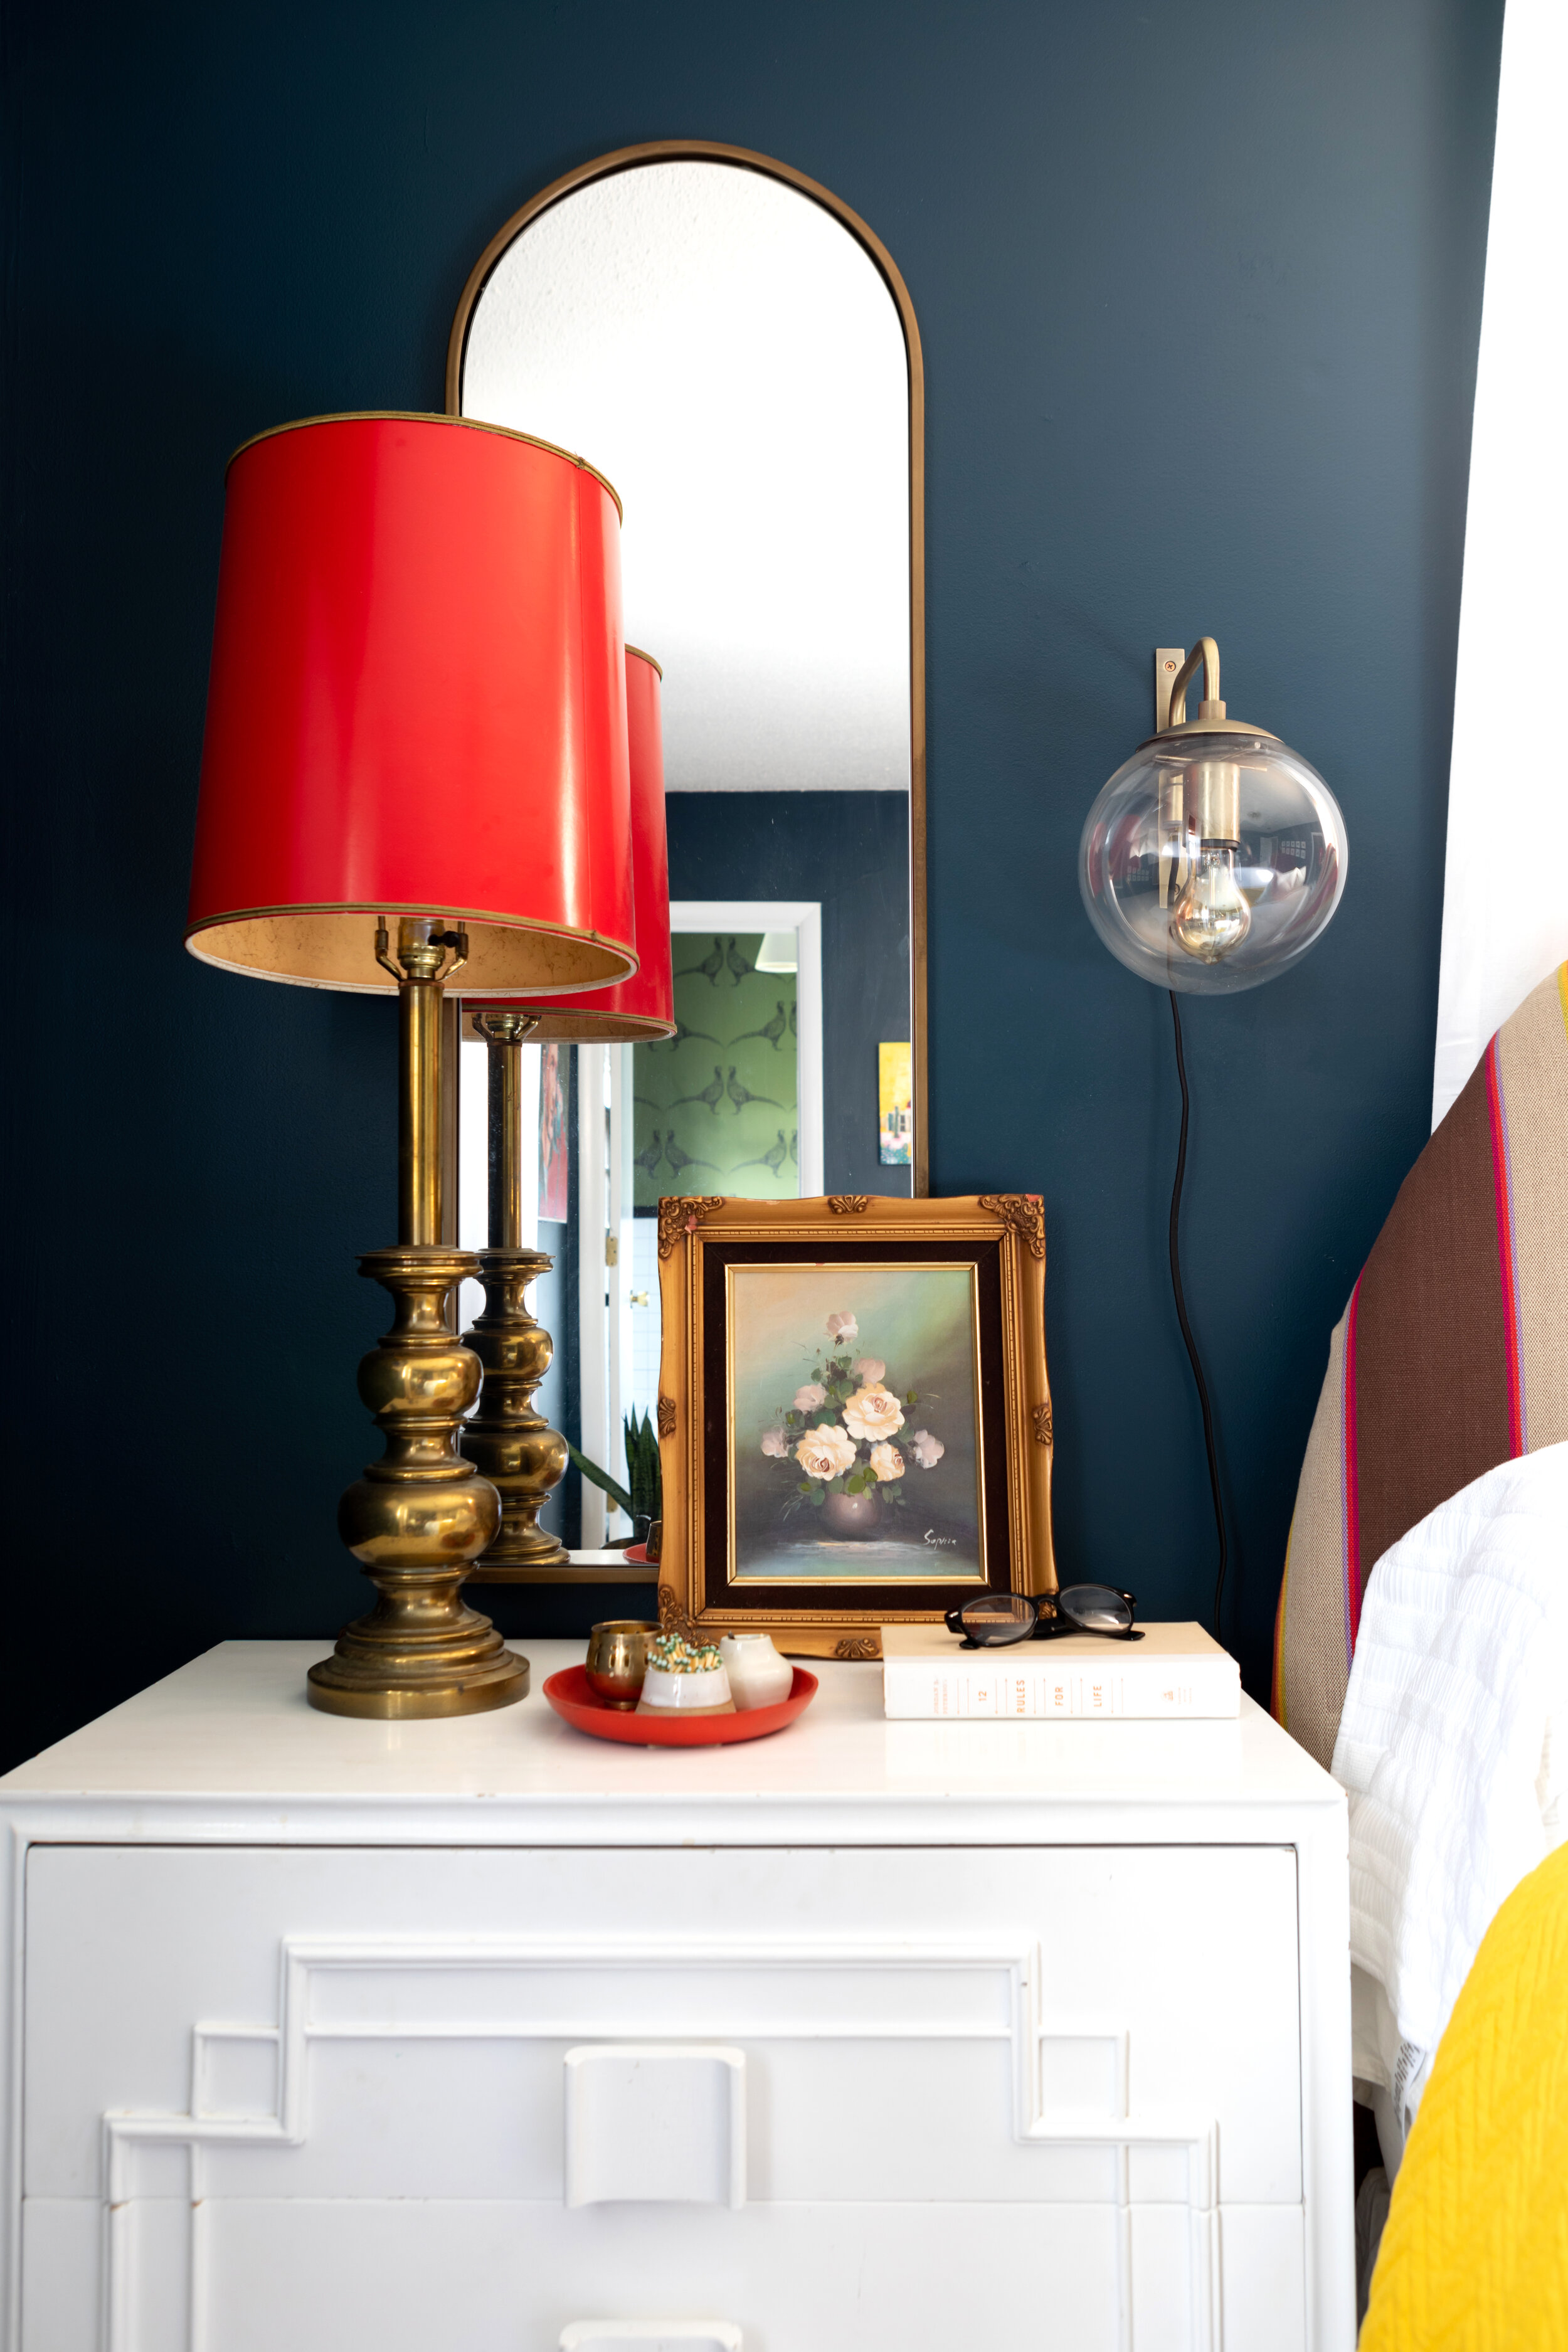
The only issue was, I needed two. I found another brass lamp base that was similar, and I was quite okay with those being different from each other; however, I needed two red lamp shades that were the same size, so the heights would match up. I searched and searched online and asked all of my vintage-selling friends if they had one, to no avail.
So I decided to look for a brand new, red lacquer shade. And let me tell you, they are not cheap! So that got my brain spinning with how to make one myself. A lacquered lamp shade…hmm…but it couldn’t be painted, right? How is it made? That’s when it hit me. It’s not lacquered. It’s vinyl! Which looks exactly like a glossy, lacquered finish.
WORD!
Now all I had to do was figure out how to make the lamp shade from scratch to custom match the size of the vintage shade.
I watched several youtube tutorials, and couldn’t find a single one where someone was attempting to make a “lacquered lamp shade”. The principles are similar, but when working with vinyl, there are a couple of differences.
Here’s how I did it. And keep in mind I was trying to be the subject AND photographer, so I know this could be a lot better, but here goes…
How to make a lacquered lamp shade
Prep
Clean the entire work station thoroughly first. We will be working with adhesives, rather than fabric or paper, so things get stuck to it very easily. Mine was covered in dog fur! Each and every spec of dirt and hair will show up under the finished shade, so this is very important! Maybe wear a hair net while you’re at it lol
Have an extra set of hands to help. Again, because of the adhesives. They end up rolling up and sticking to themselves very easily. You will save yourself so much trouble with an extra person to hold one end down.
Materials
Styrene sheet (I purchased mine here). The height of the sheet you purchase will be the finished height of your shade. You can cut styrene, but it is extremely thick, so much easier to go ahead buy to size.
Two lamp shade rings, like these. The diameter of the rings corresponds to the diameter of your finished shade. I used a spider fitting, but depending on the look you want, you may choose something else.
Vinyl sheet. These are everywhere in craft stores, but a sheet is not enough. You’ll need a roll that is long enough to wrap around your shade. I found mine here
A level or ruler to help you draw a straight line for cutting
pencil
sharp scissors or an exacto knife
measuring tape
clothespins or paper clips
a quick drying, extra strong glue. I used 10 second, Gorilla© glue gel.

styrene, adhesive vinyl, lampshade rings

Since I was trying to match up the size of my vintage lamp shade, I used that as a template. If you are simply making one from scratch, you’ll just need to measure and mark your desired size. Make sure you leave about 1/4” extra to overlap on the sides and about 1/2” on the top and bottom (you will be folding this over to finish). When you are cutting them, make sure you get an extra straight line, because it will be pretty hard to trim the finished ends later on.

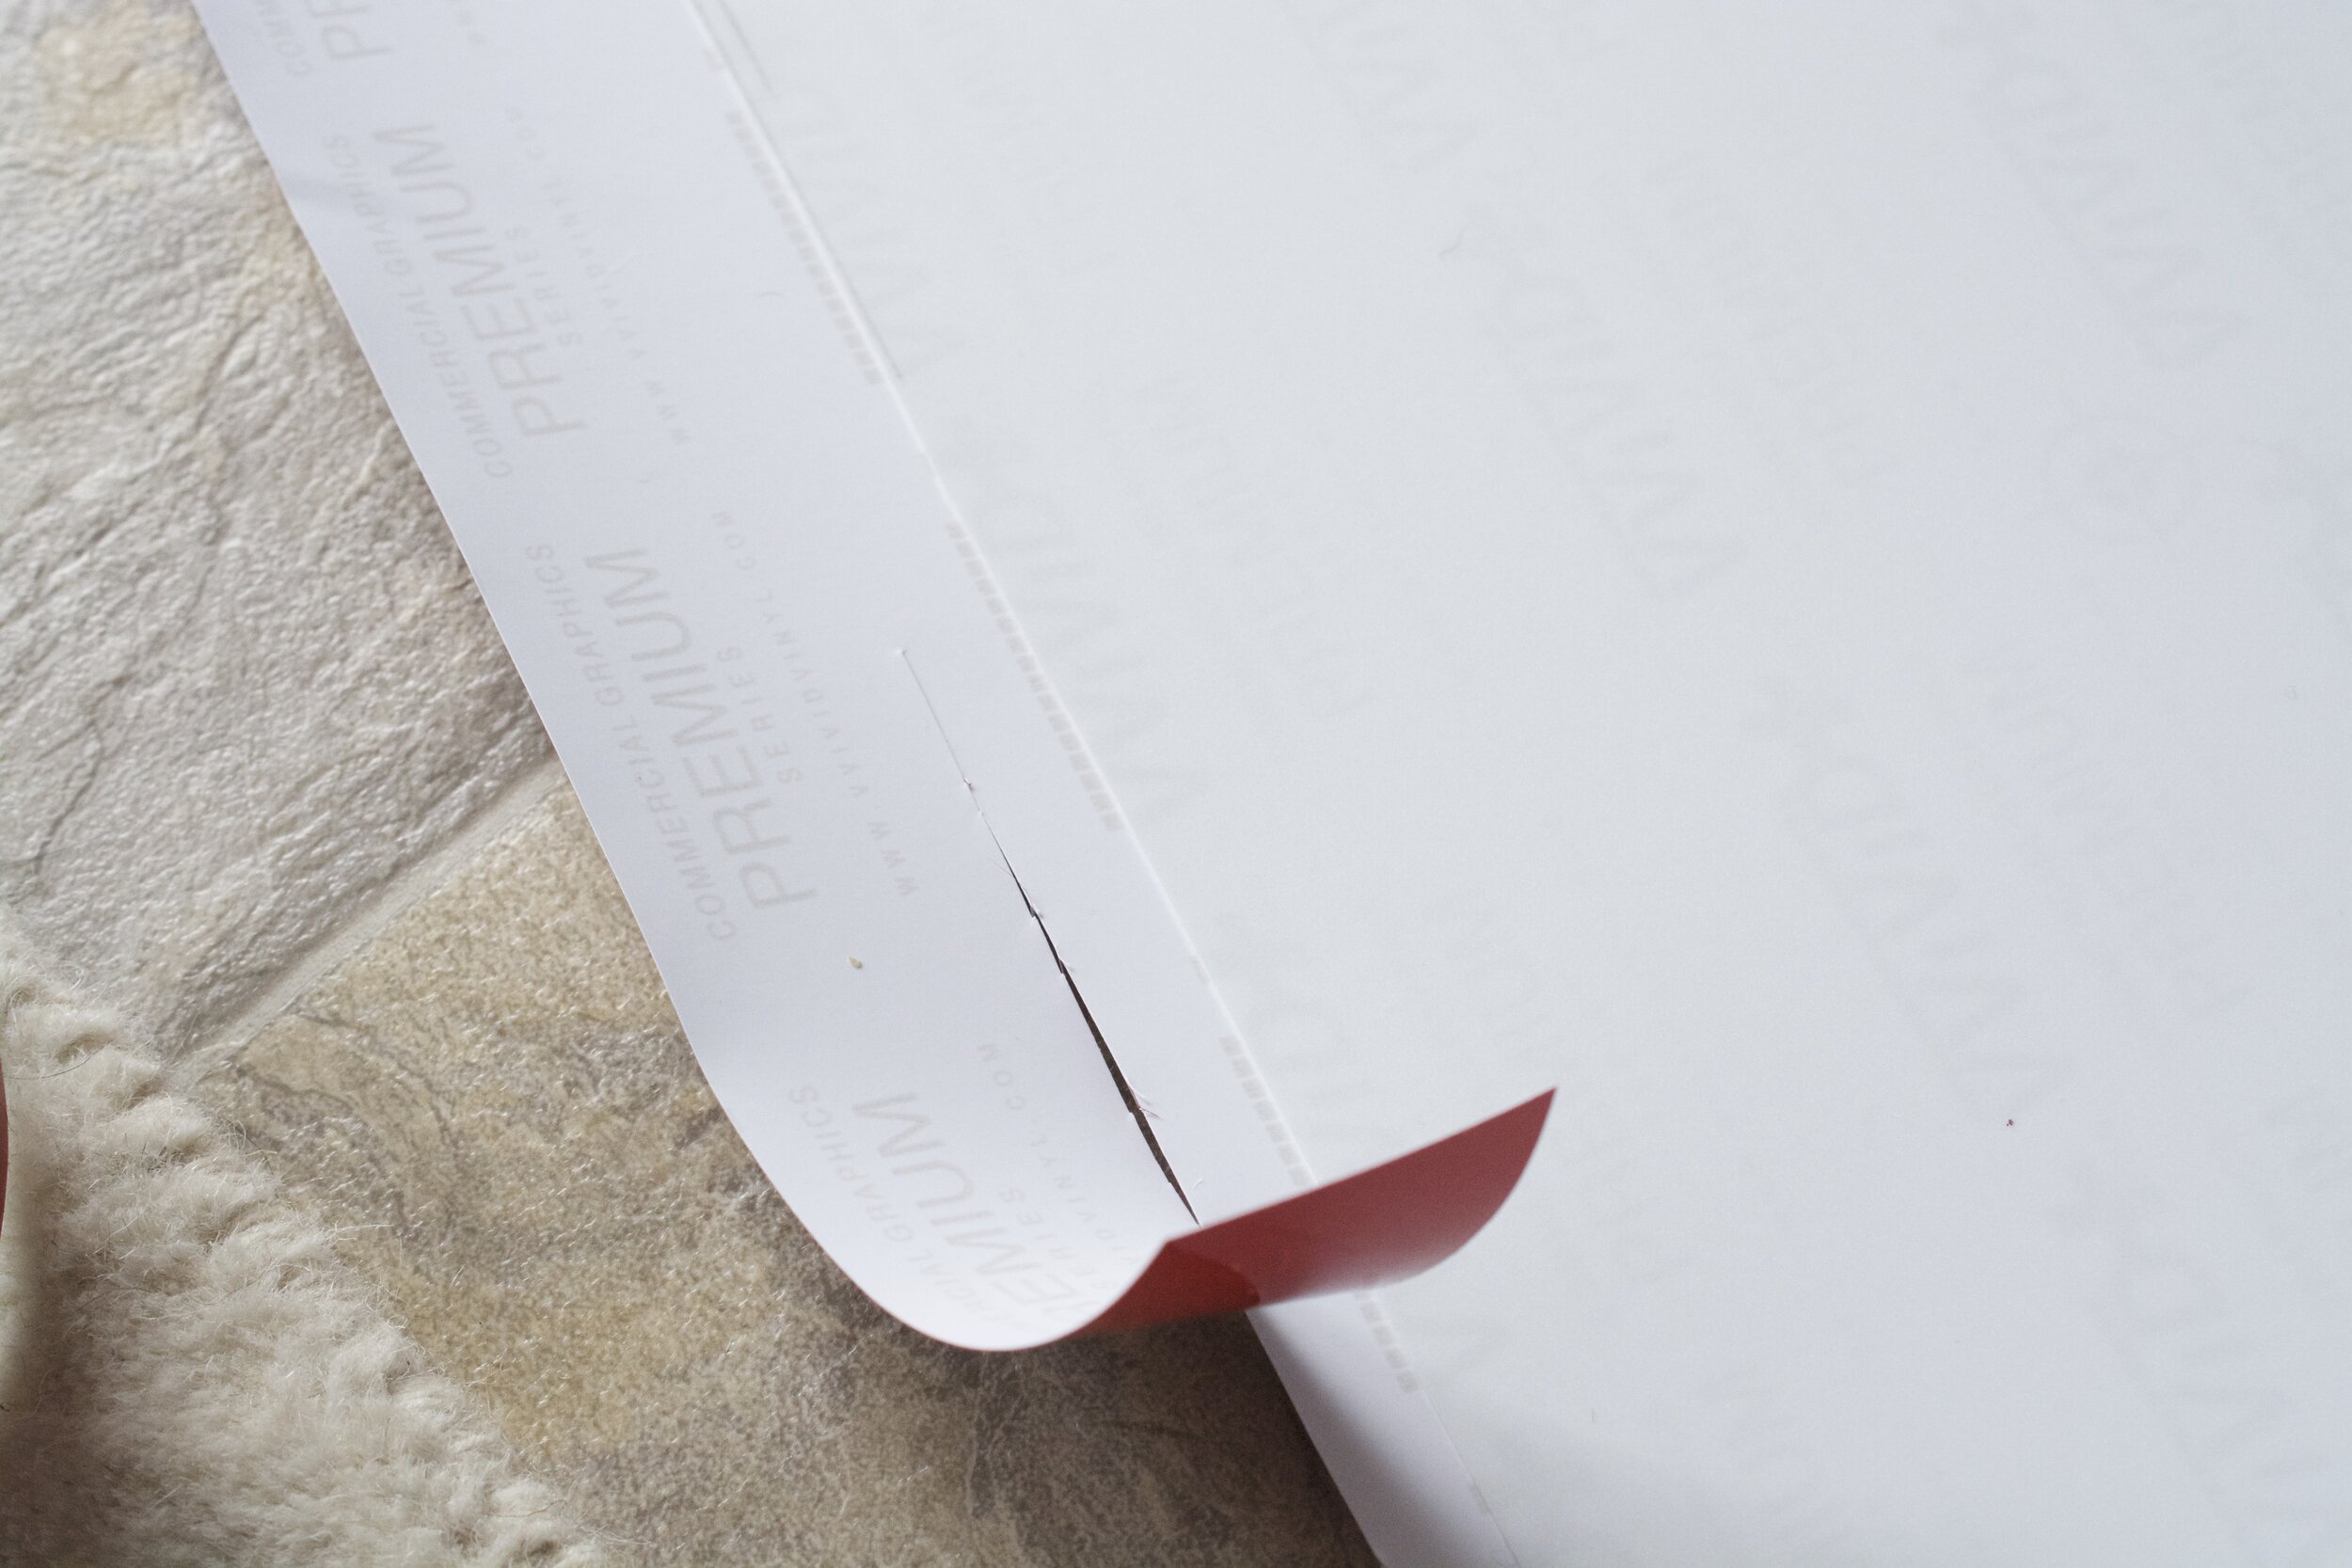
Now comes the part you need an extra set of hands for (and dear god, a clean floor or table!). Both the syrene and the vinyl have adhesive backs on them. I didn’t realize that at first and was wondering why on earth it was so stiff to work with. Whoops. LOL.
So you are going to take the adhesive off the back of the vinyl you have precut AND the styrene. You now have two adhesives you’ll sandwich together. They are not both necessary for adhering, but you have to take the backings off, or it will be too stiff. If you are using fabric or paper instead of vinyl, you won’t need an extra adhesive because the styrene already has it.

This was a pic I took BEFORE I realized there was also as adhesive backing on the vinyl. You shouldn’t see any text on your paper at this point (DUH). But this is what it should look like with your extra half inch you will fold over the styrene.
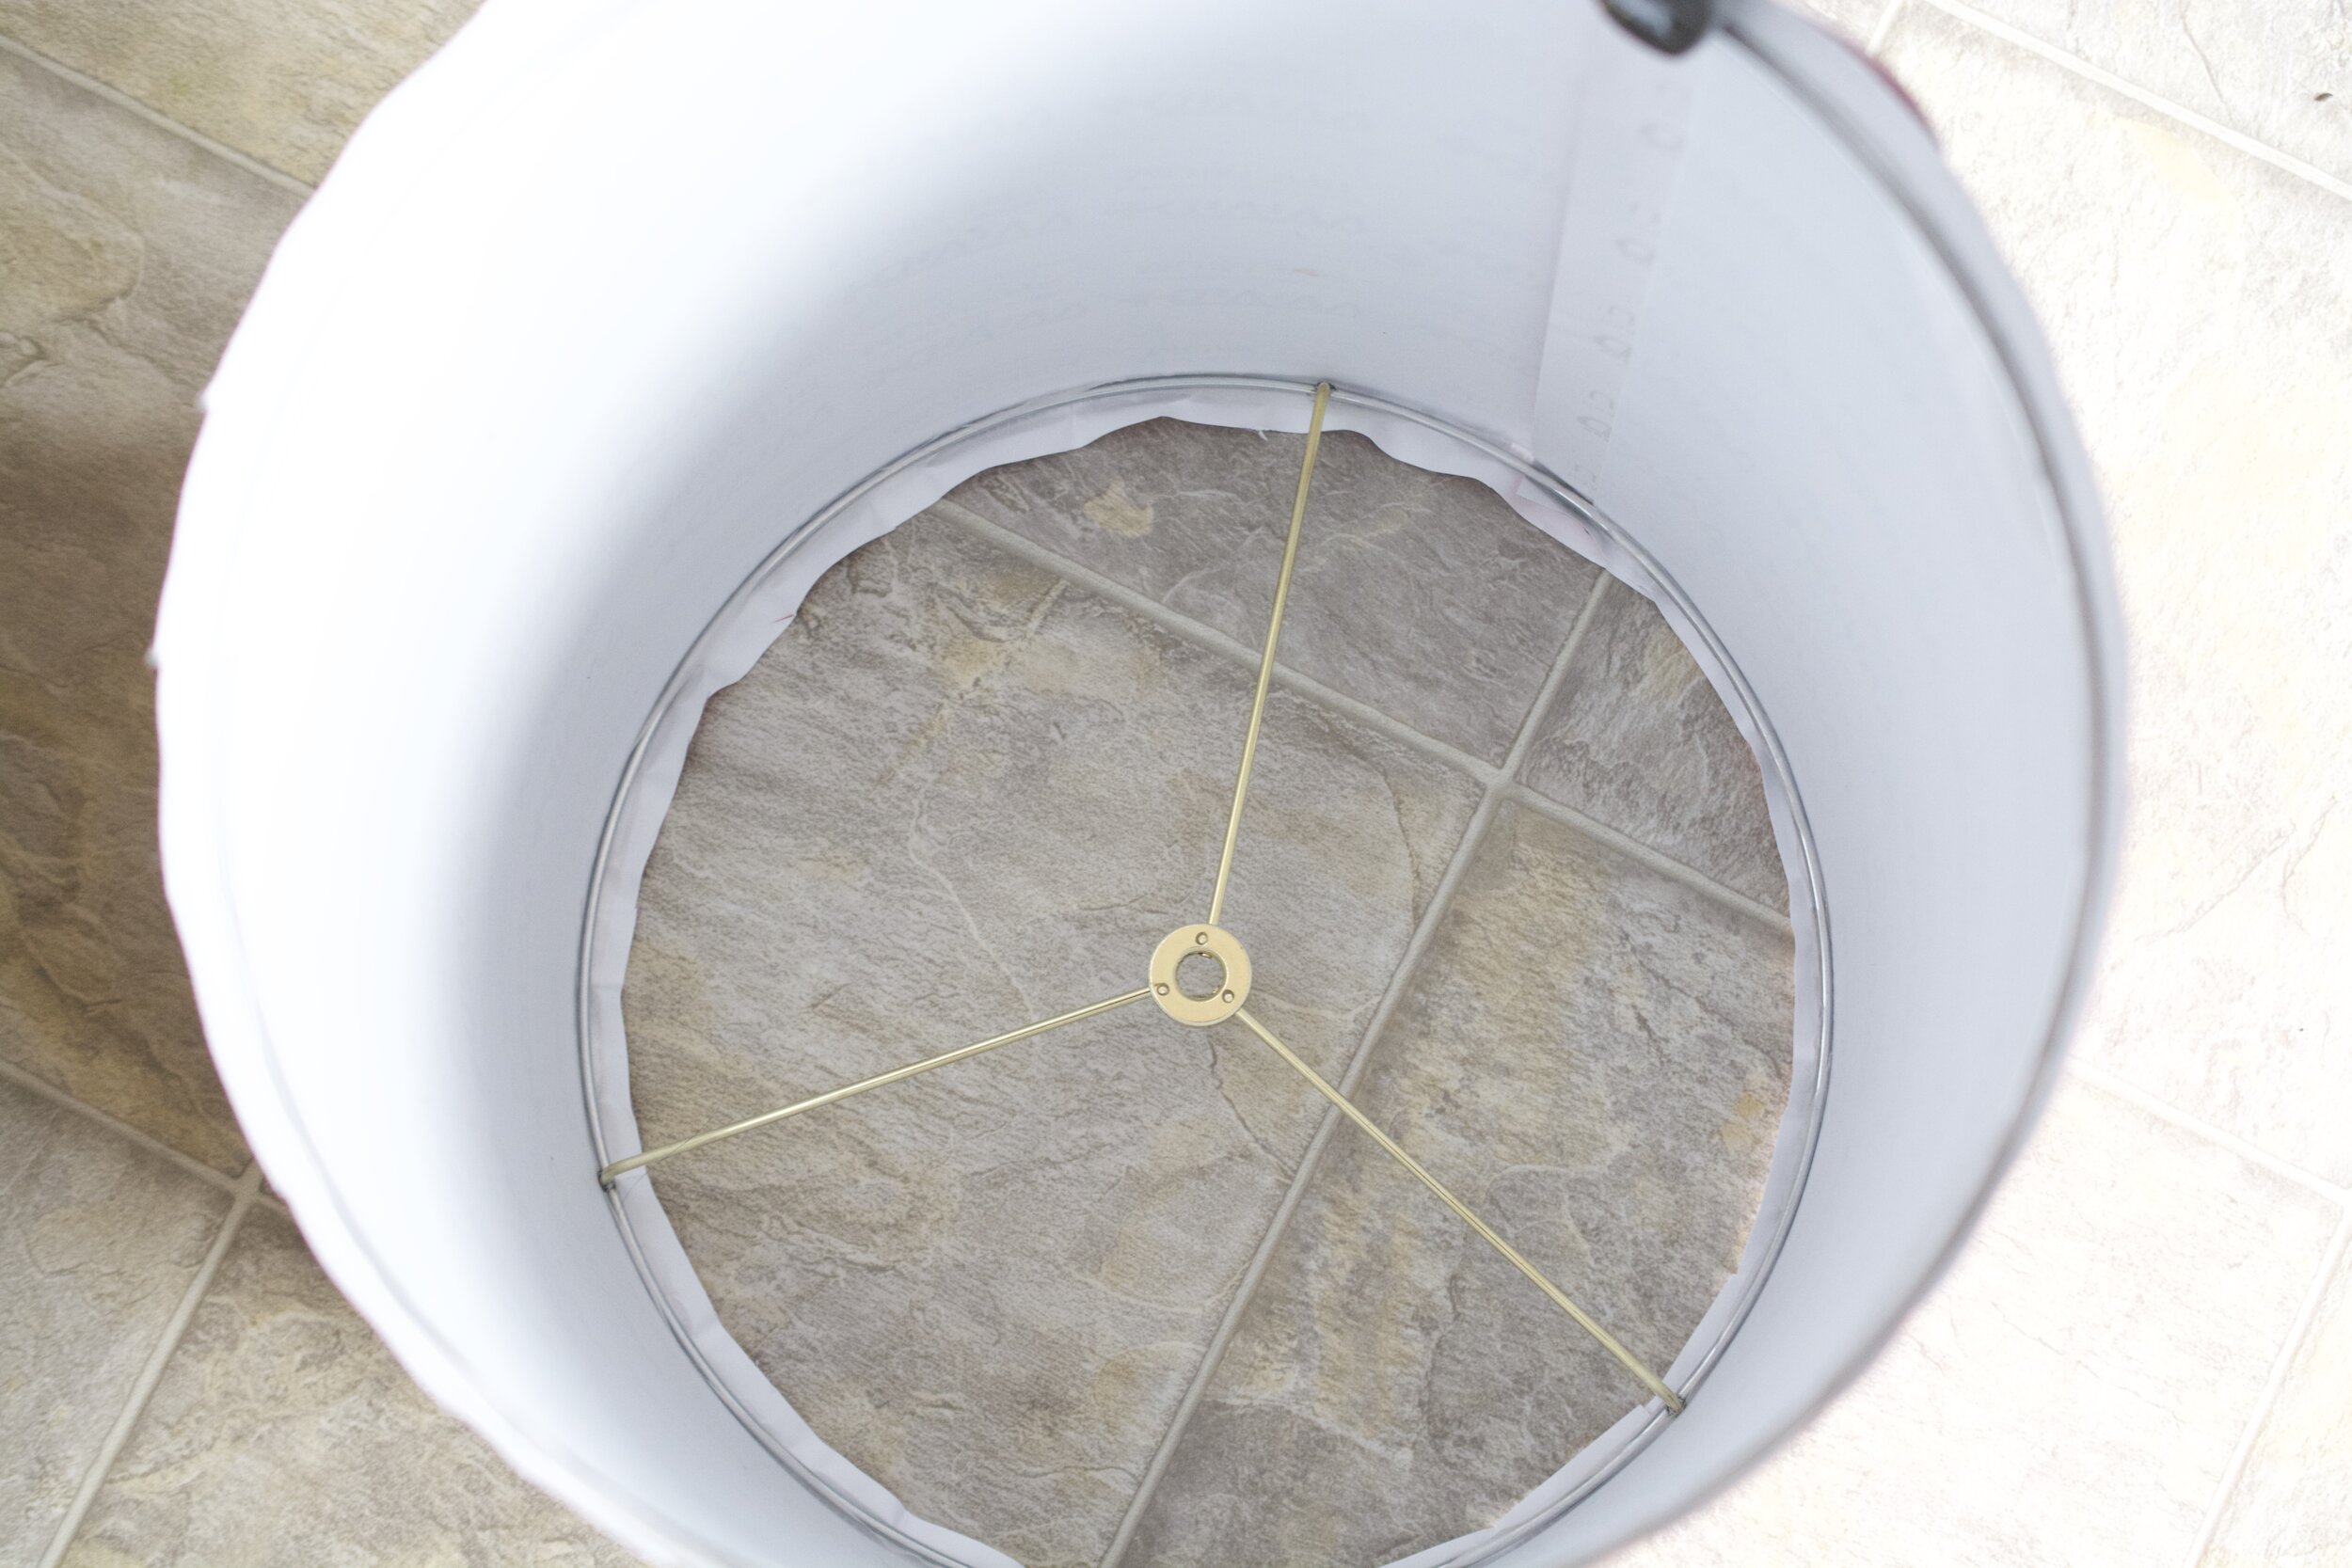
And now you are going to start rolling at top and bottom of your paper, on the exposed, sticky side of the vinyl. Make sure your spider fitting is on the inside.

Got that extra set of hands? You’ll need them, because you are rolling both rings at the same time. One of you can roll one ring while the other rolls the other. Not impossible to do solo, but so much easier! Use a clip to hold the ends together once you have made it around the ring completely.

Now that you have rolled your sandwiched papers around both rings, it should look like this. You have a bit of extra paper on both ends to fold over the rings. Although this is a sticky part of the paper, it is NOT sticky enough to stay adhered over the ring, so you’ll need the glue for this part. Your vertical seem along the shade itself shouldn’t need any reinforcing.
Run your glue along the extra flap of paper and be ready to work fast. You’ll need the clips to hold everything in place.
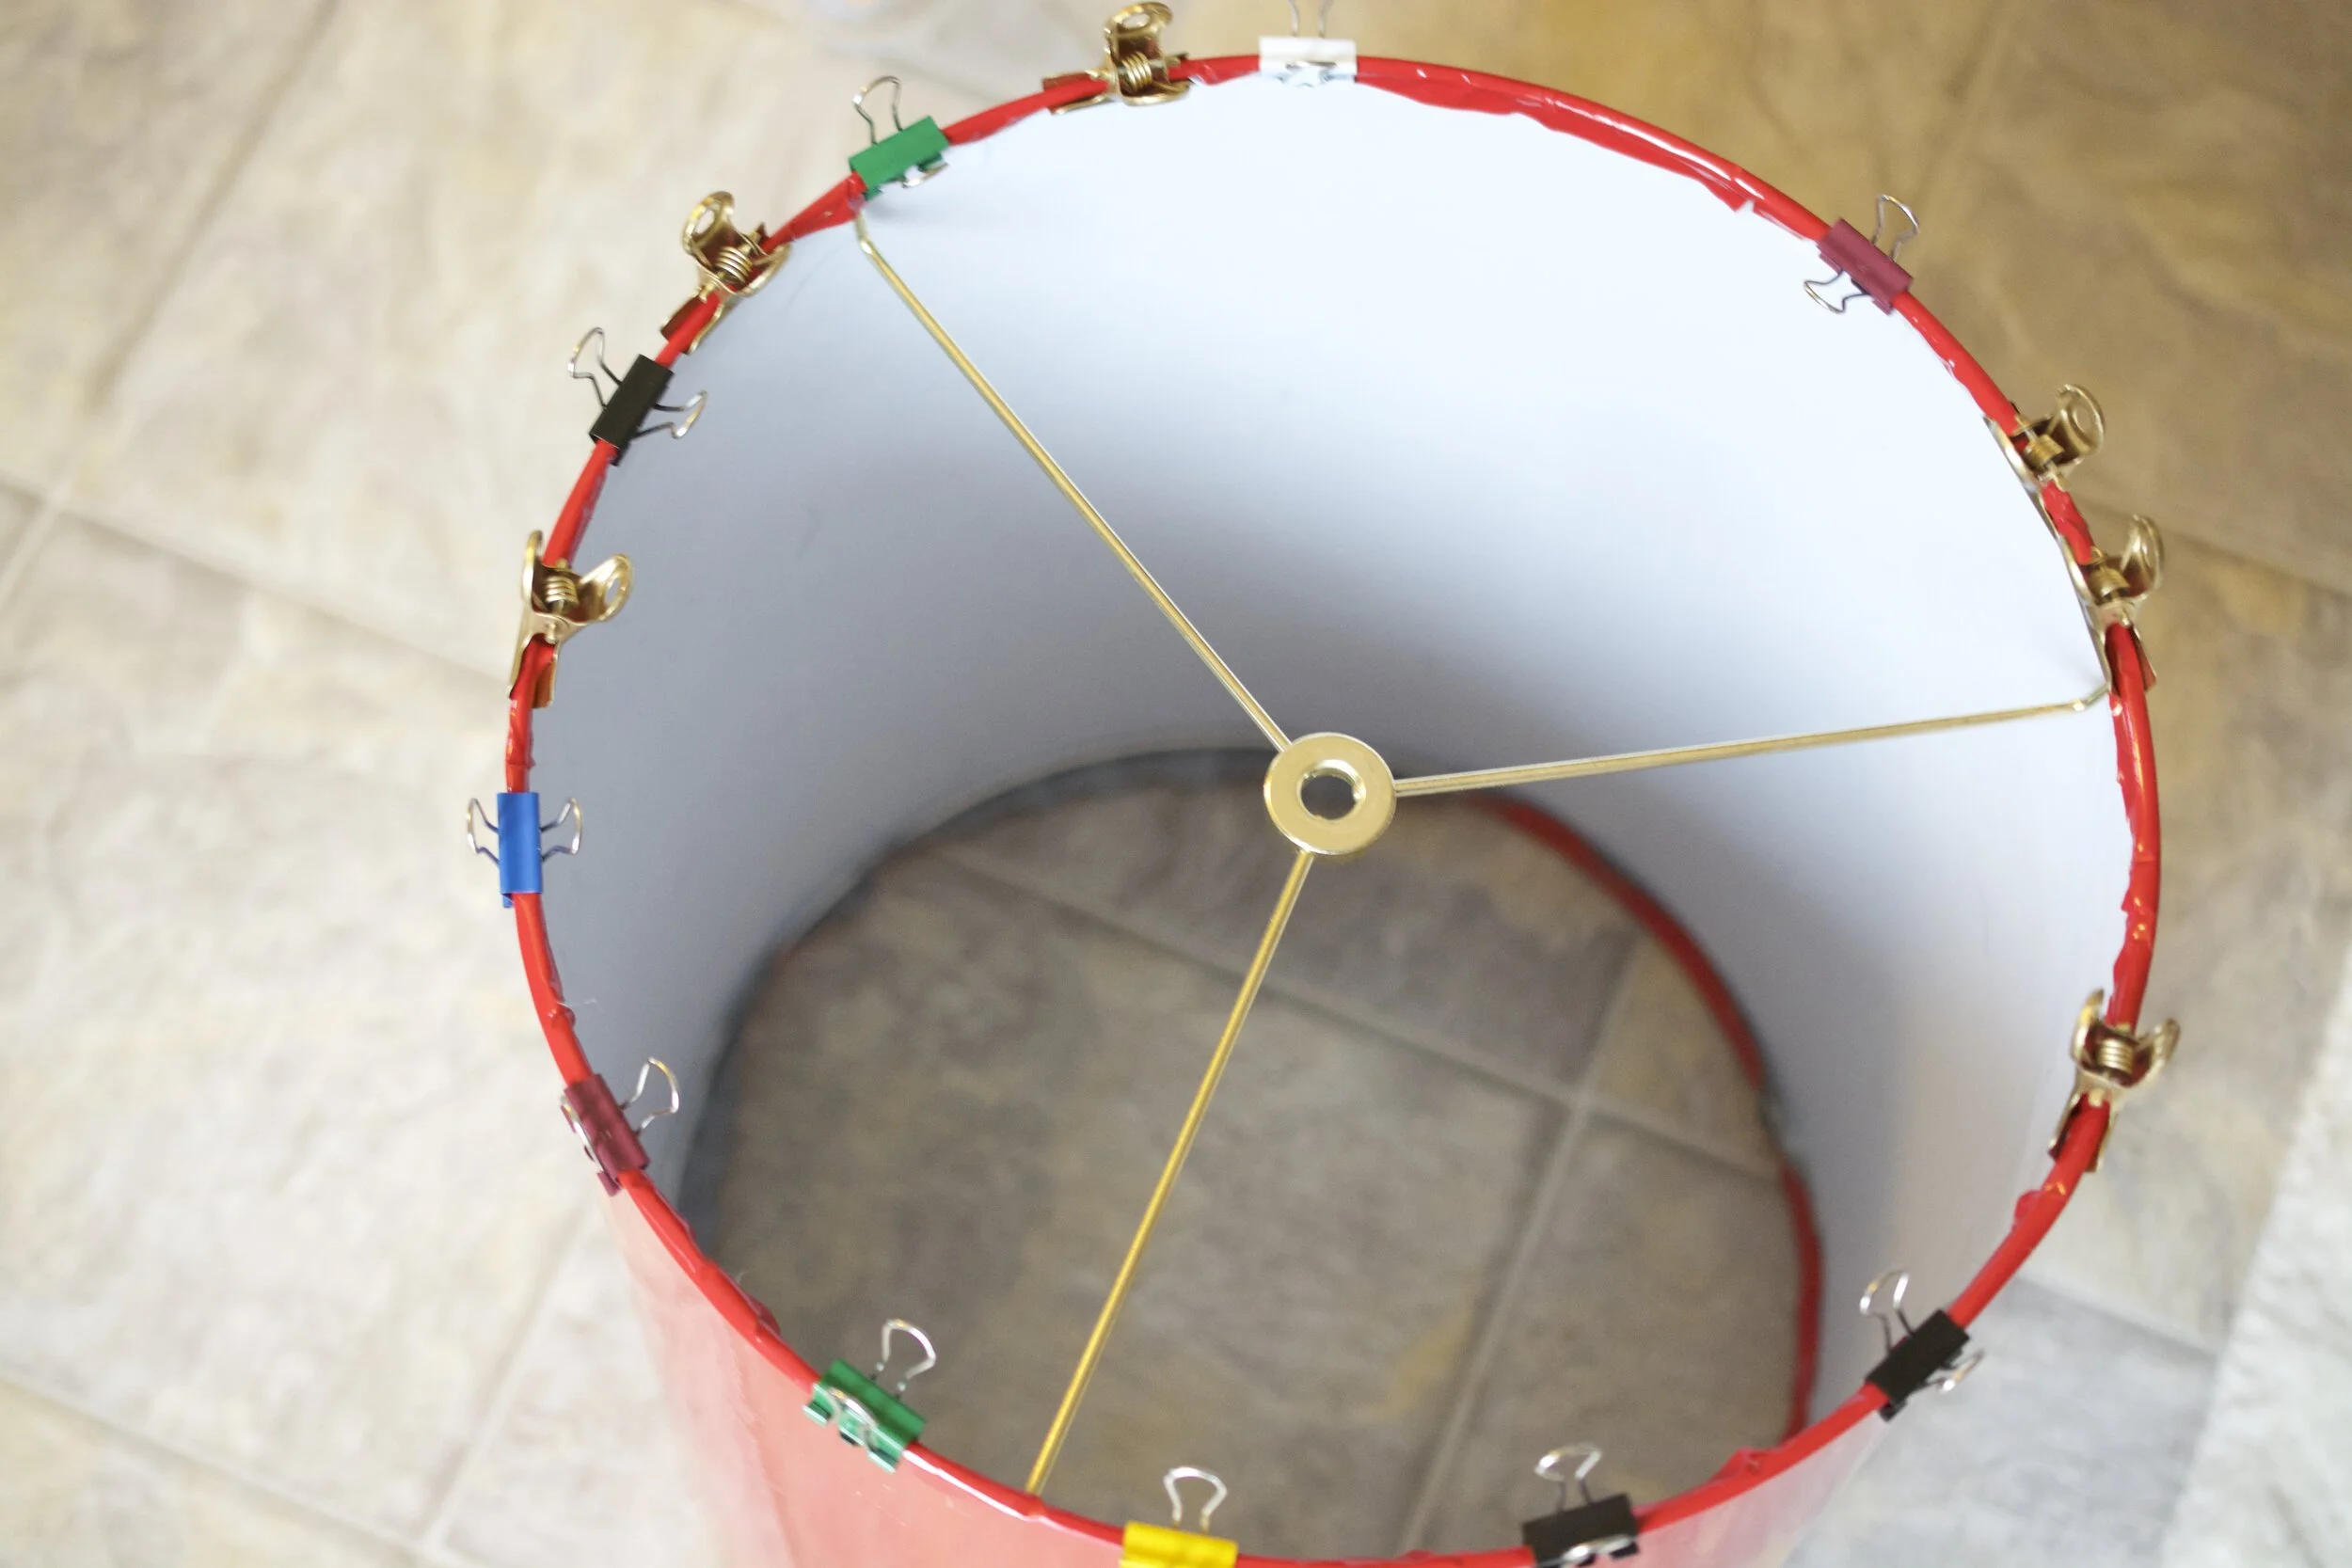
If your glue isn’t strong enough, you’ll soon know it because the vinyl will start popping off. A glue gun is NOT strong enough. I tried a couple of glues before I found the Gorilla© 10 second gel to do the trick.
See the little blemish on the right side of this photo? That’s a teeny tiny spec of dirt, that created a large bubble that couldn’t be removed. Oy.

And there you have it! The total cost for my shade was about $45. I have a little extra supplies I can make mini shades with, so it was actually even cheaper than that for the one shade. If you haven’t shopped for lacquered shades lately, take a gander. This is SO MUCH cheaper! It took me around 30 minutes to make the shade, but I think it would go much faster on the next.
If you wanna get fancy with it, you can add some pretty paper to the interior and trim to the top and bottom. I didn’t do any of that and it still looks great, but I definitely want to try this again with a clean workspace. If you visit my instagram “bedroom” story highlight, you can see some video of my process.
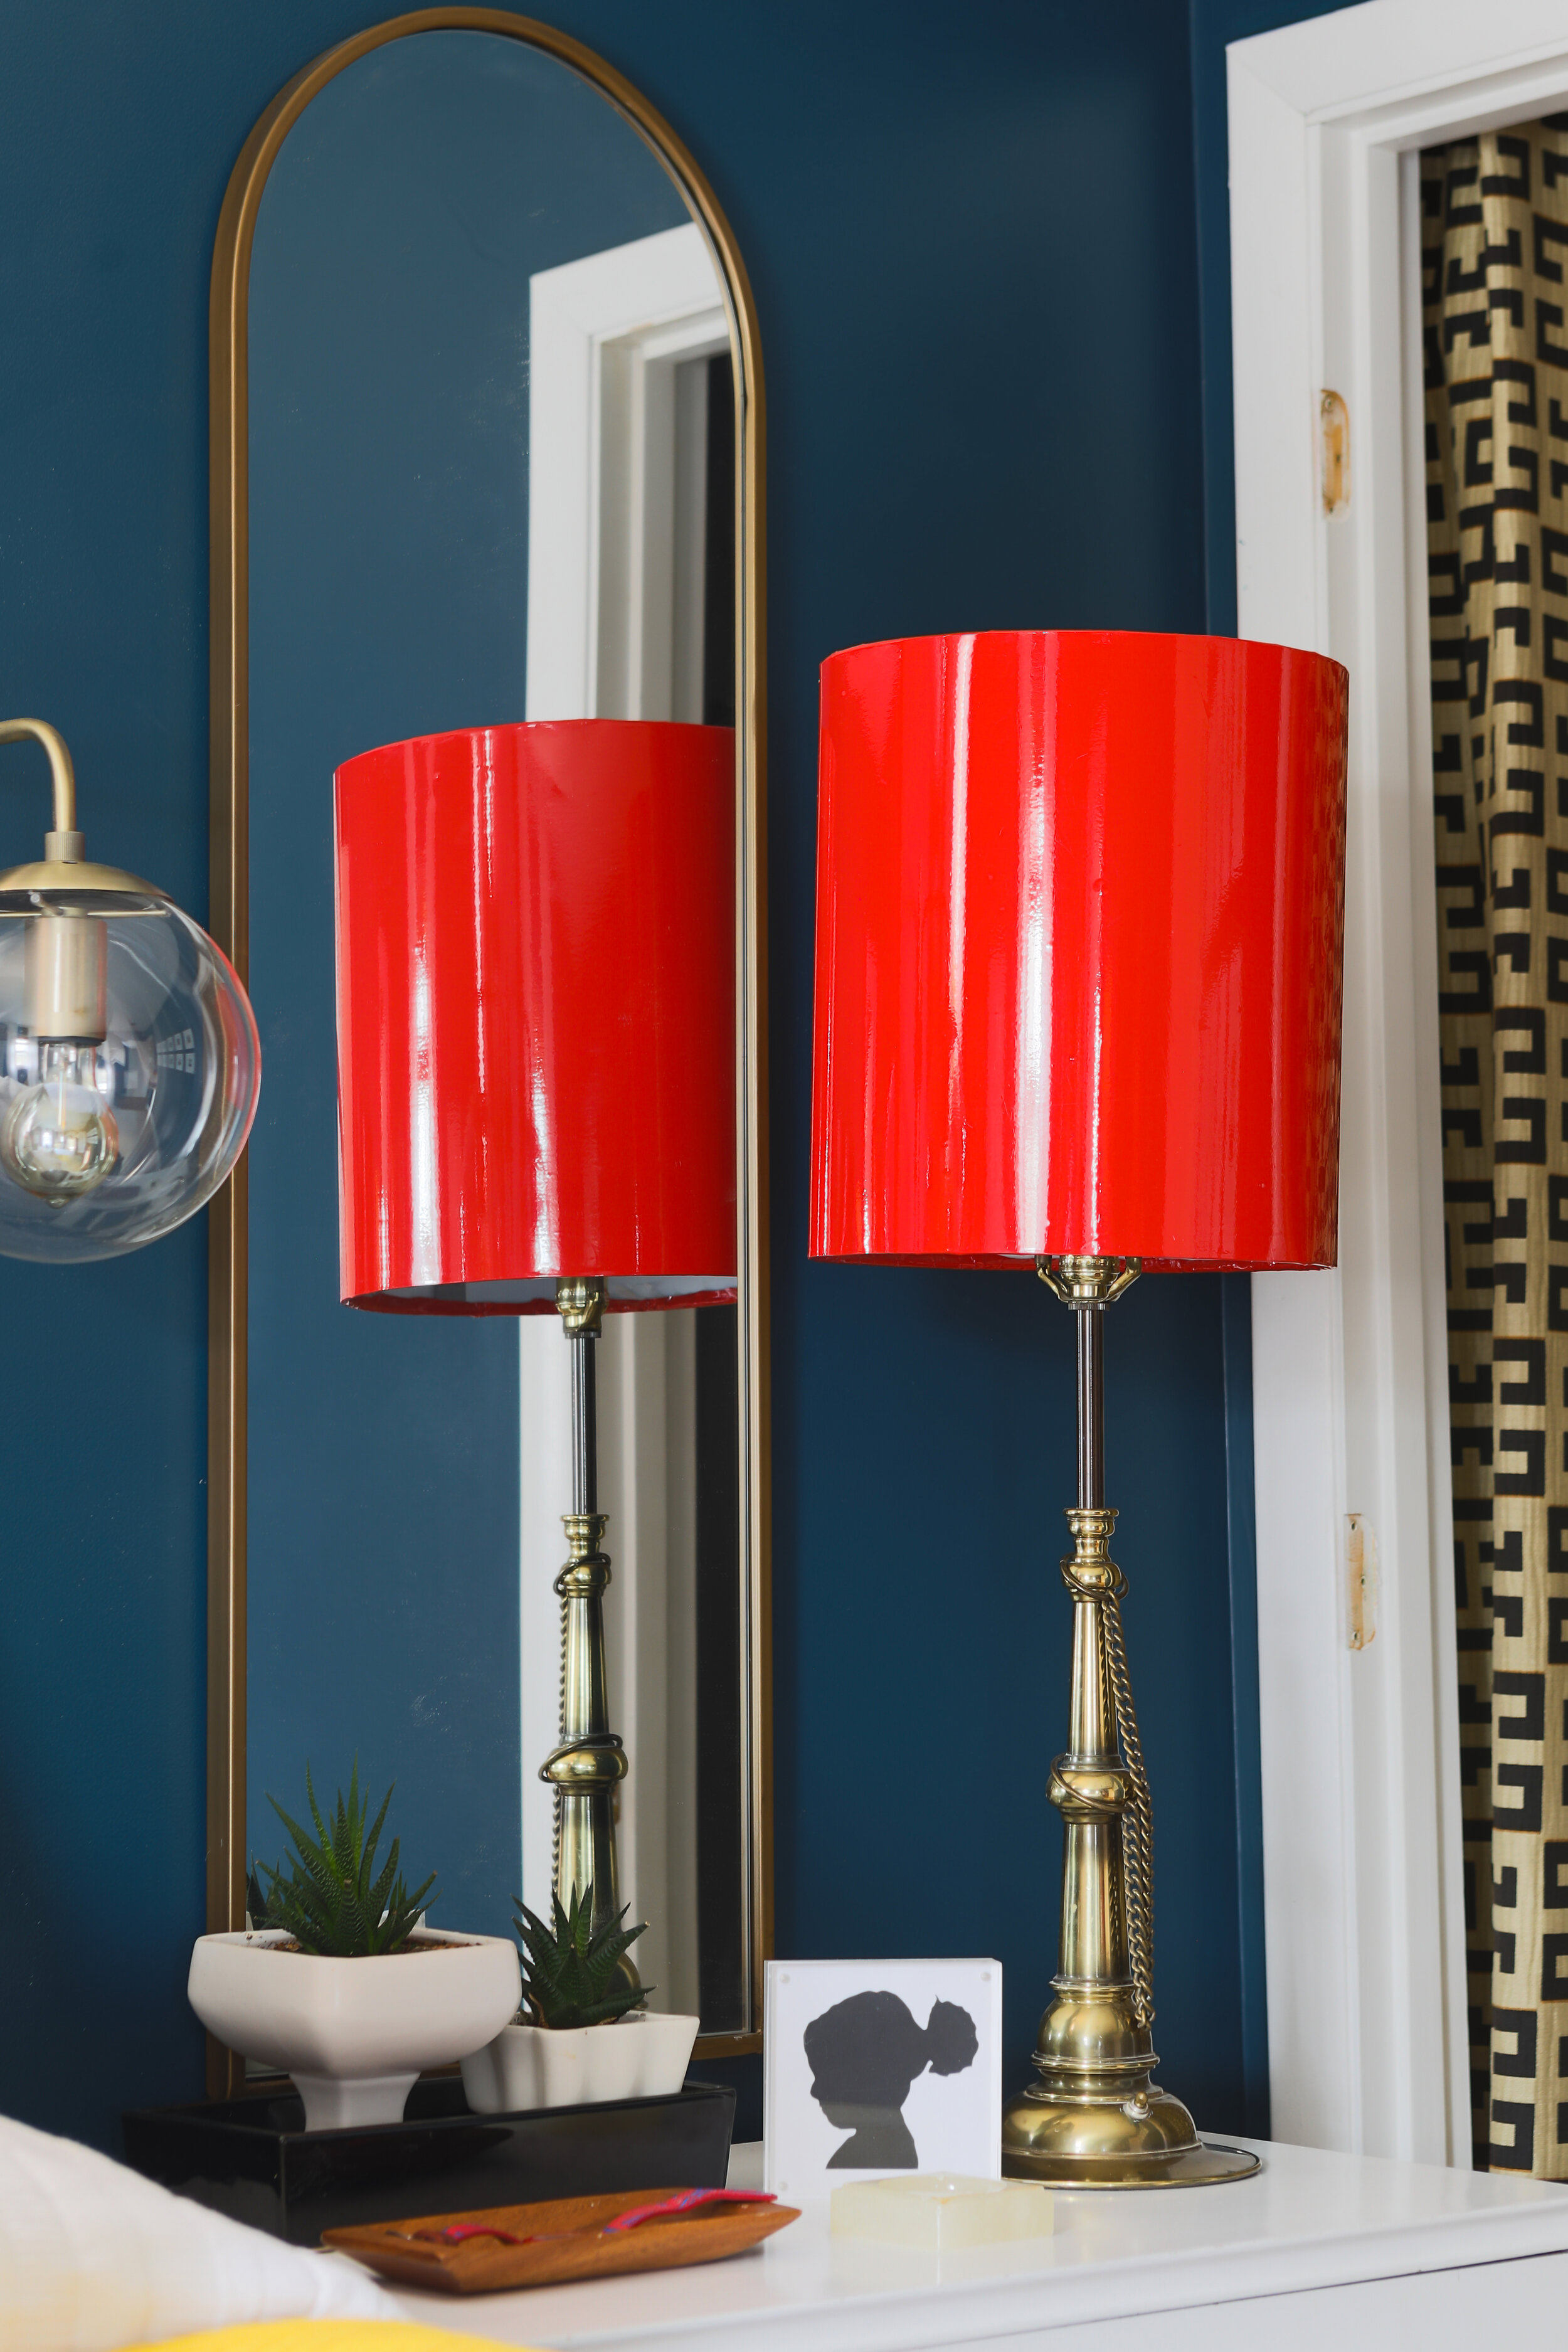
I needed to play around with different sized harps to get the heights right. The end result is pretty close! I thought the vintage shade was lacquered, but now that I see it with mine, it is not nearly as shiny. So I may make another one to match my new one.
I can’t wait to make many more! In all the colors! Now that I know how to do it, I’m sure it will go even faster.
I may never buy a lamp shade again??

Please let me know if you make one. And send pics!
Katie