How to Manage cords when the desk is in the middle of the room
One of the questions I most often get asked about my home office, is where are the cords?
So I thought I would explain exactly how we did that! But first, why the round desk in the first place? I’m so glad you asked! ;)
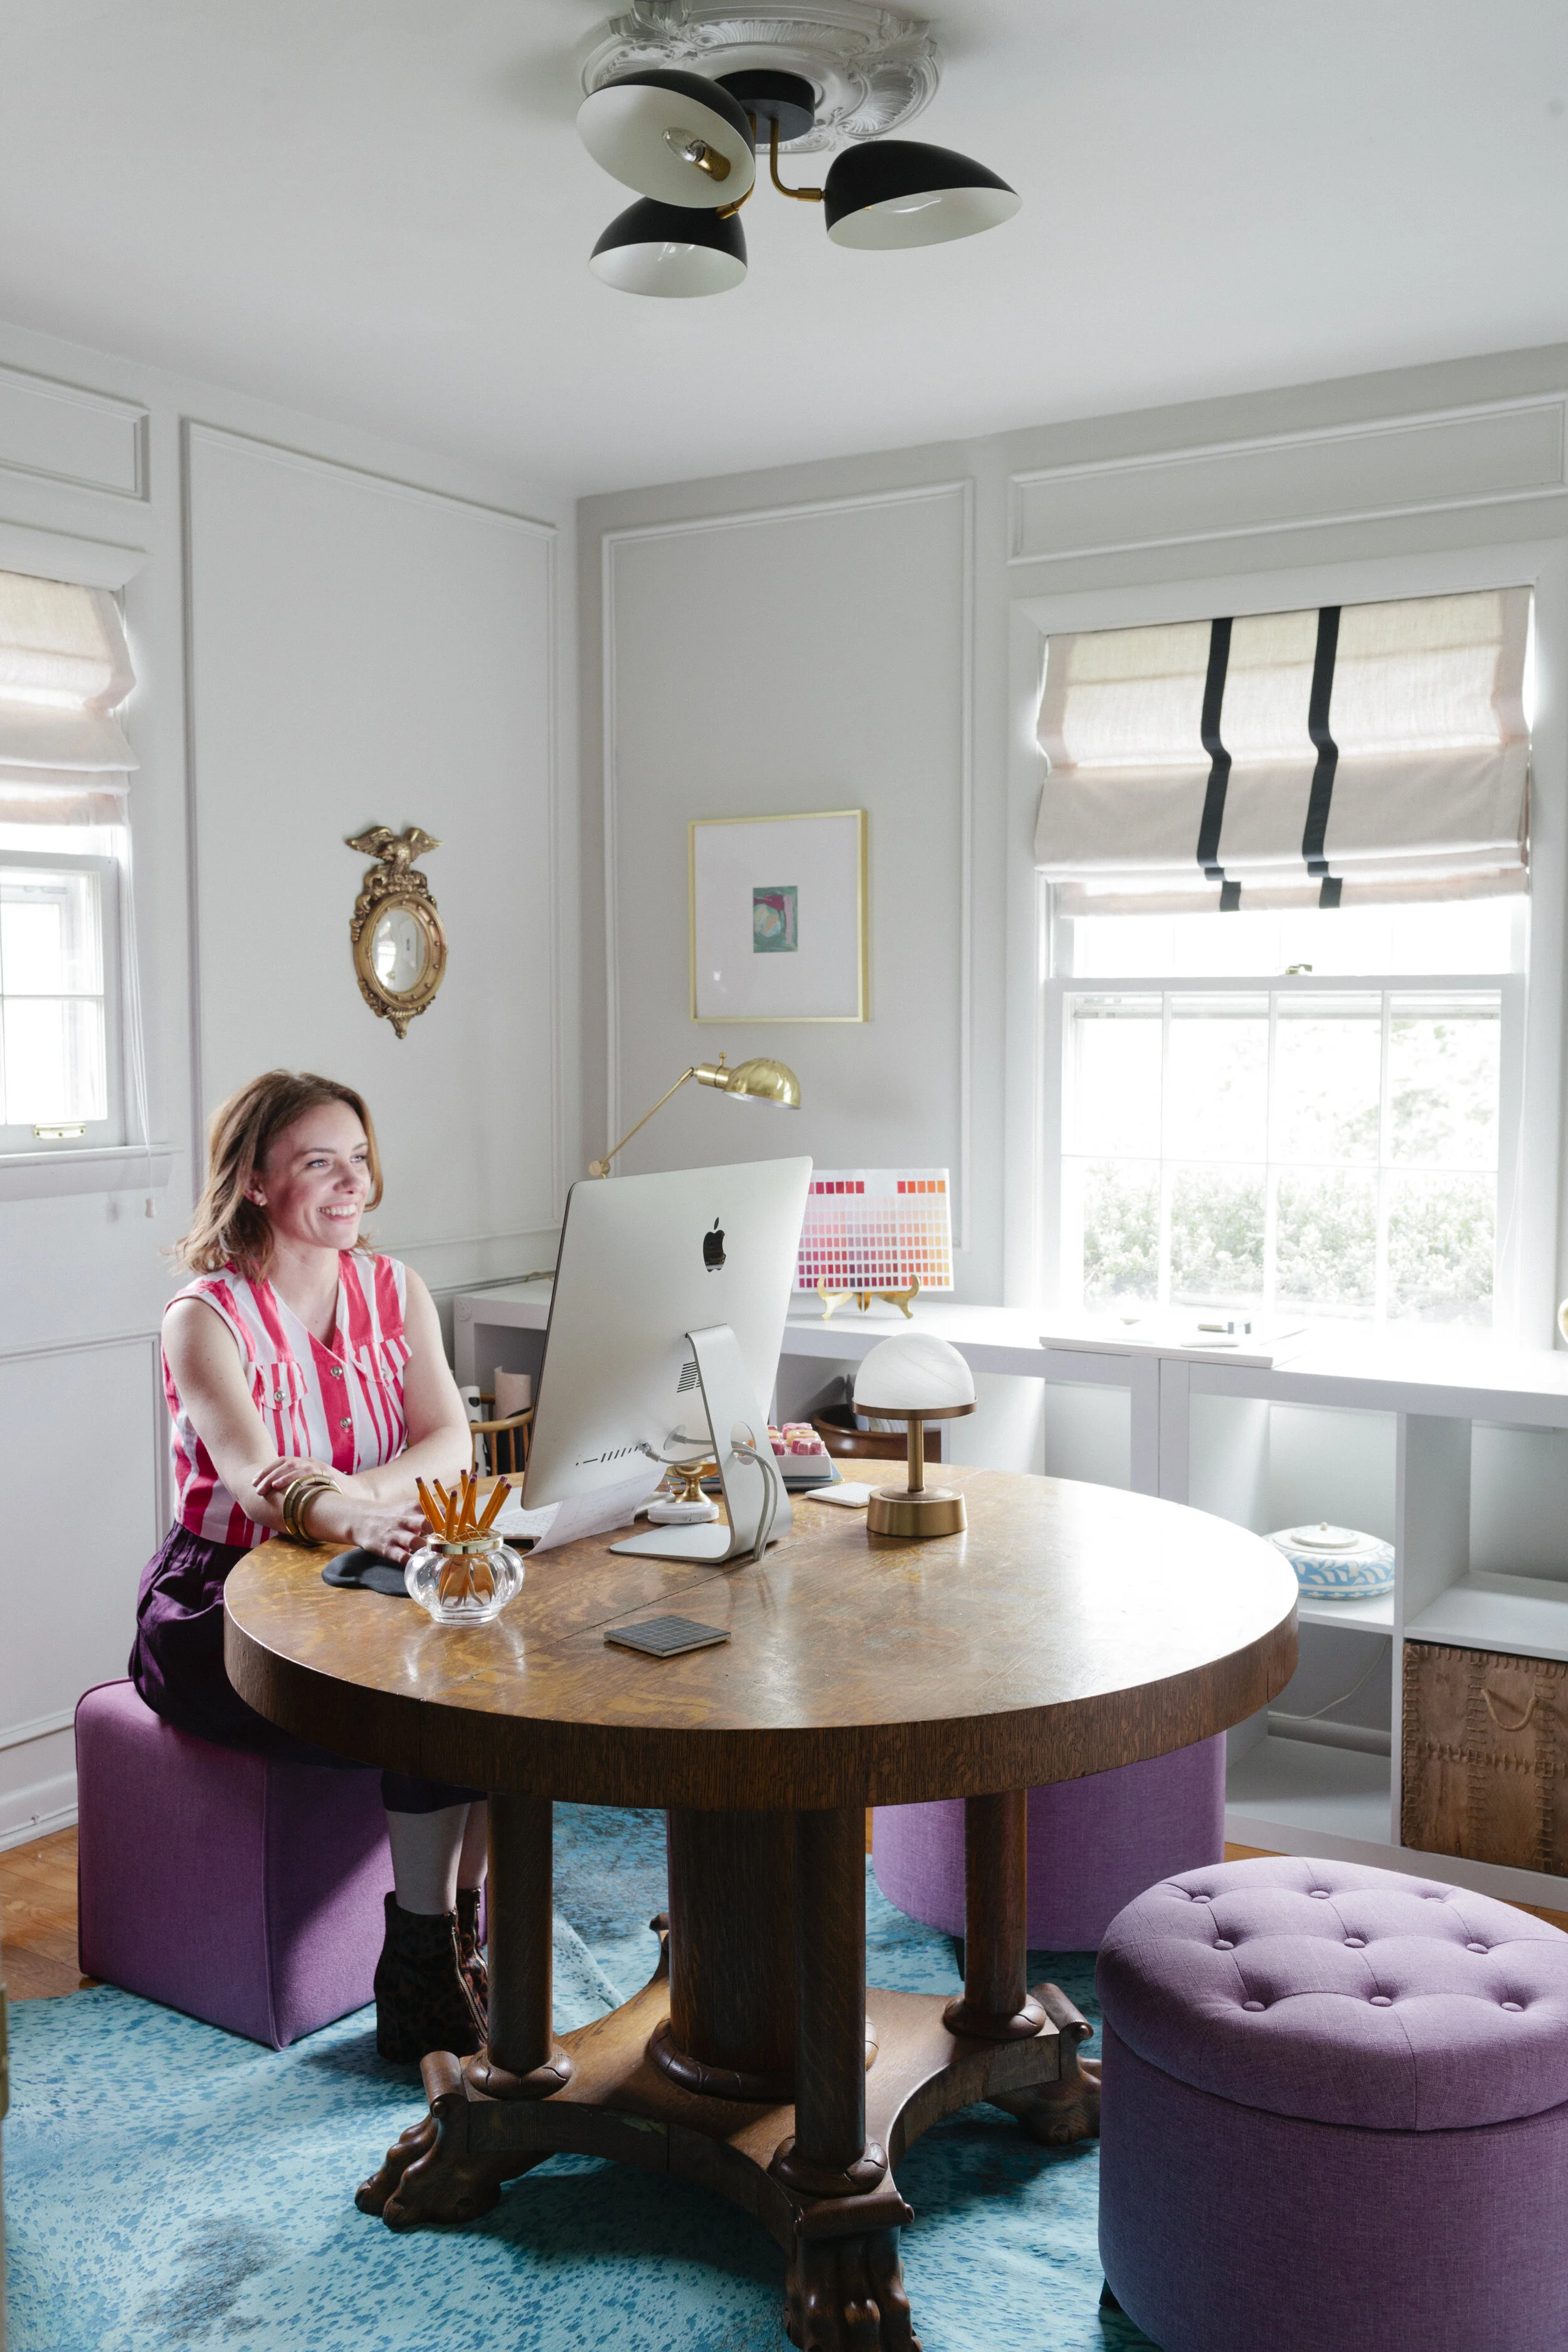
The decision to go round was really the best for this room, because it needed to have multiple functions. It needed to be a home office, homeschool space and design studio. And we. made. it. werk!
Definitely out of the box, but if you are looking for something functional, that pulls your family together, this is a great option.
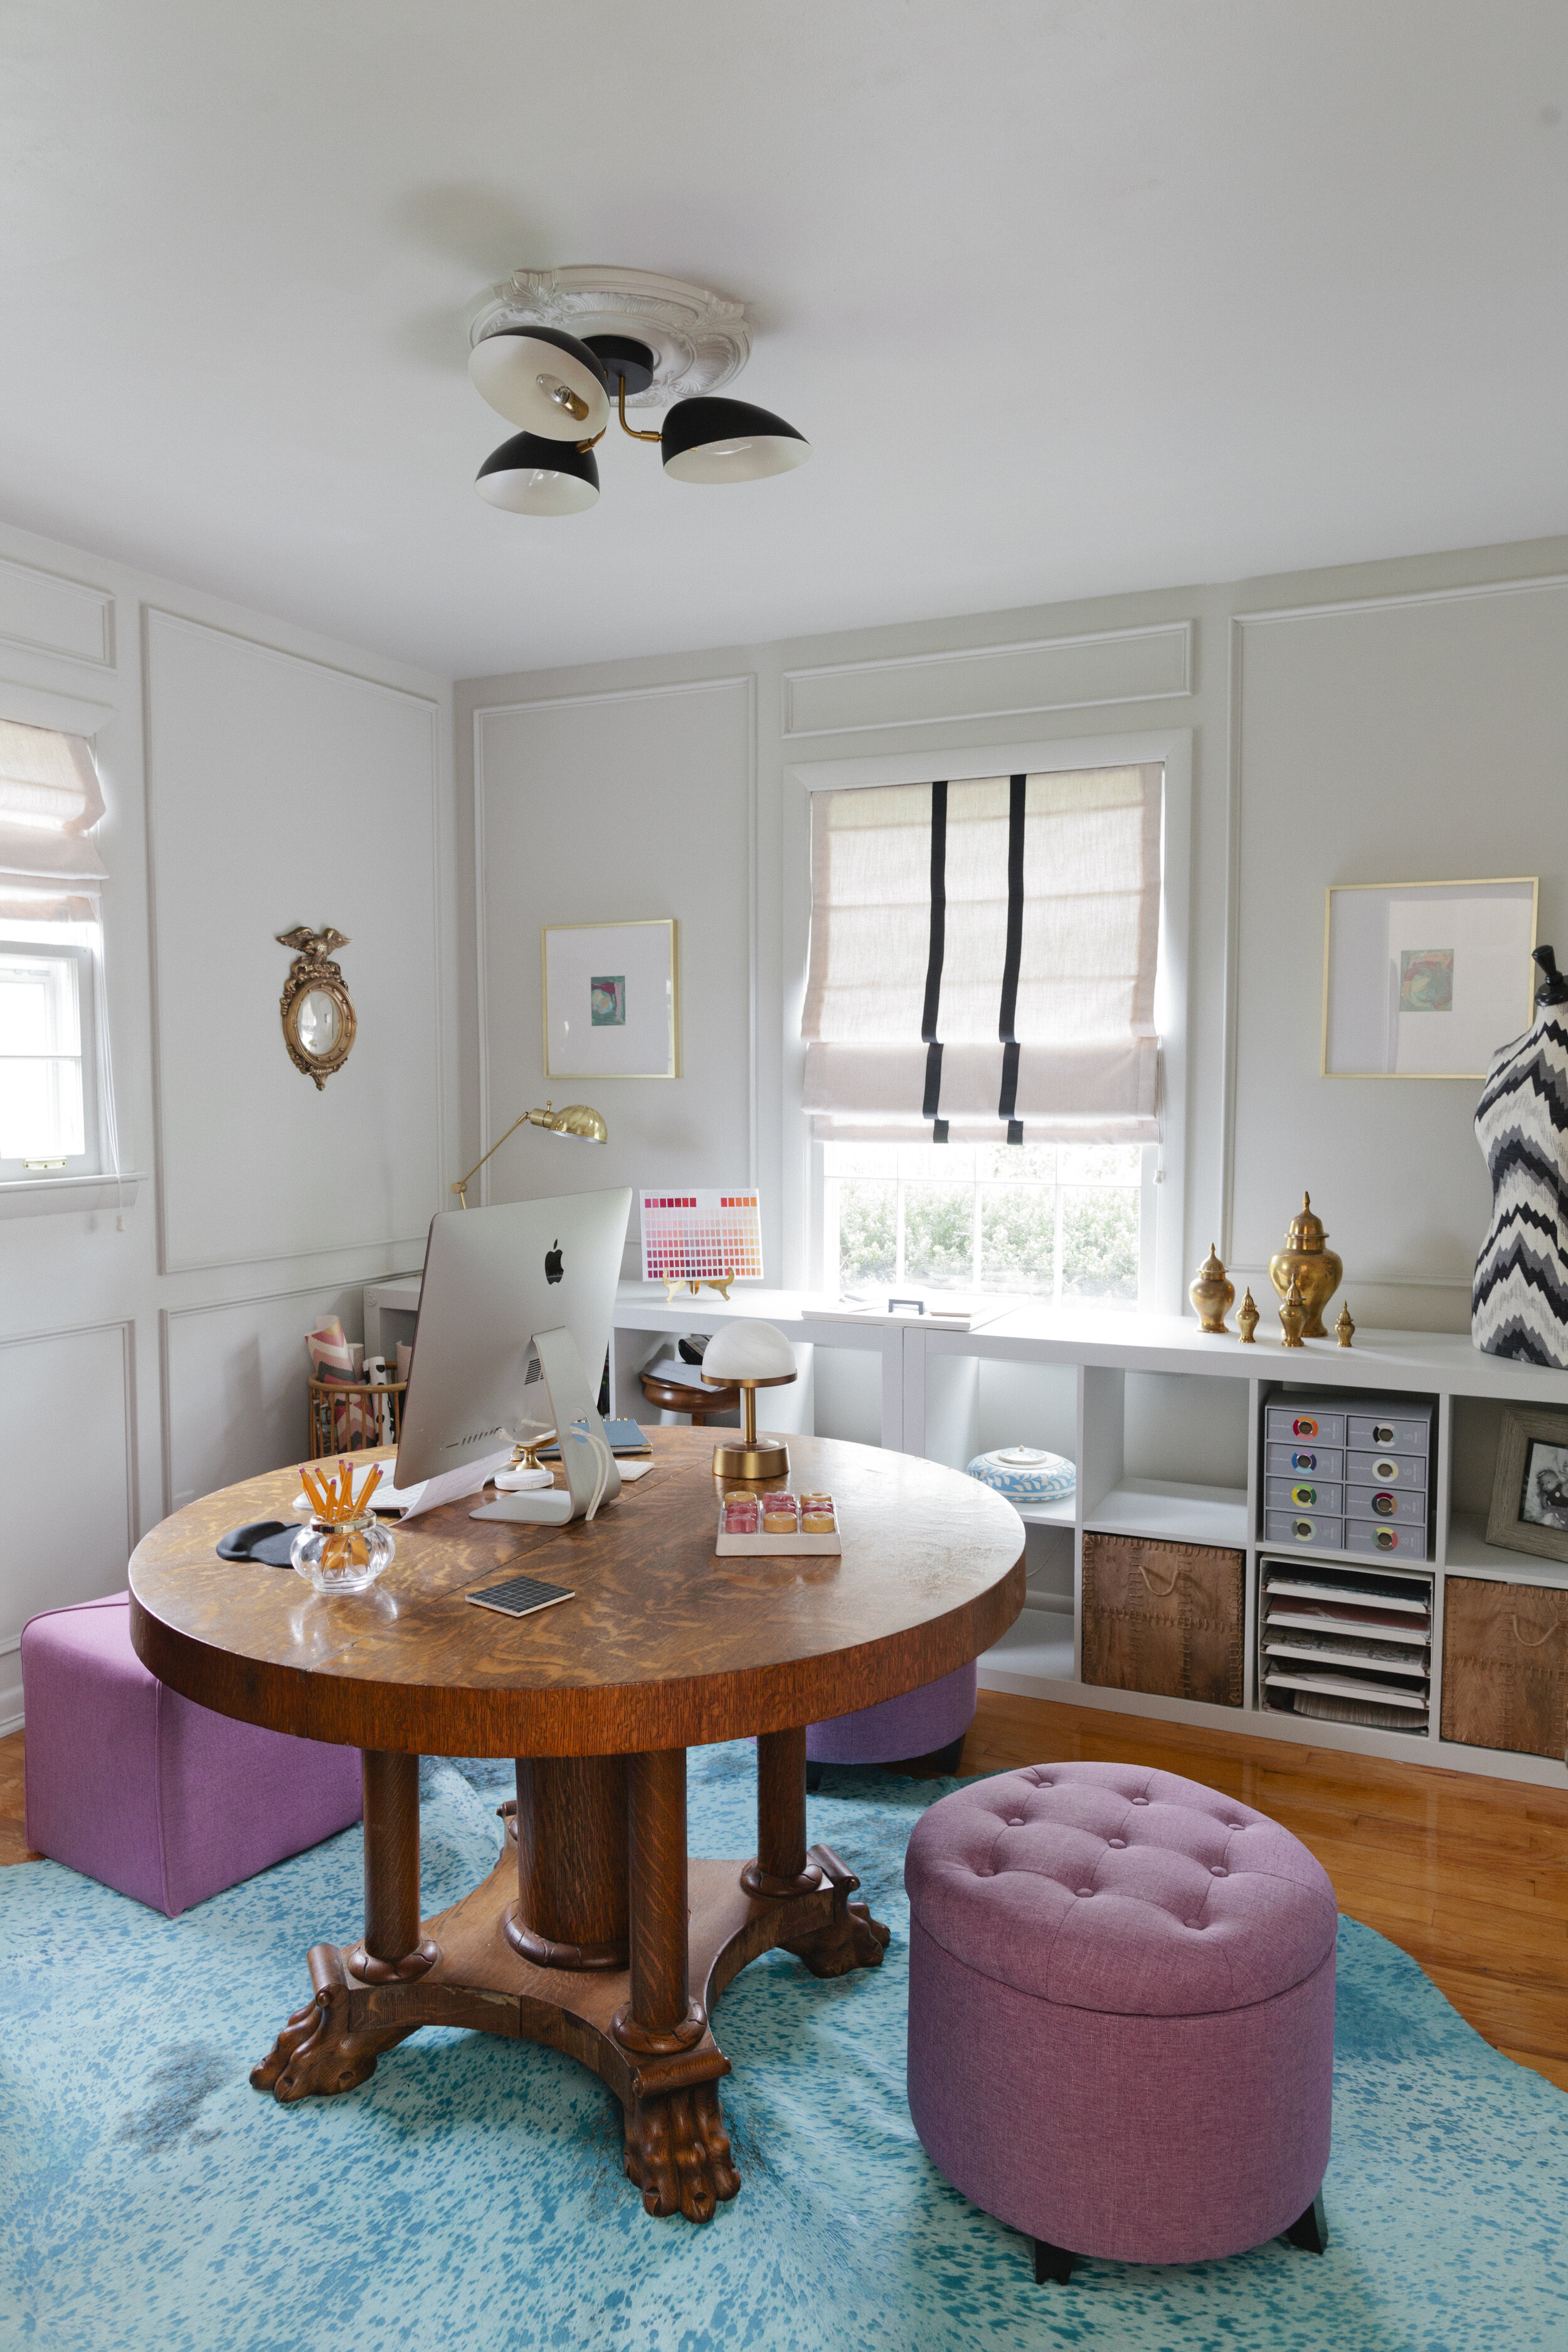
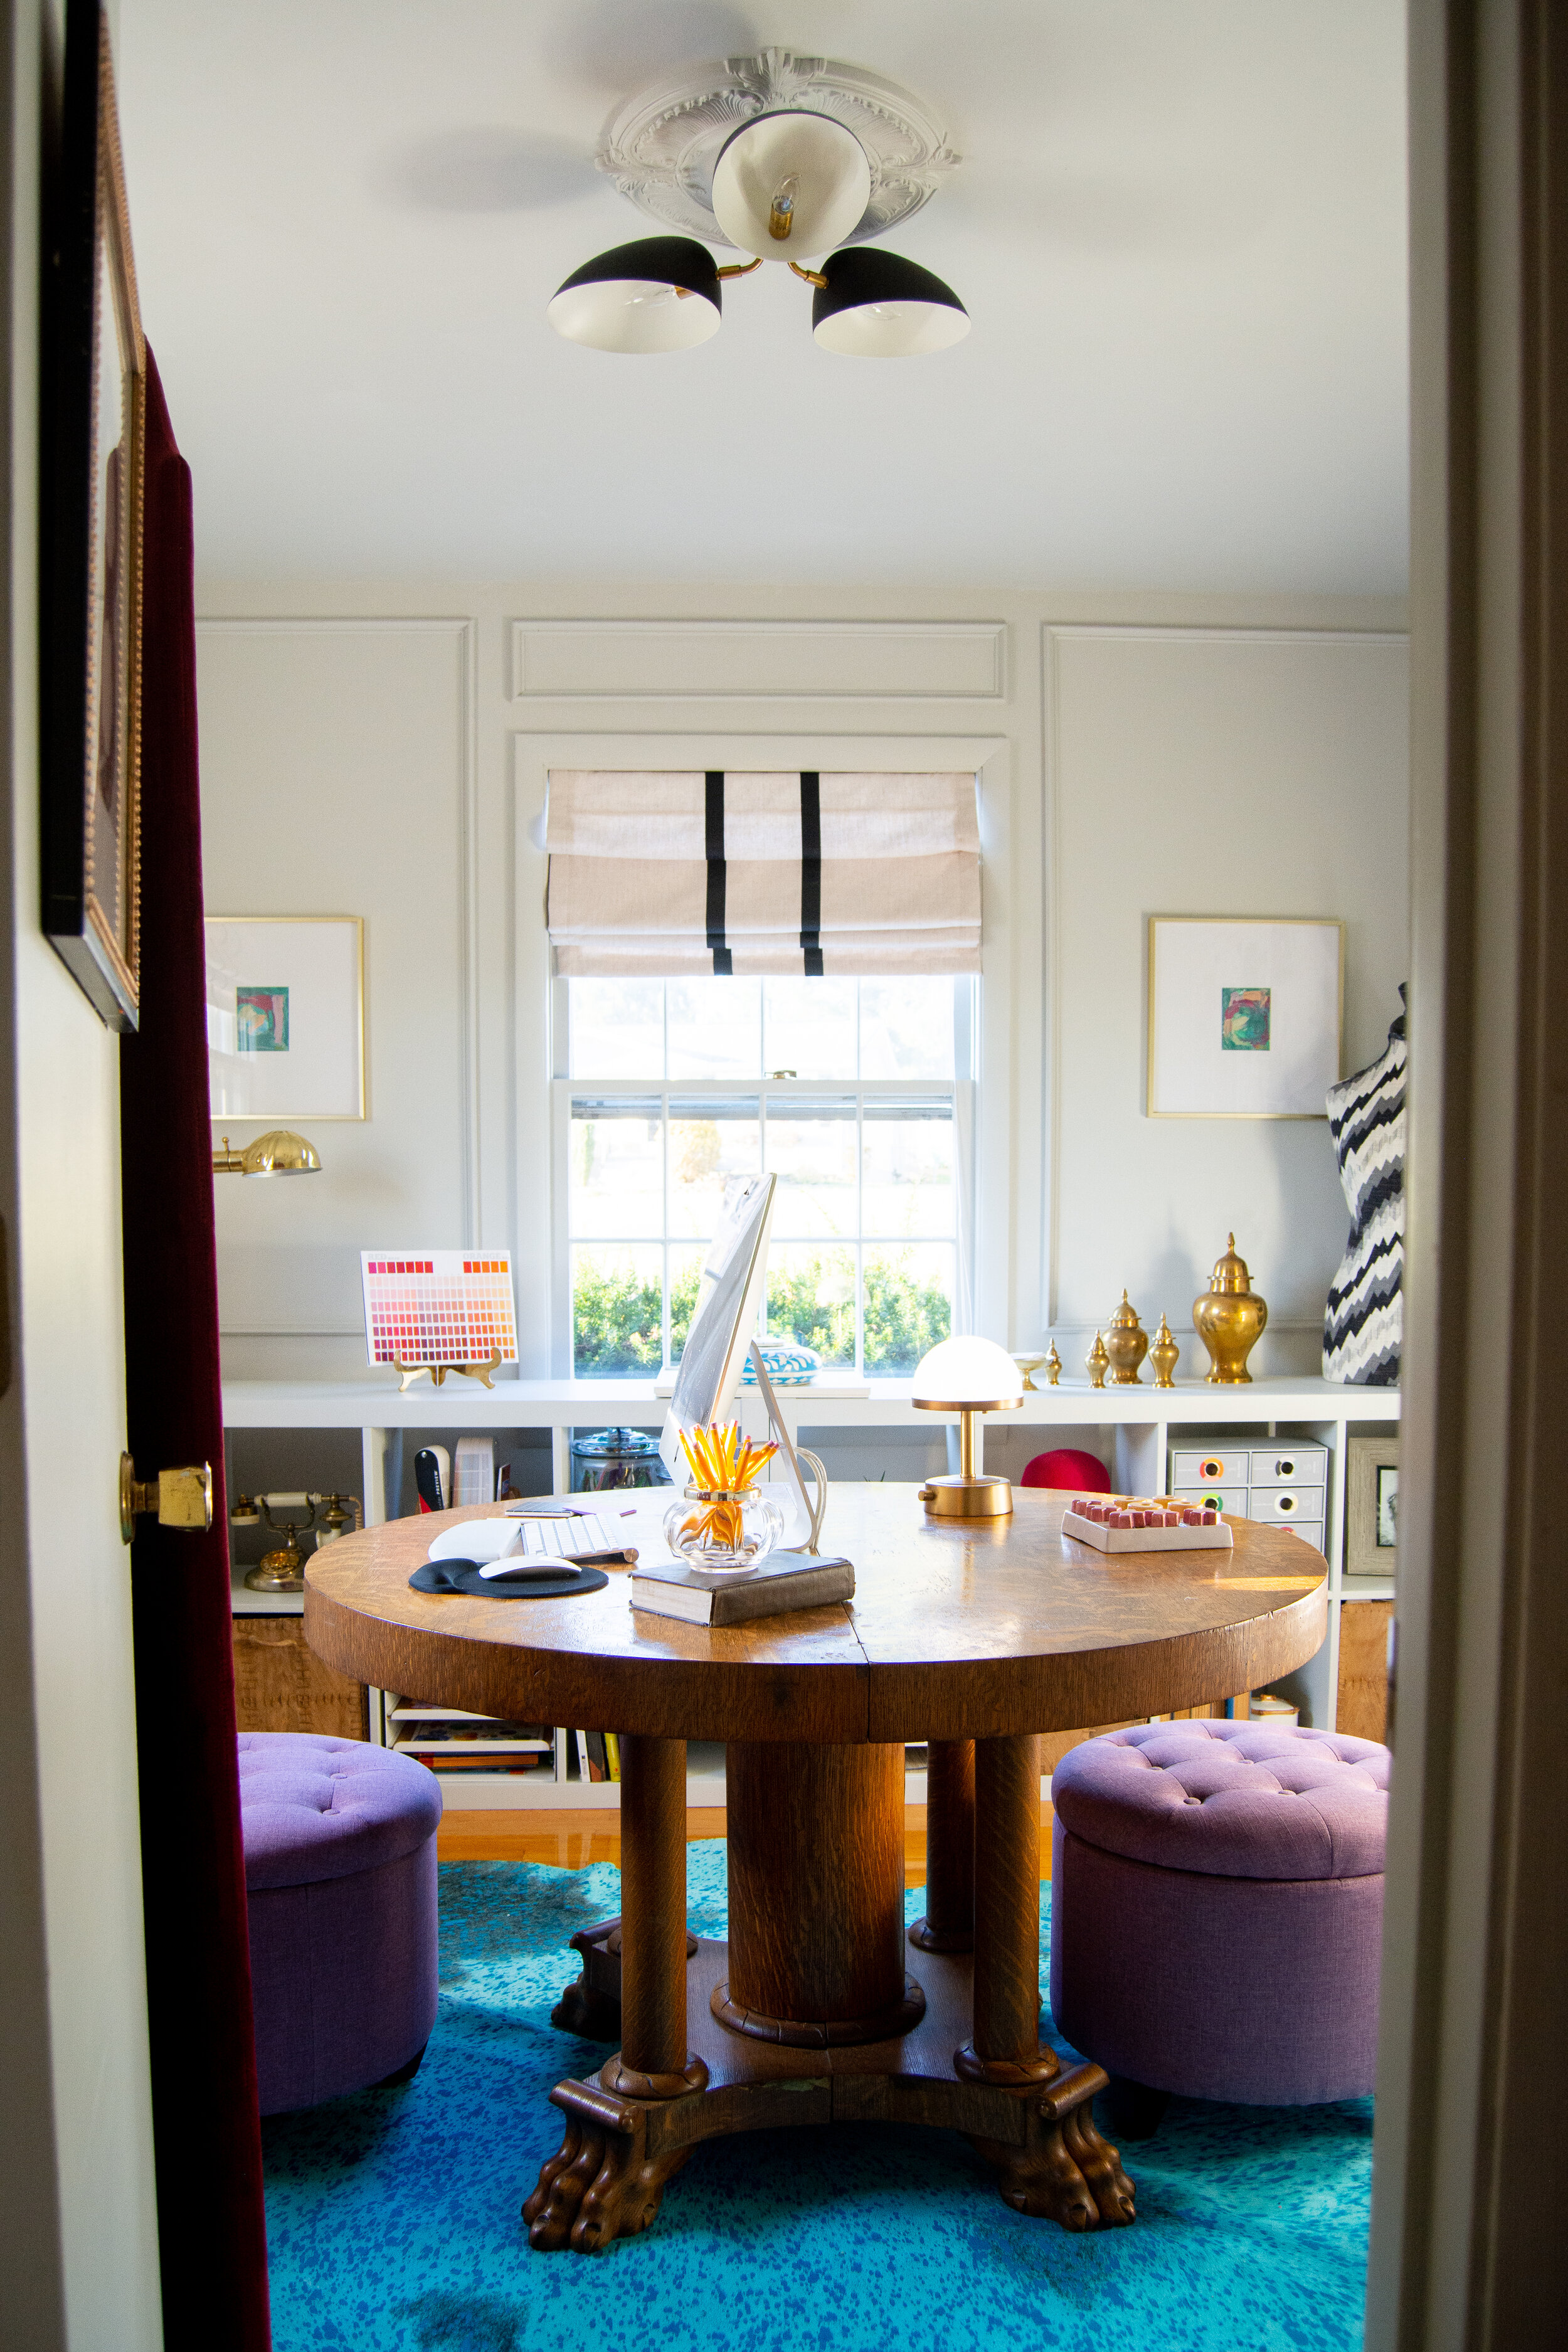
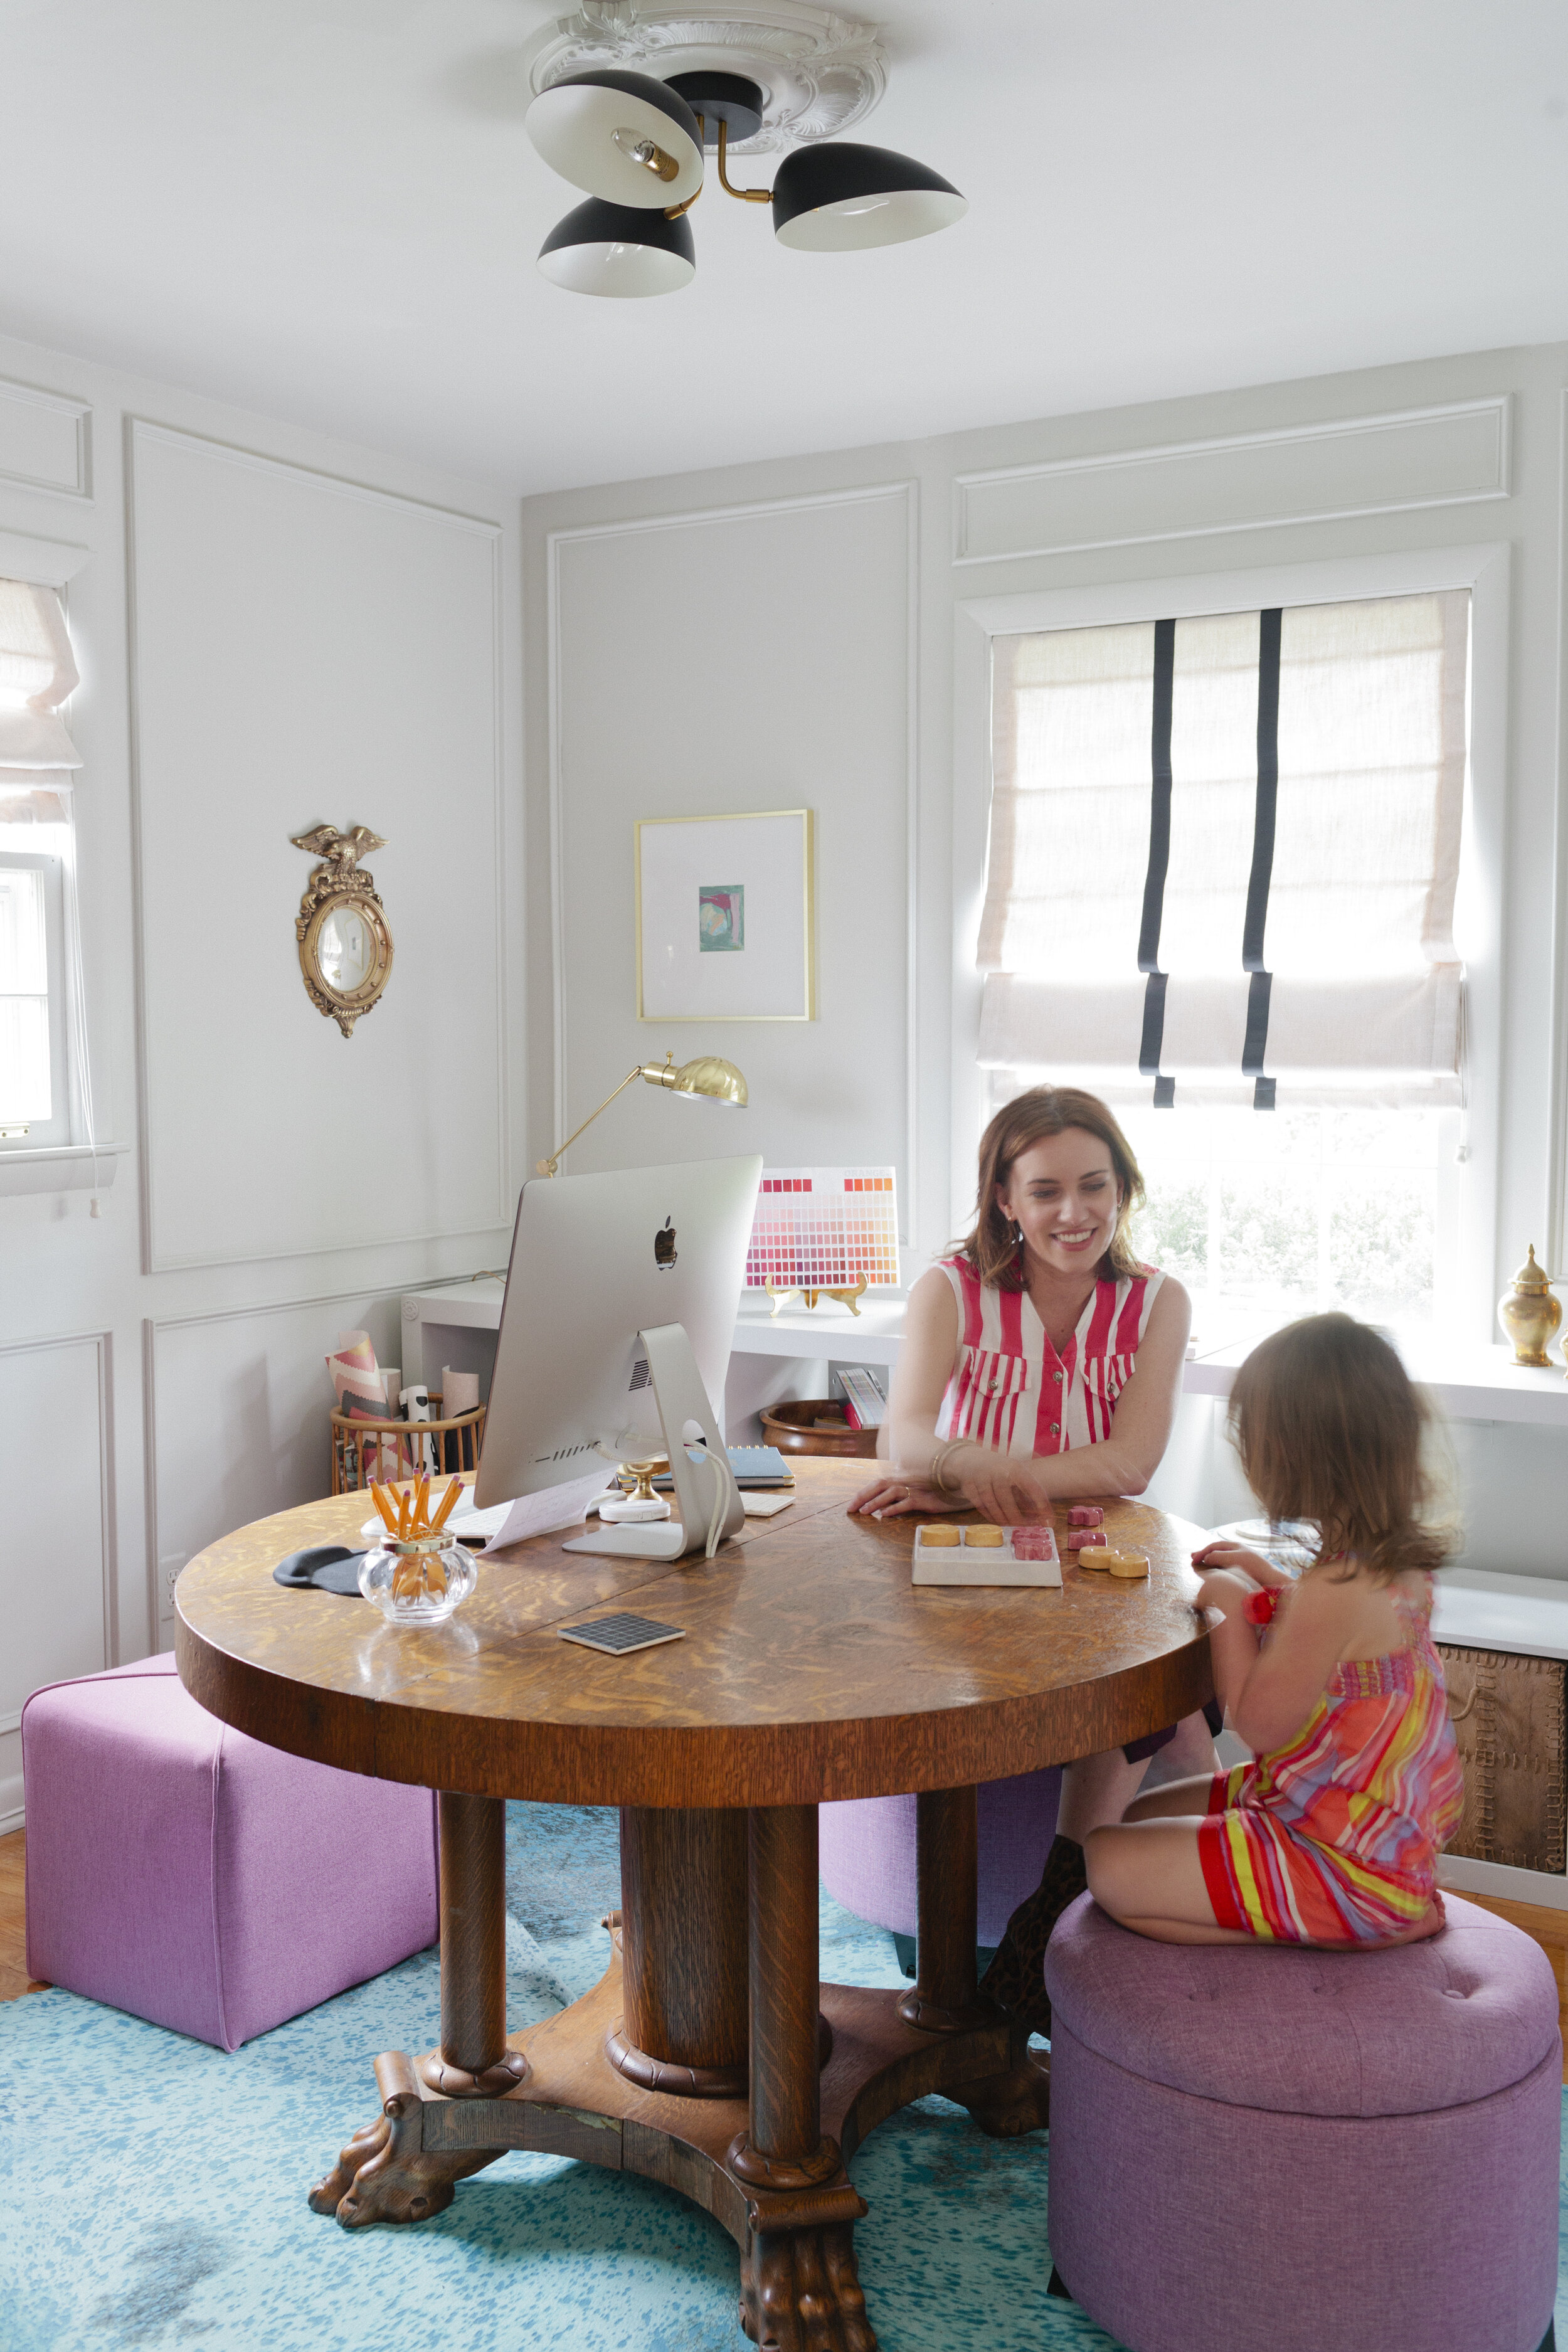
The beauty of just having the one “desk” rather than multiple, is I have a large enough surface space to lay out materials, my daughter is close-by and can work on things alongside me, and I don’t have to worry about multiple pieces of furniture. Which is good, because there really just wasn’t room in here anyway! And, with my desk positioned the way it is, I can see out the window AND face the entrance door to the room. It’s really the best of both worlds.
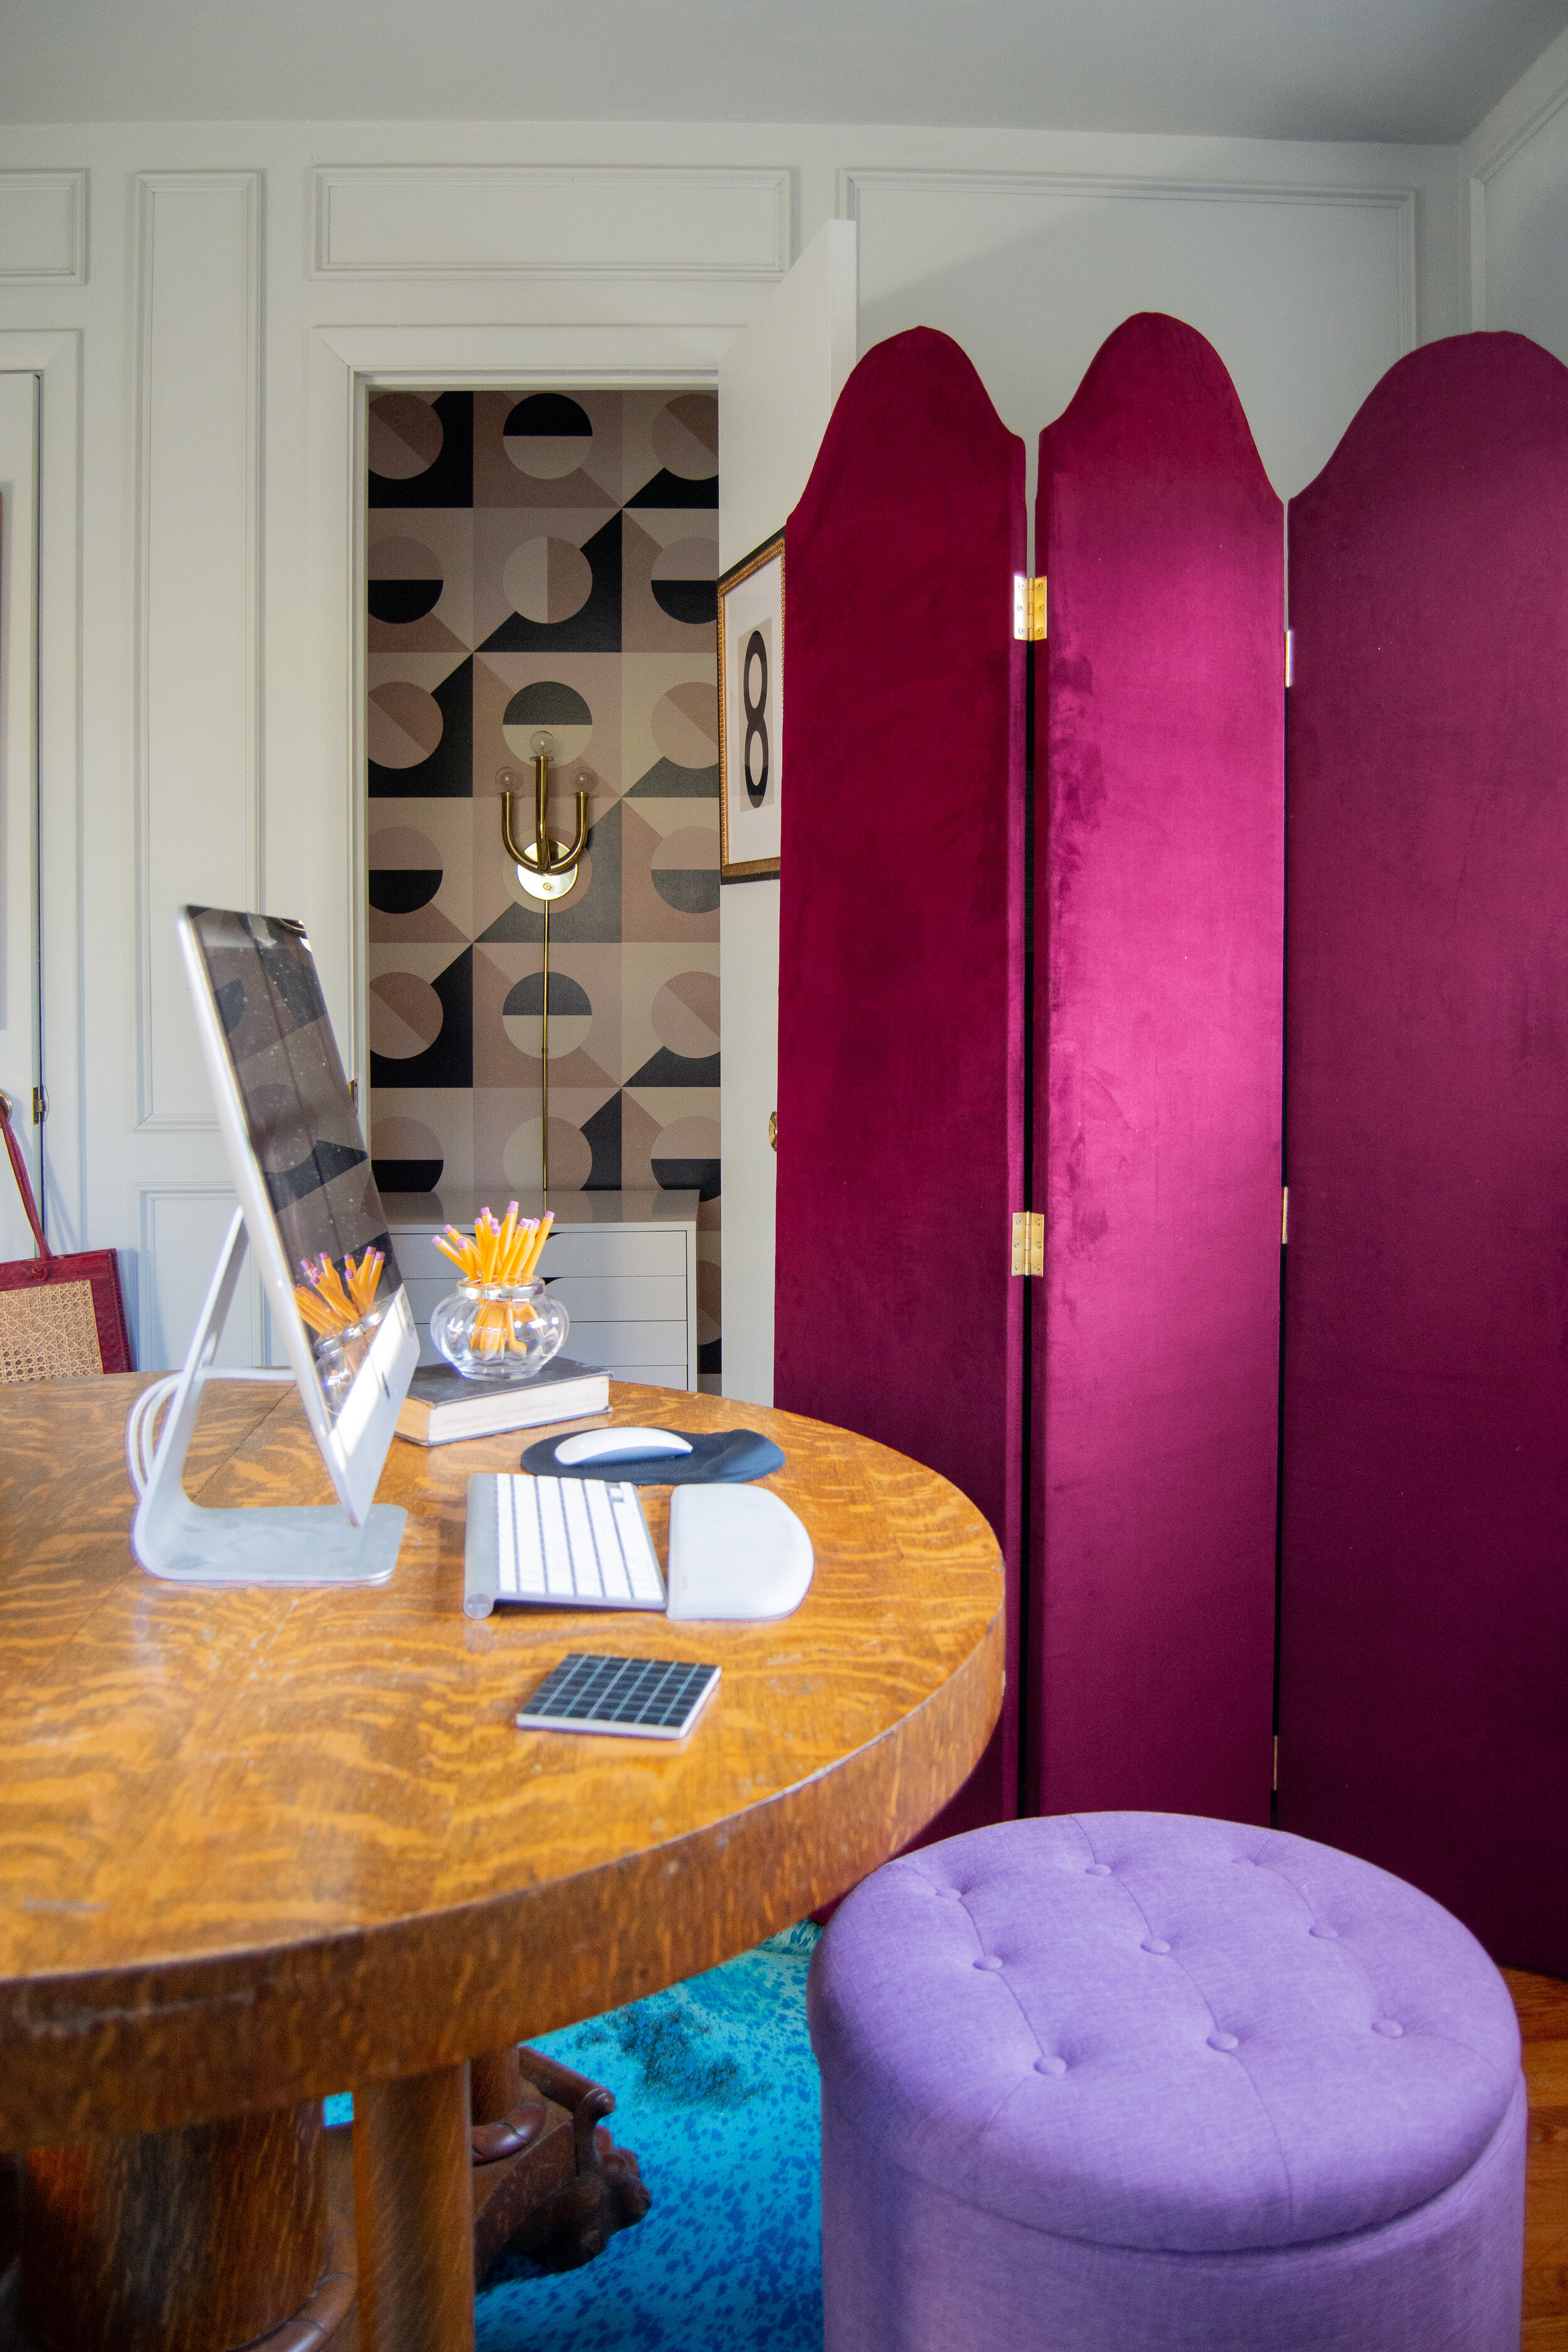
For seating, I used storage ottomans that hold paint samples, and school materials. The storage cubbies in the back are an ikea hack and hold a mountain of supplies!
So let’s take a whirl around the desk and it’s many uses so you have a better idea of the many ways this can function:
Homeschooling (okay, not exactly, we are playing tic tac toe here)
Laying out a mood-board for a client
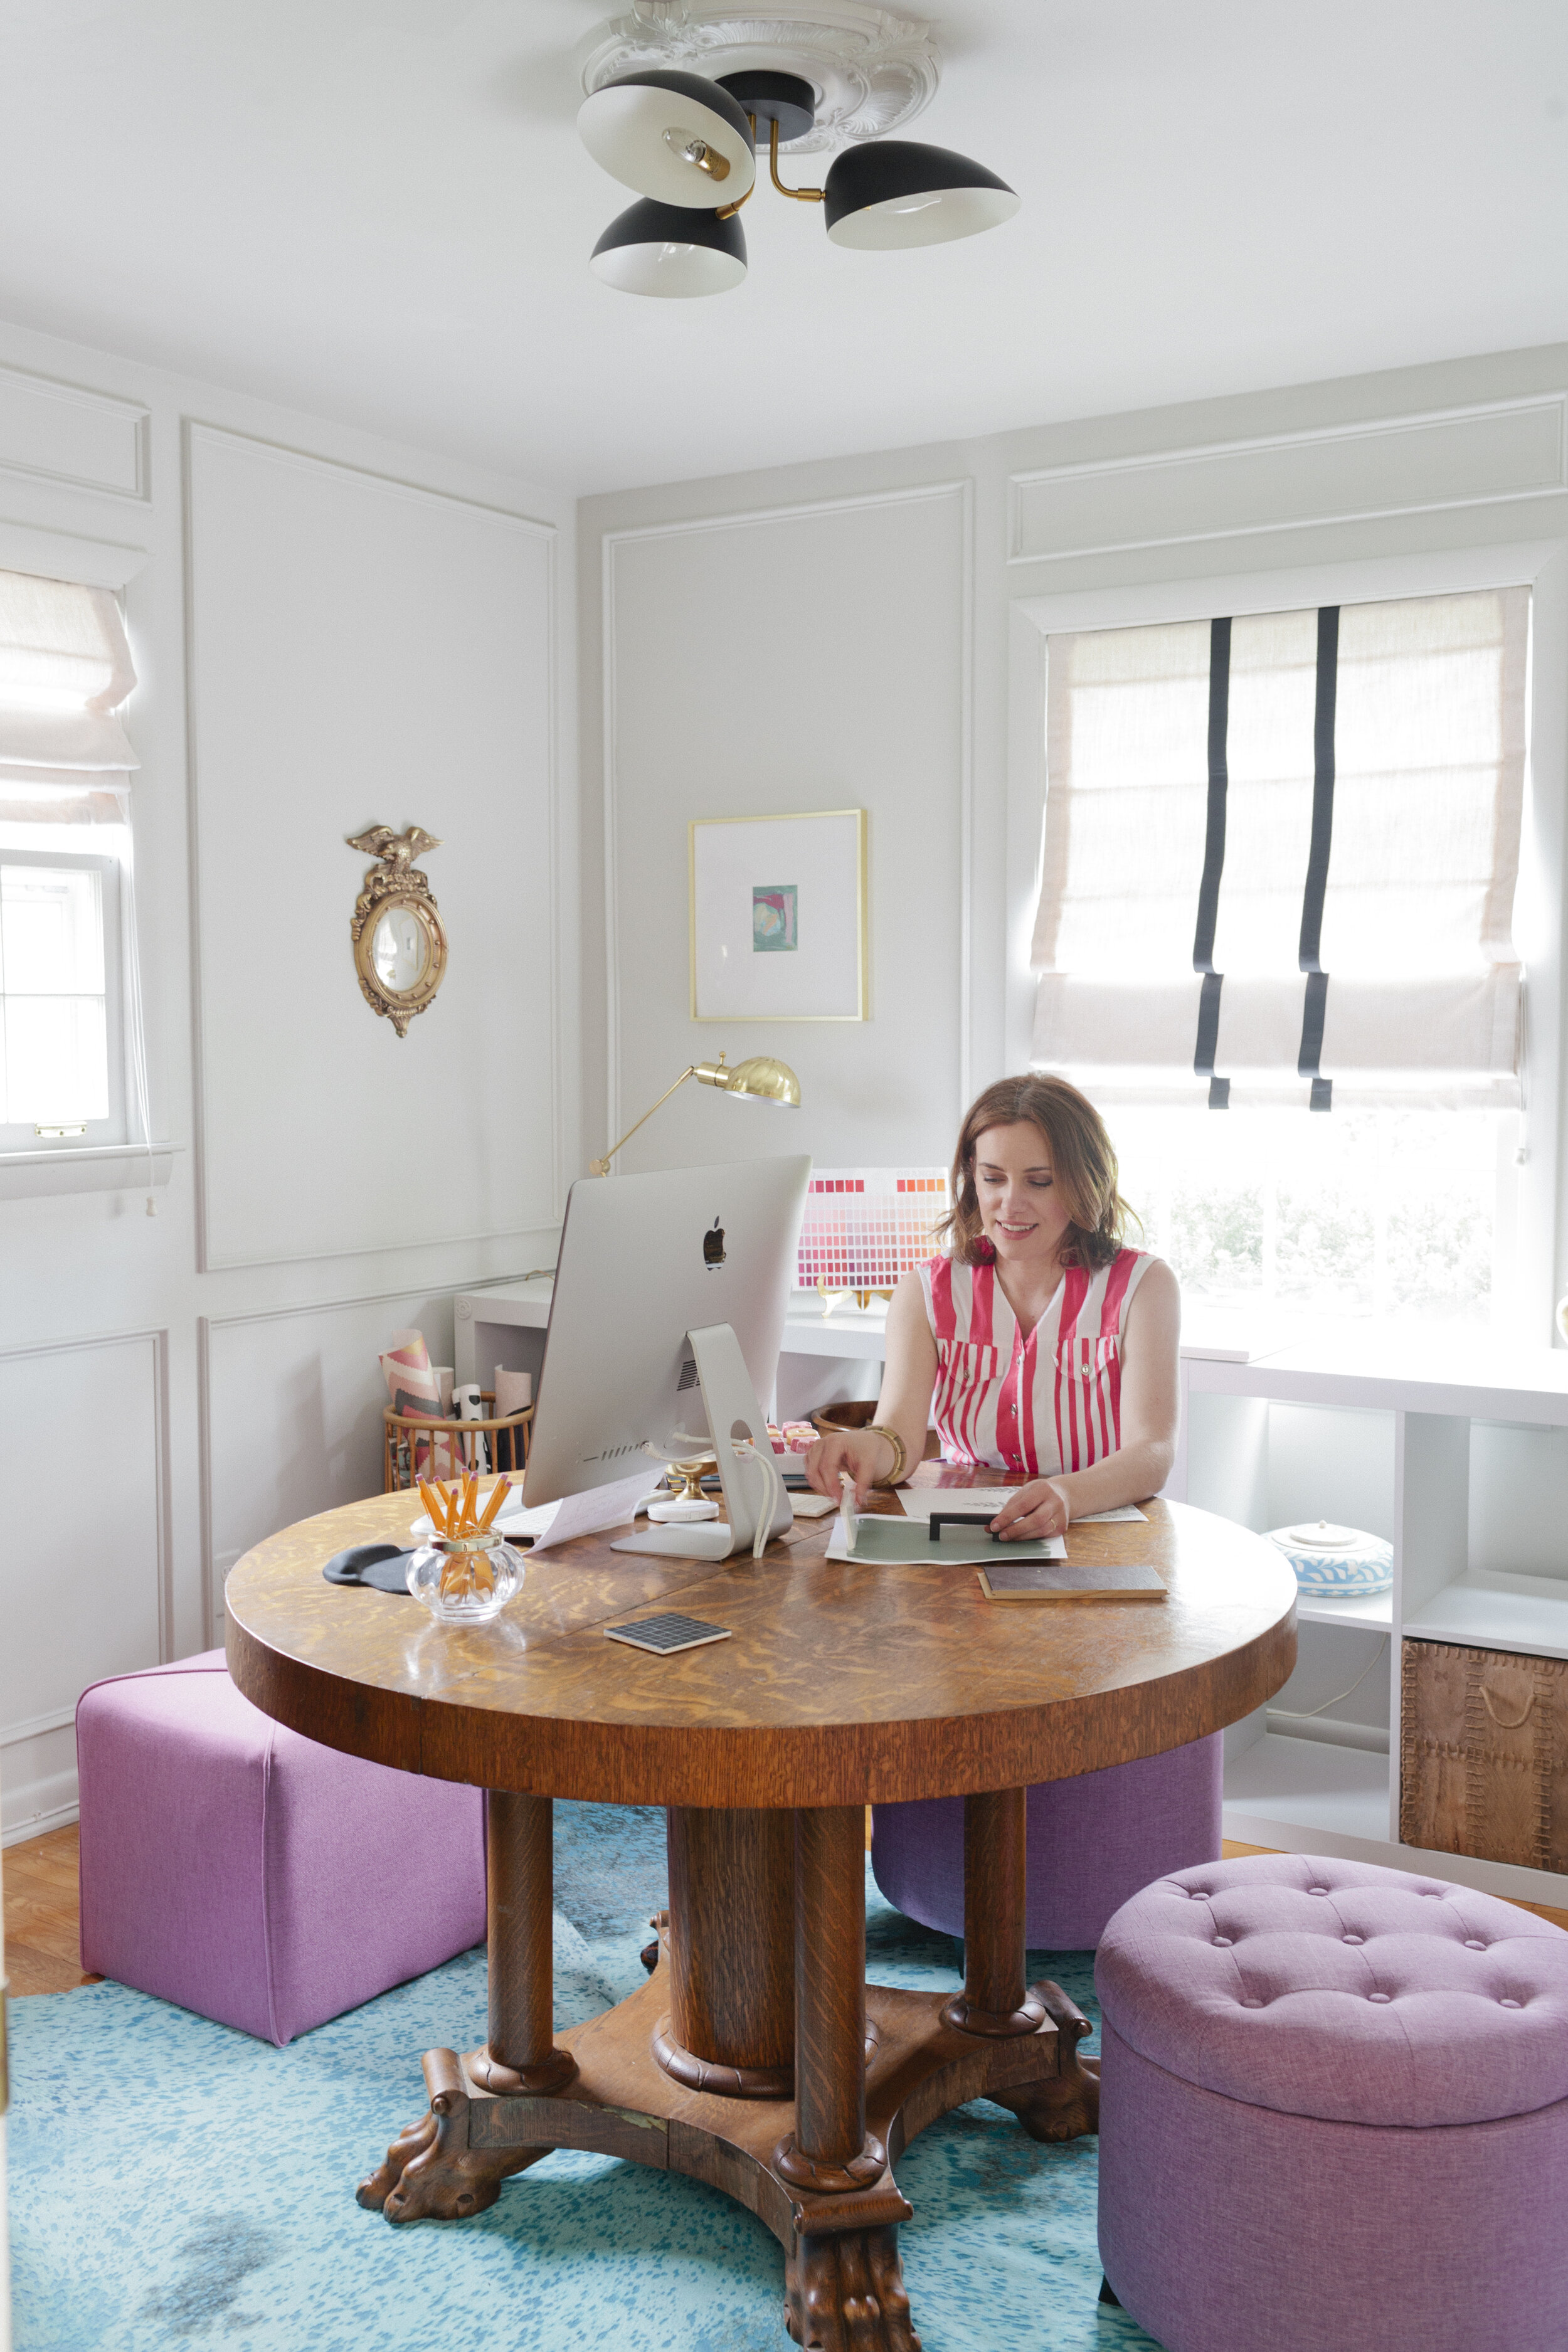
Catching up on emails (and looking very happy about it). Since my job doesn’t require a ton of computer work, the ottomans work just fine. If I am sitting for more than an hour, I have a more supportive chair I bring in.
So what about the cords?
I normally would have junction boxes and cables running directly from the floor for a project like this, but since this is a rental home, we needed to get clever with the exact table and rug!
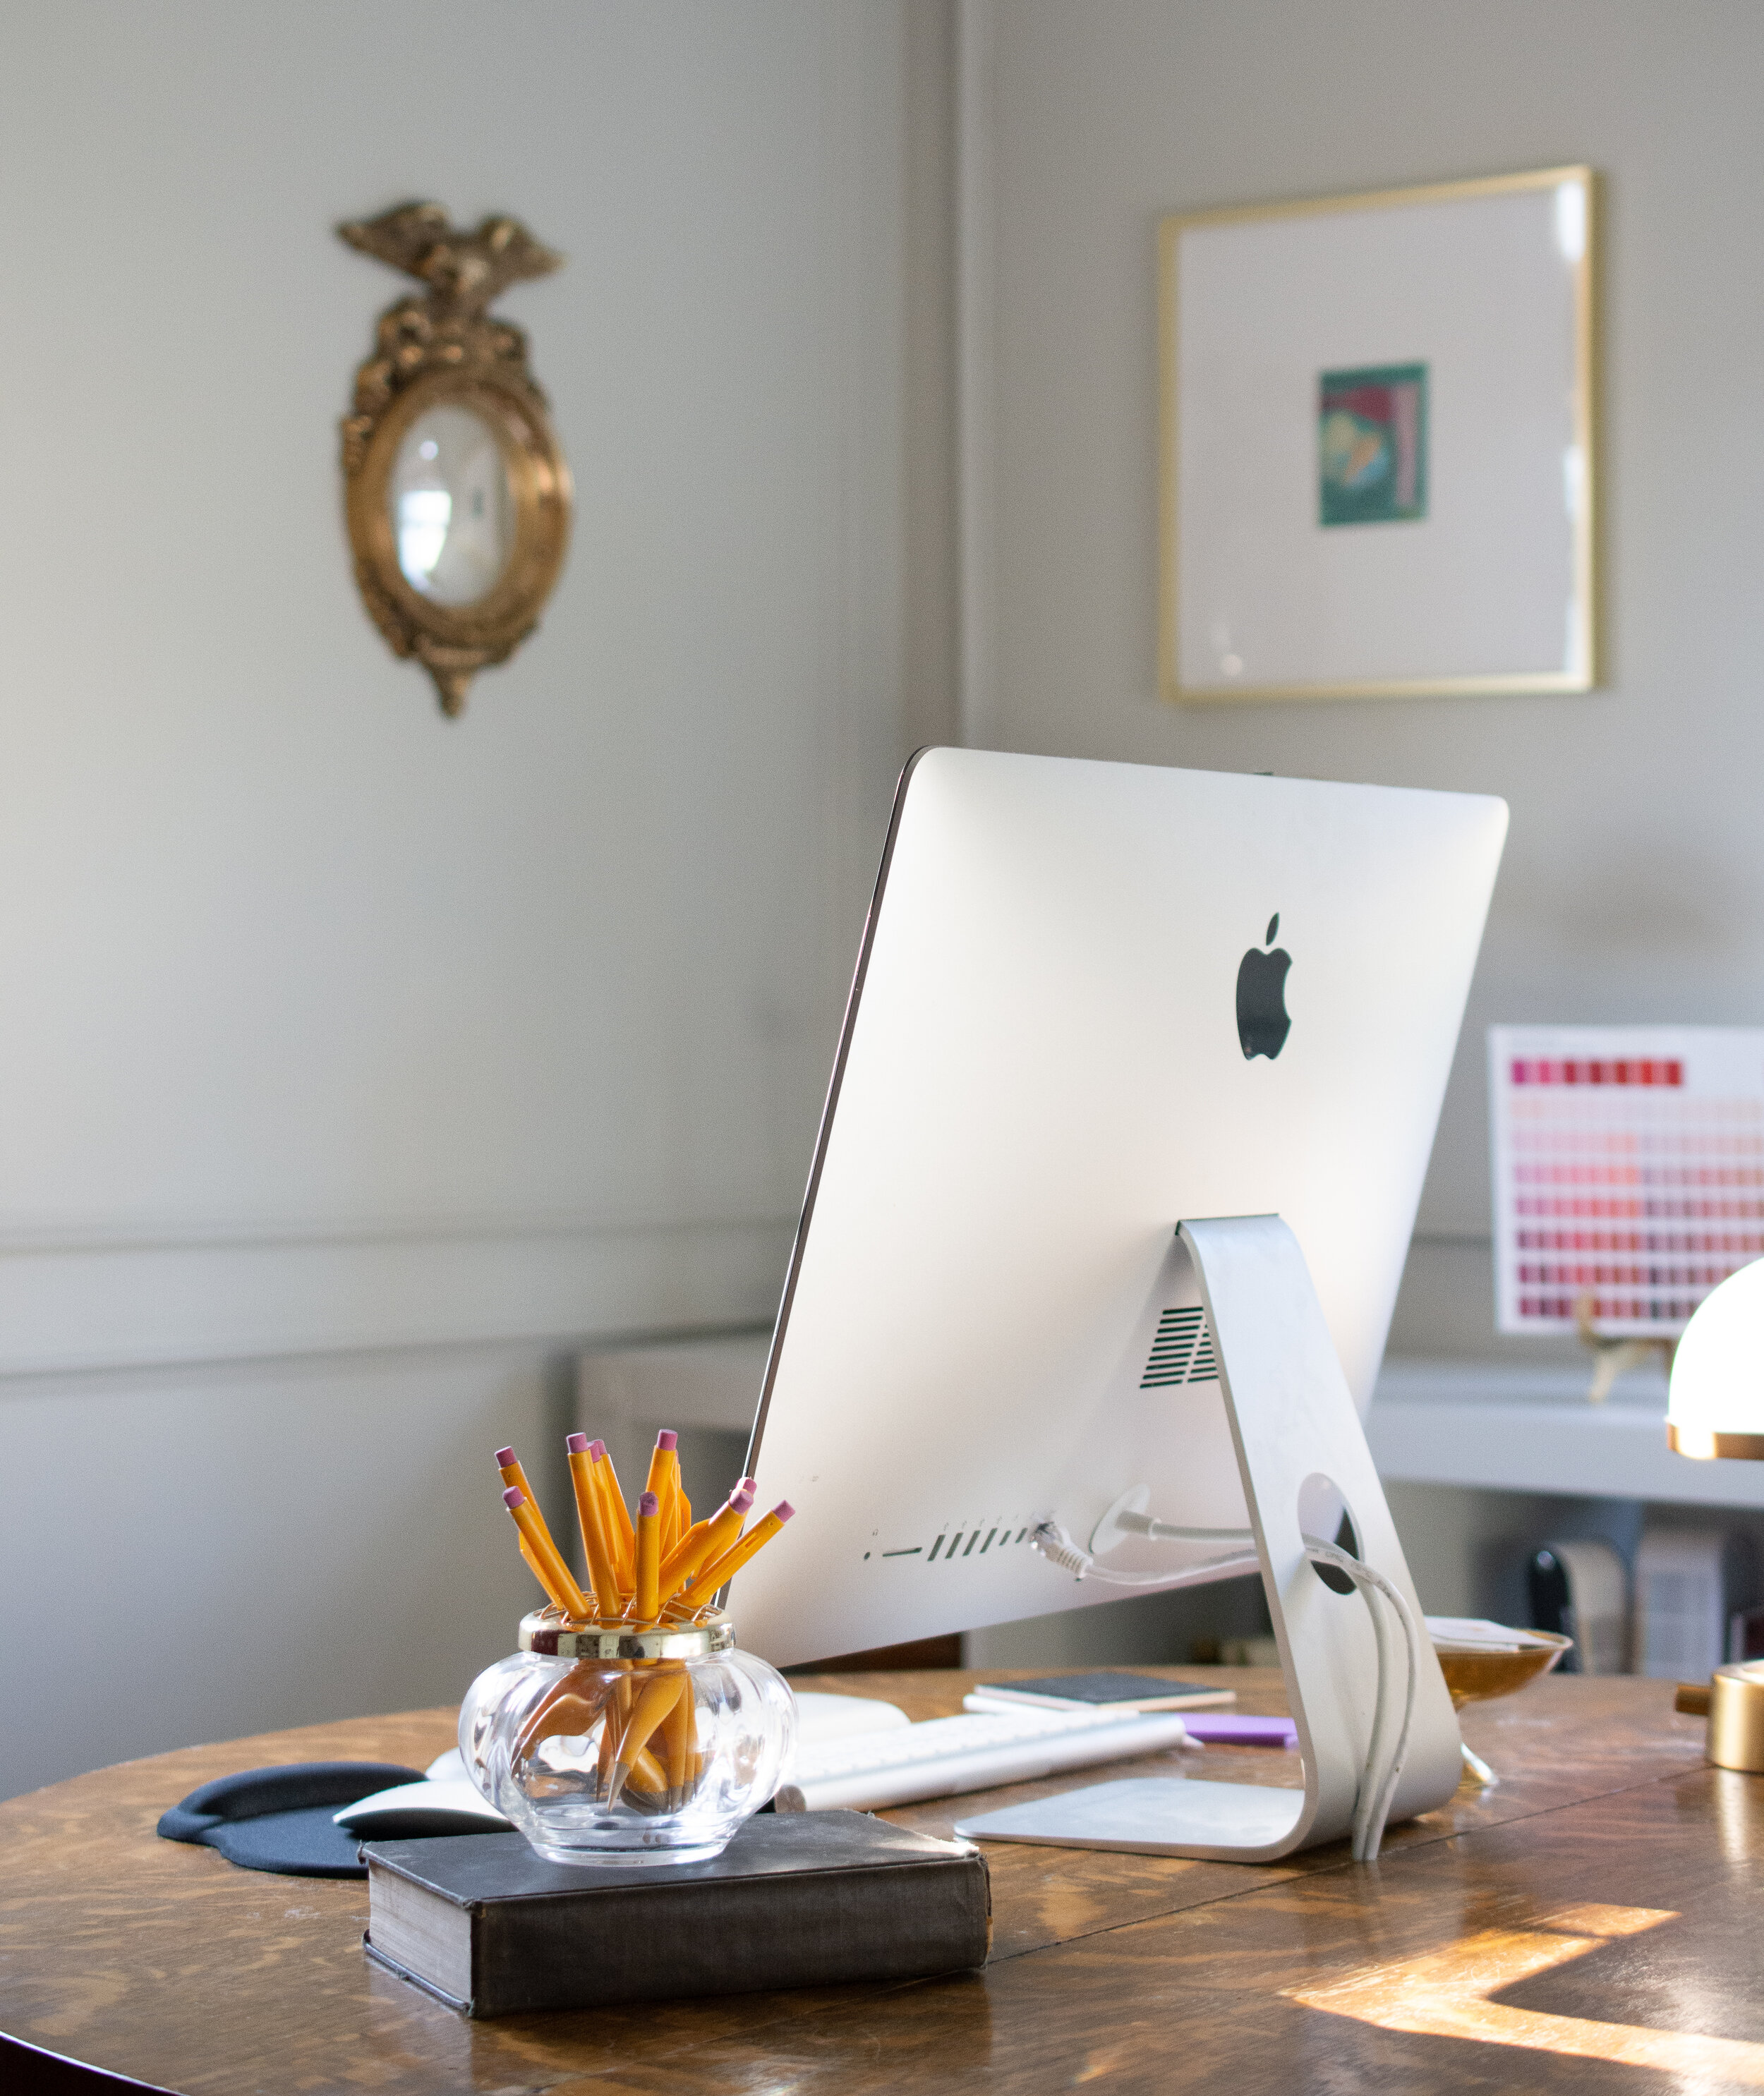
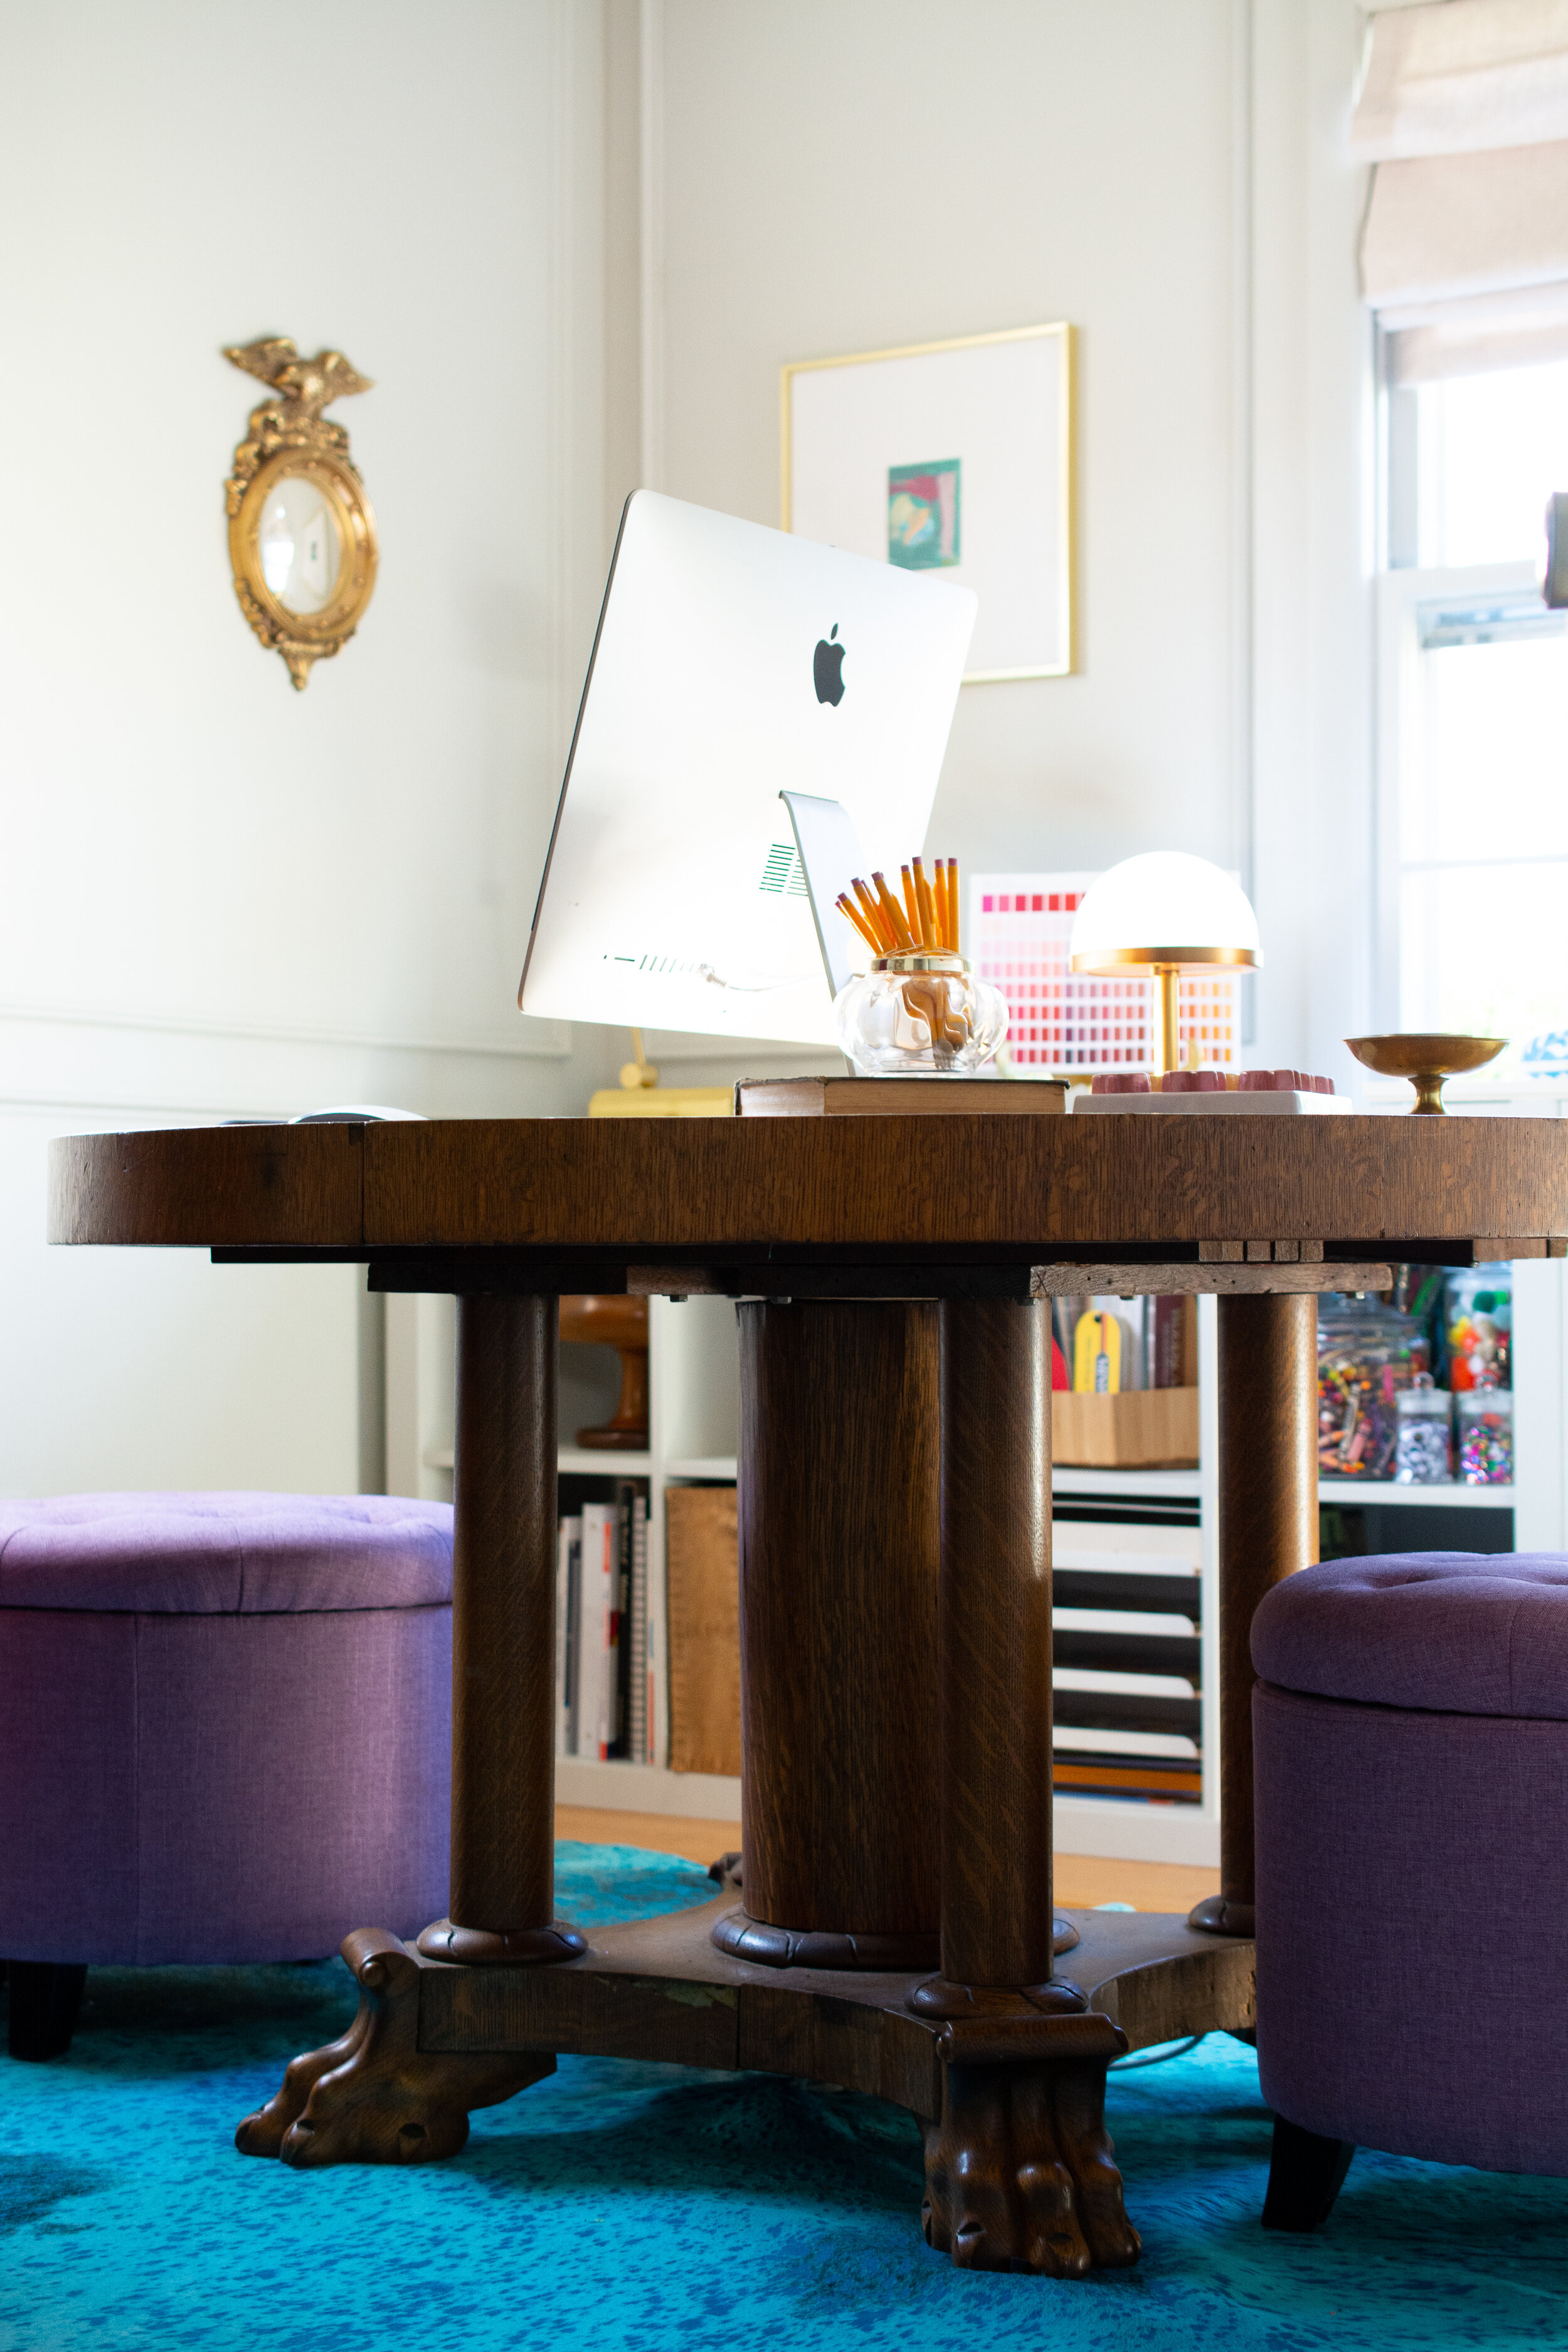
The type of table used really matters. In this case, I found an antique tiger oak tavalo table for $80 (score!) and the fact that it opens in the middle, leading to a center pedestal, made this all possible. It’s not that it can’t be done with other types of tables, it just requires more noodling and eye trickery (see my tips below).
By simply opening the expandable joint in the center, and drilling a hole to accommodate our cable and cord…

we were able to feed power to the computer along with the cable line.

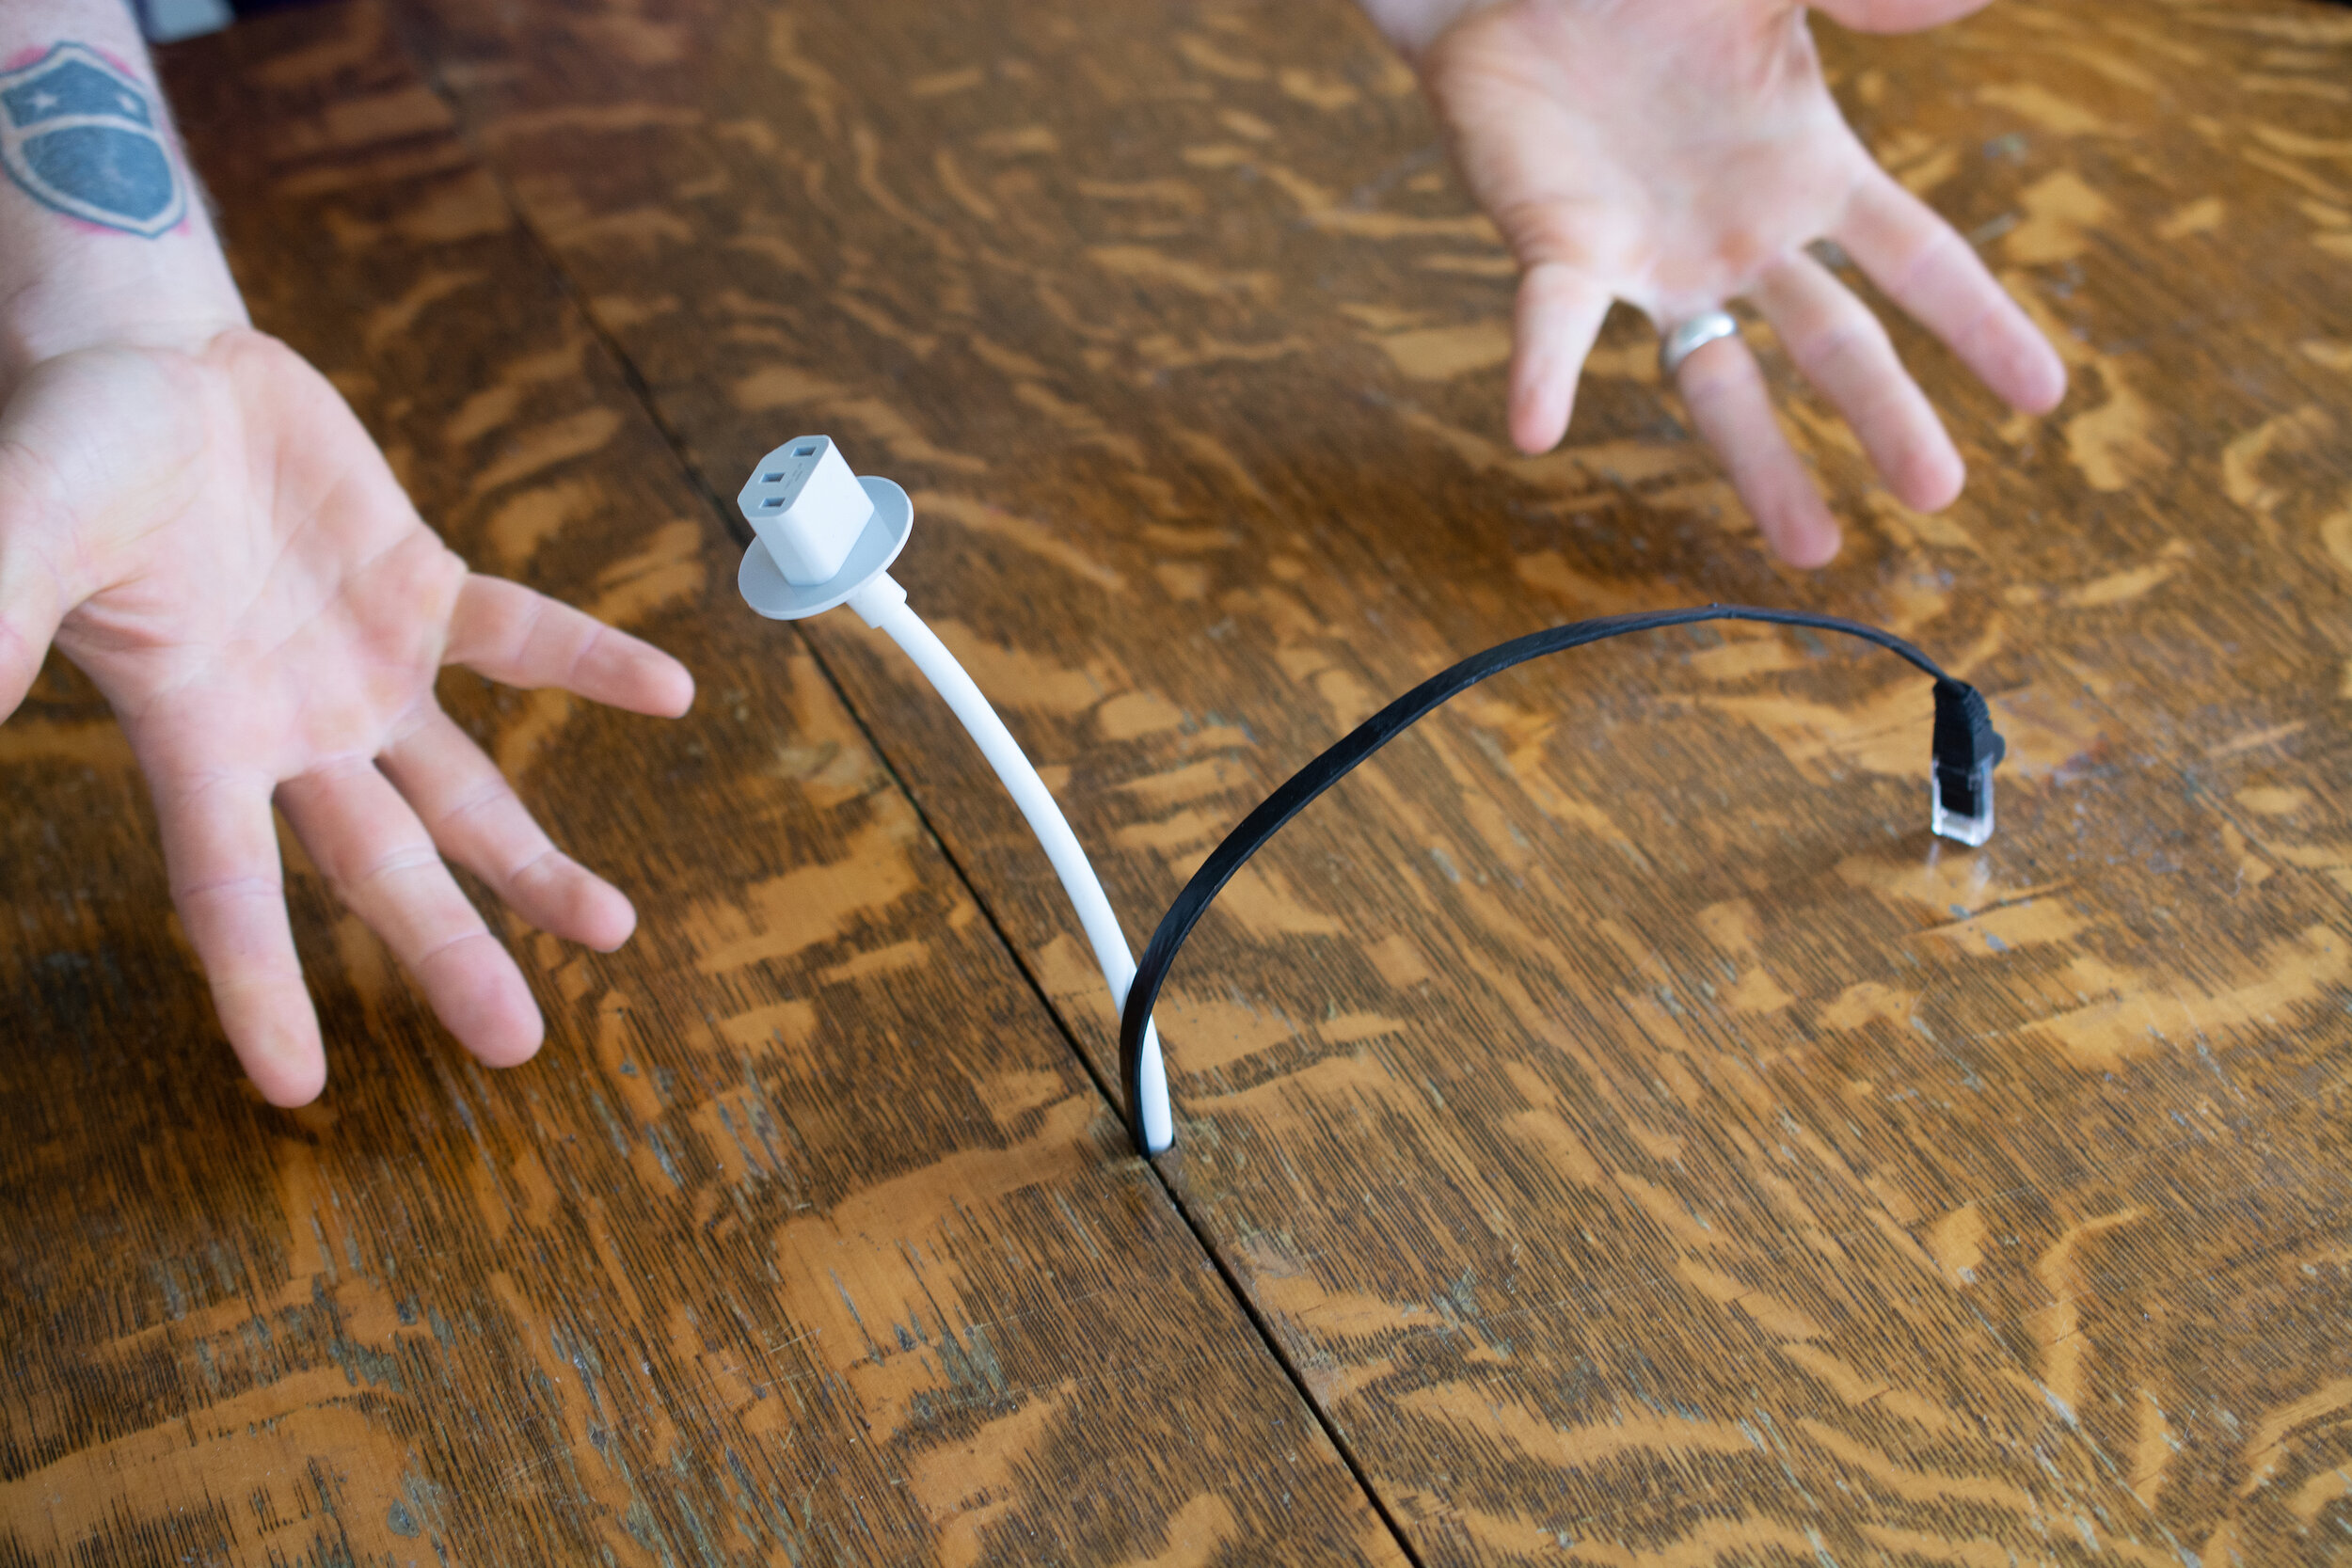
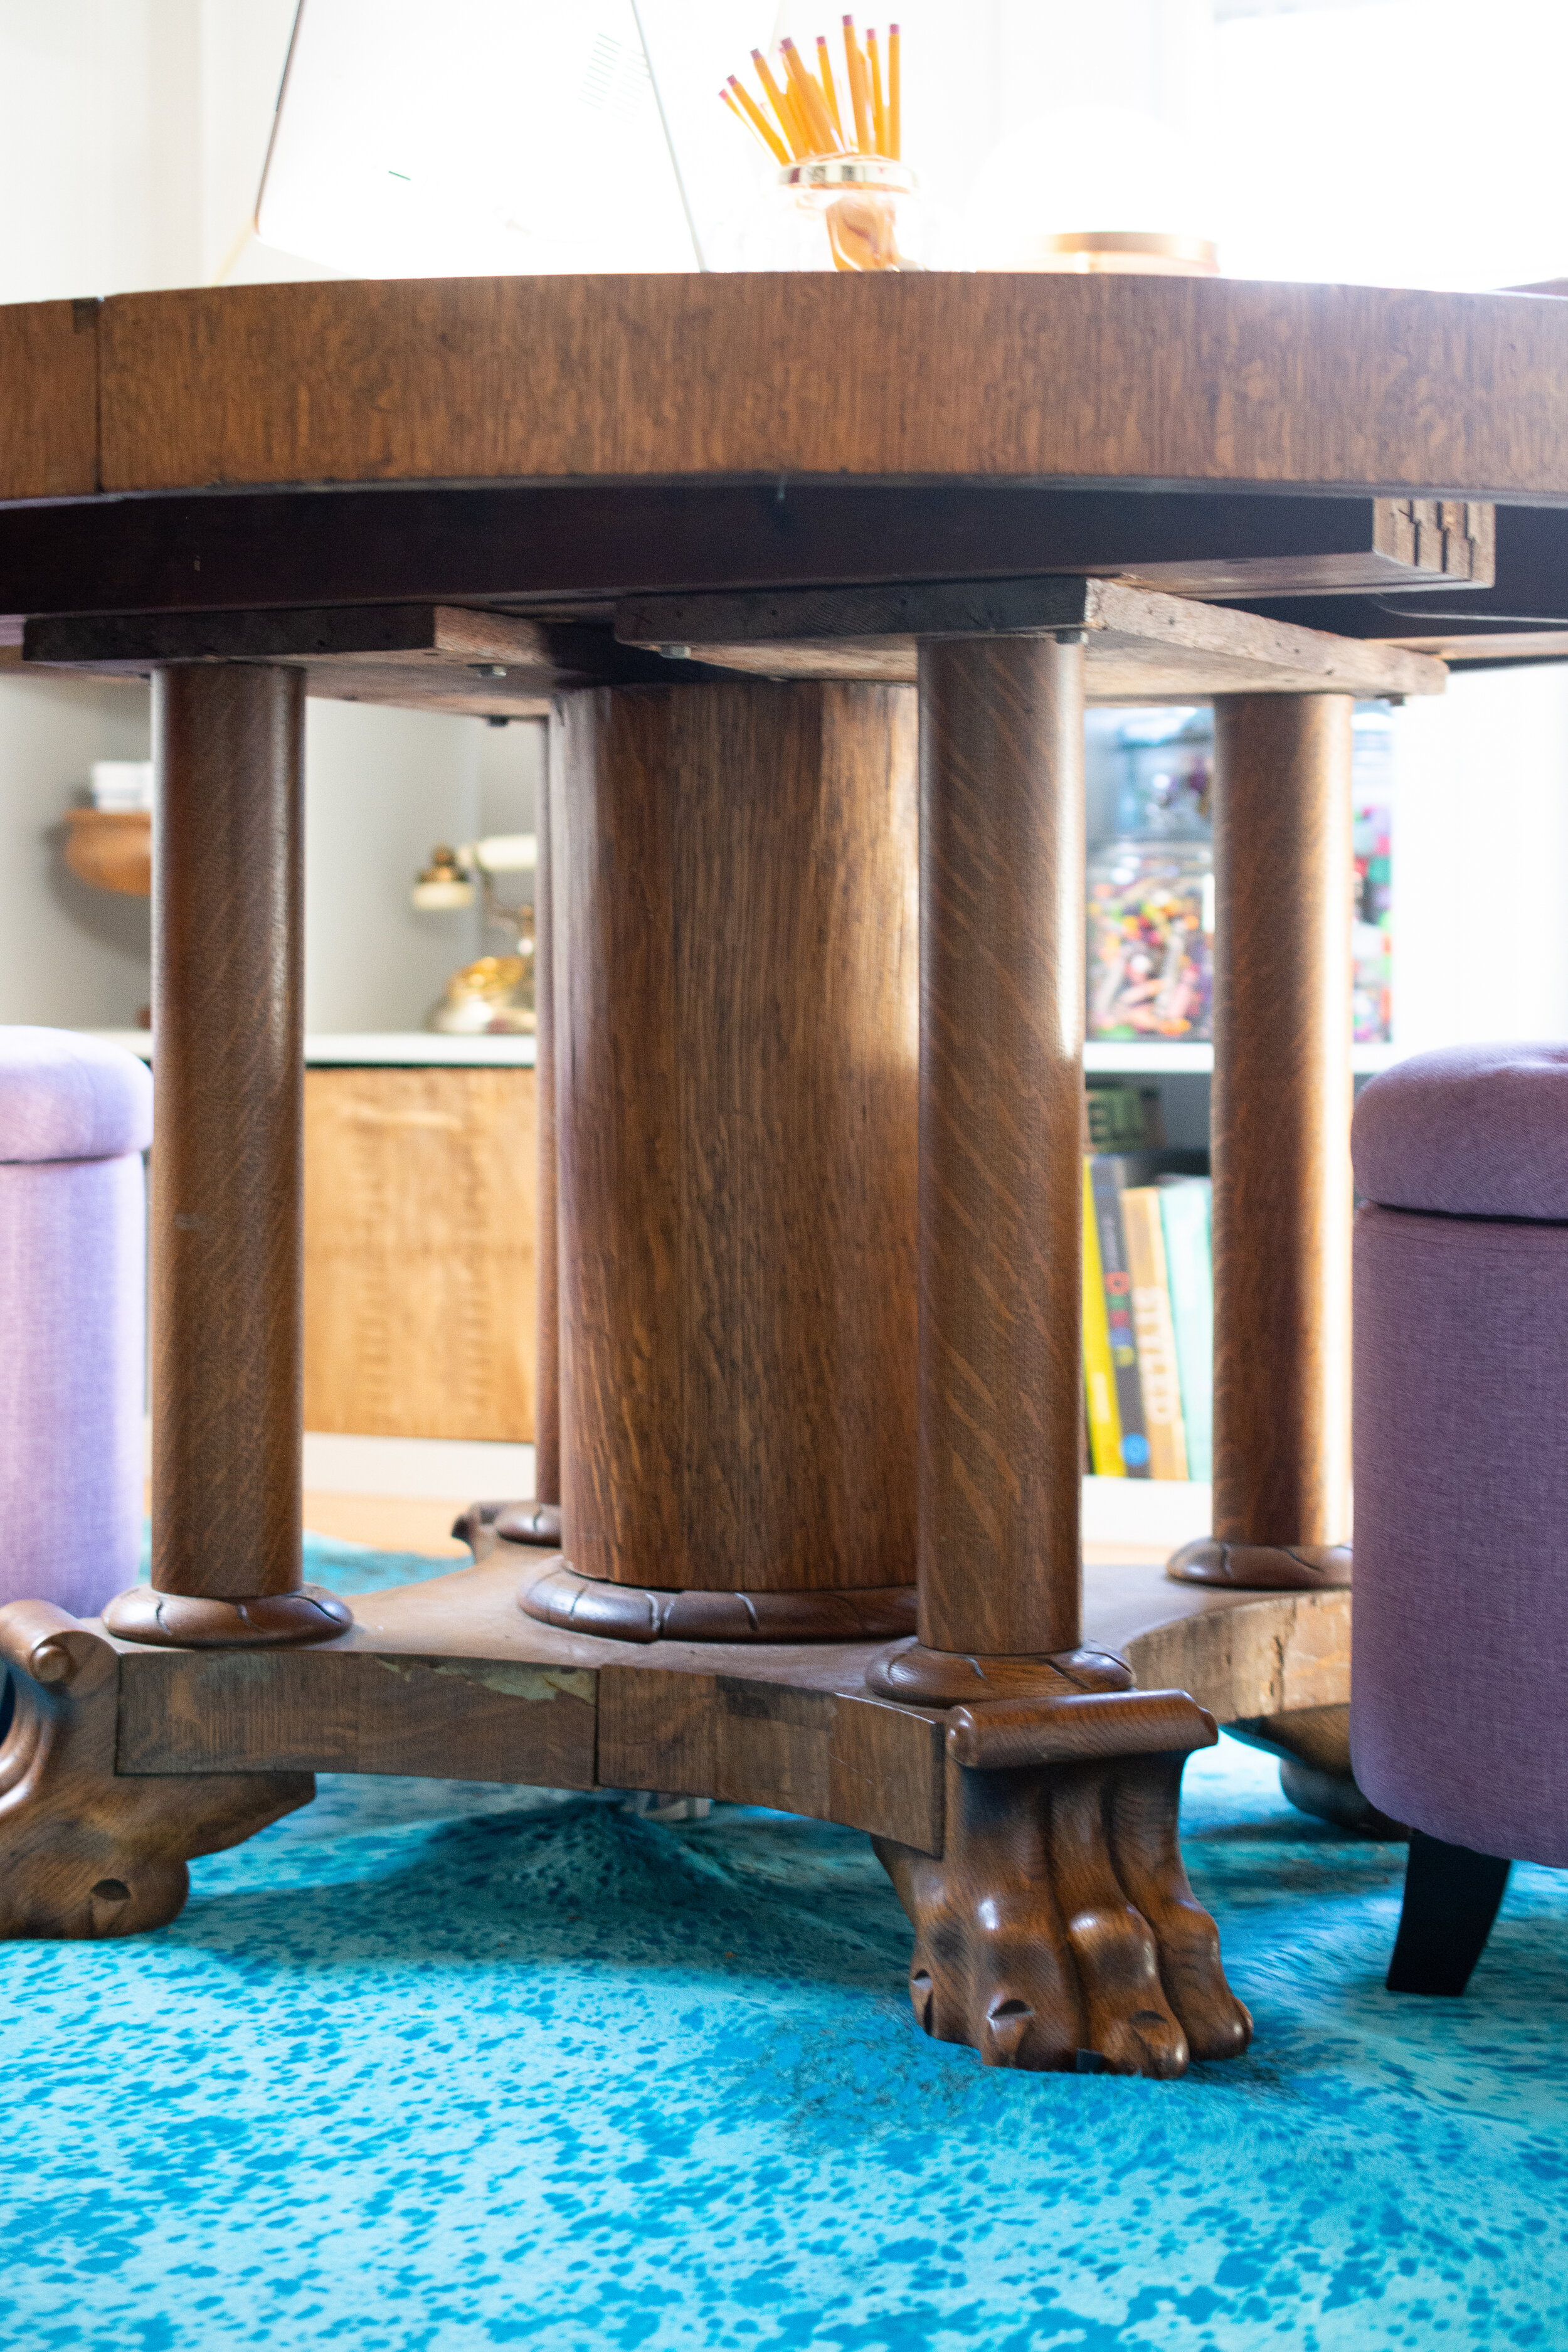
The cables were able to run down the middle of the center pedestal, out of site!
Now, if your desk has four legs, you would need to run the cords down the inside of one of the legs using cord clips like these. If drilling a hole through your desk doesn’t seem like a viable option, an adhesive cord-cover going from the computer, to the leg of your desk, can make your work surface feel a little more tidy.
The only issue being how to hide them on the floor. I chose a cowhide rug, strategically place, for this reason. Genuine leather can be punctured without risk of unraveling or fraying like a fiber rug. So I put a small slit in it and thread the cords underneath, out of site. Because the leather is so thick (in a quality cow-hide), there isn’t any awkward bump to trip over either. Waaaaay better solution than a cord cover or tape! If we ever decide to use this rug in another room, the slit will lay flat and won’t even be noticeable.
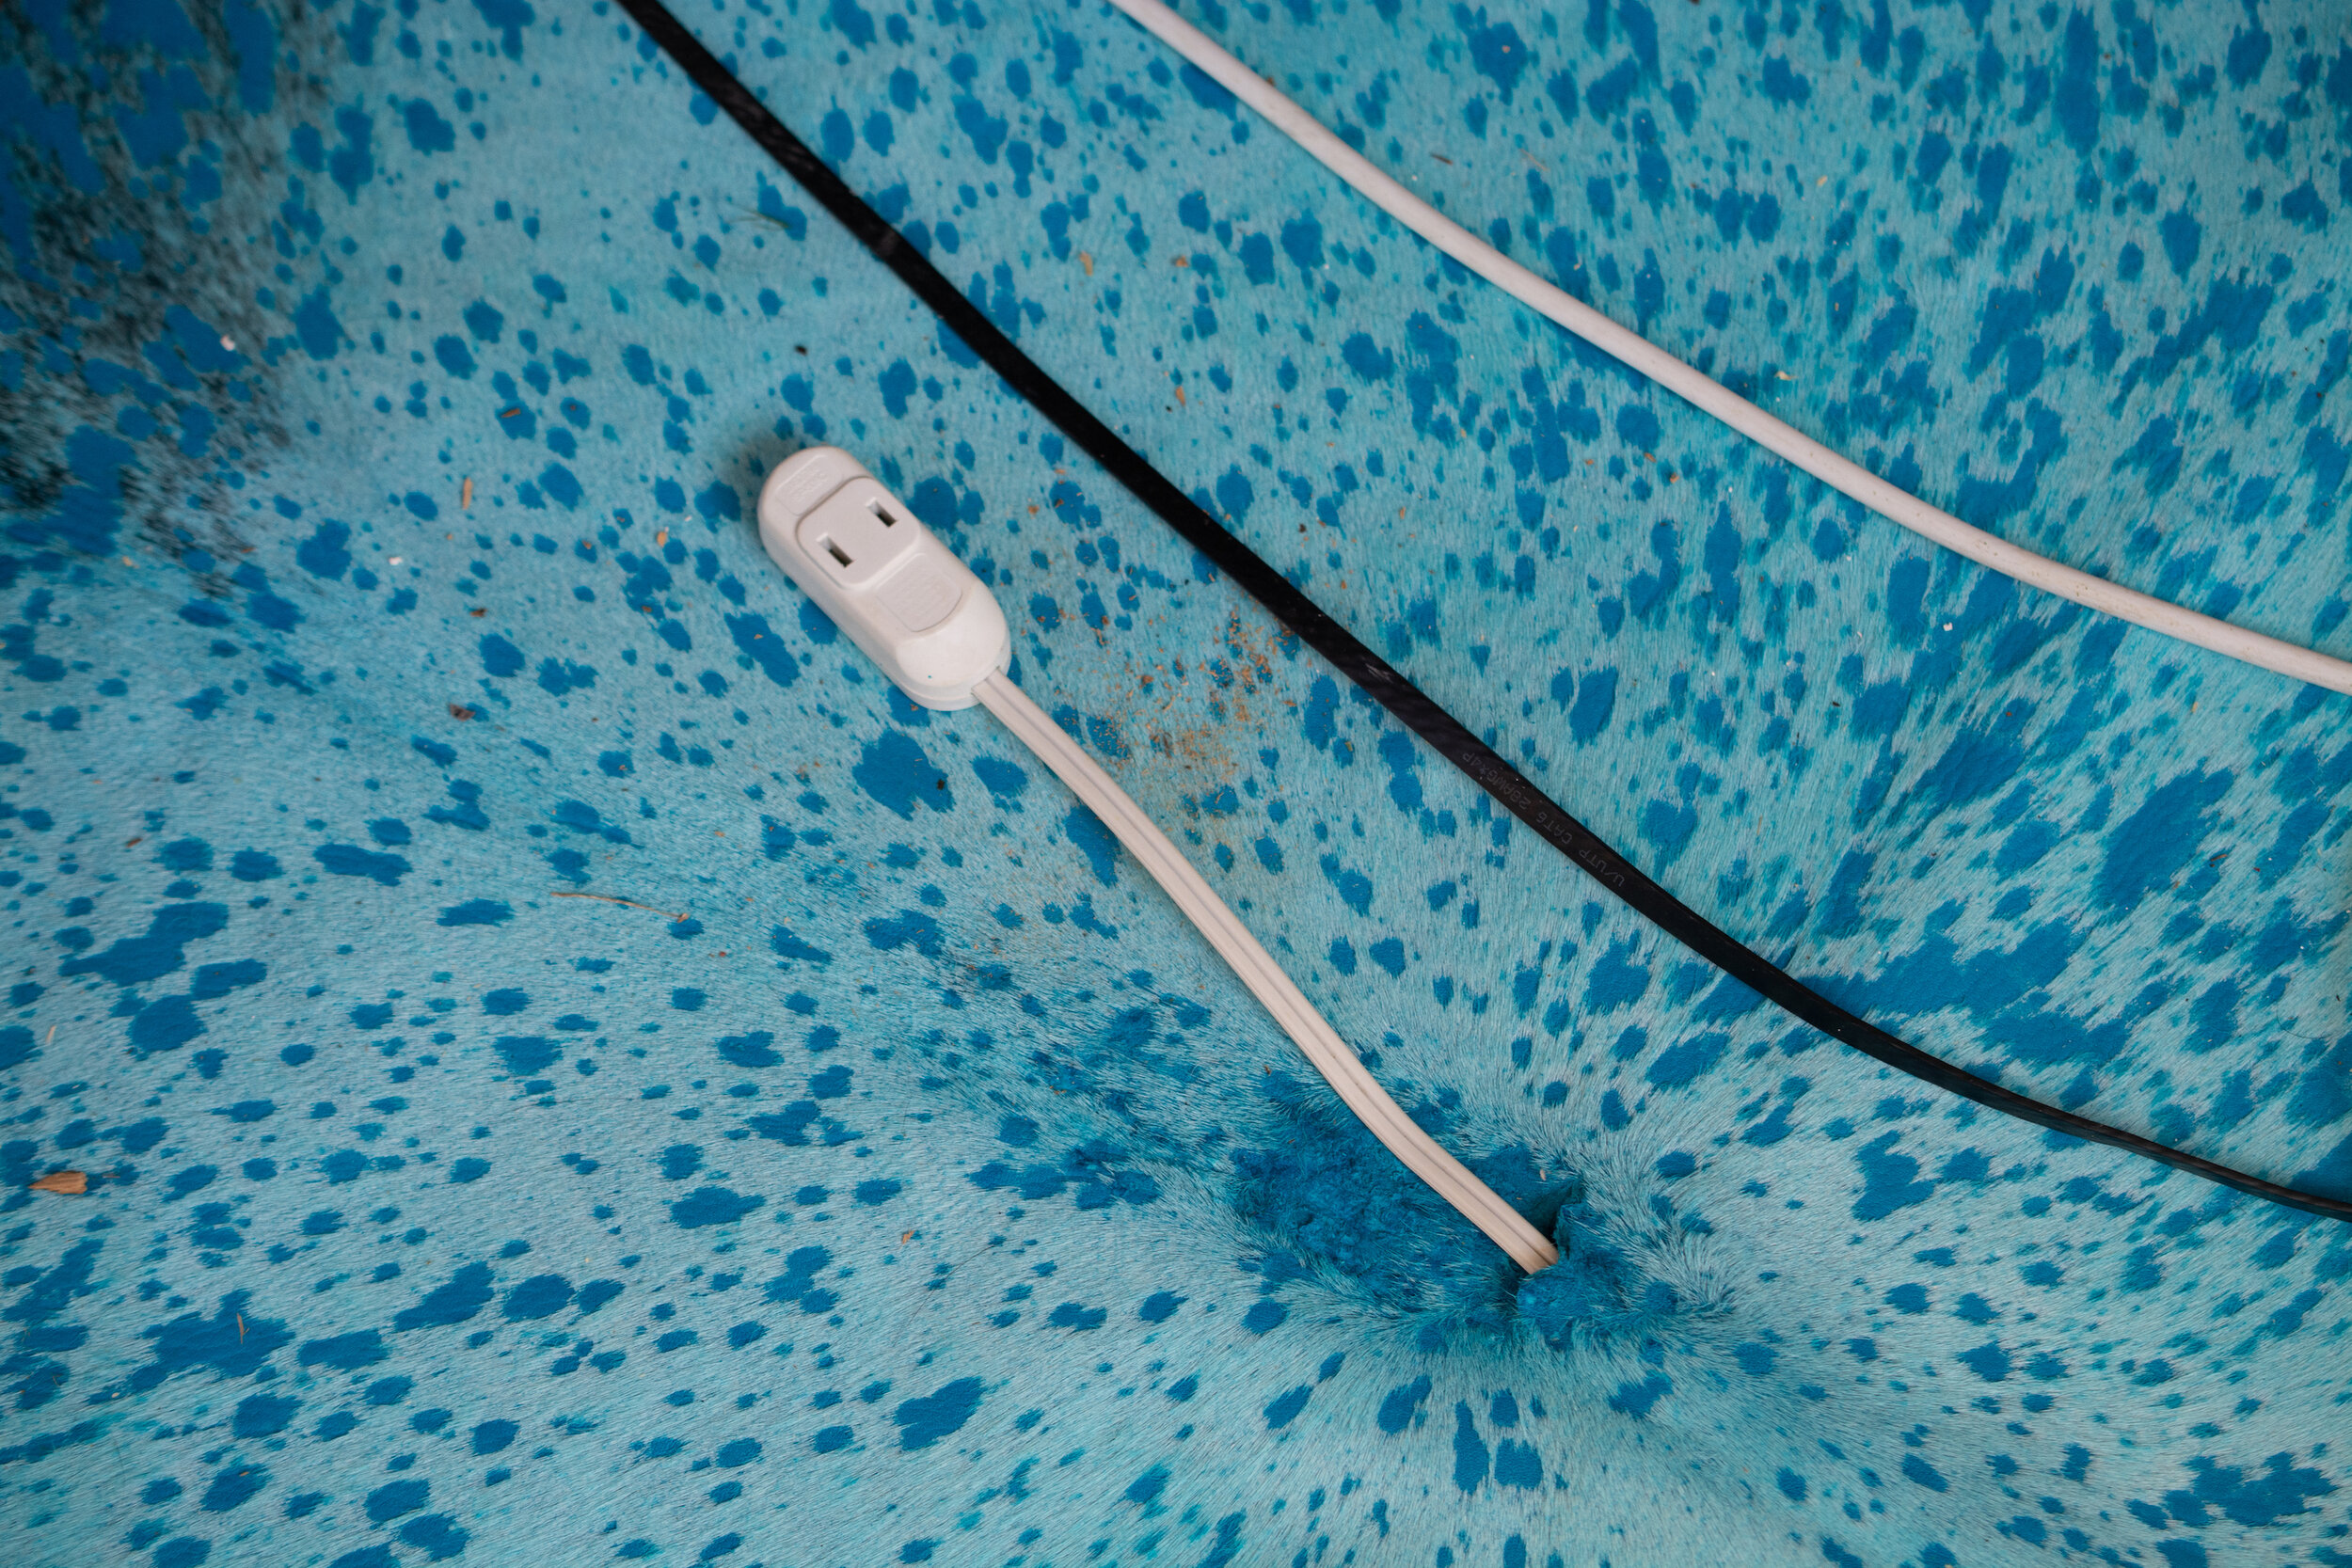
There is about 9” where it can be seen before it hits the baseboards and I am fine with that all things considered!

I’m so glad we went round! This arrangement wouldn’t work for just everyone, but it works for us, and that is the beauty of having a custom-made design, fit just for the family that occupies it!