$1K Kitchen Makeover - one year later
What do you do when you have a kitchen with old vinyl floors, laminate countertops and outdated cabinetry? You gut that sh*t and start over! But what if that’s not an option? About a year ago, I decided to pitch the idea of a $1,000 budget makeover to the landlord for this rental kitchen. She would foot the bill, and I would come up with the design and labor. To be clear, it wasn’t so much that I couldn’t live with it as it was, but I wanted the challenge of transforming a space, while working around some major fixed elements.
In this post I am going to revisit some of decisions I made and share how they’ve held up one year later - what I’d use again and what I would do differently next time. Since working with temporary-fix materials is not my forté, this was all wildly experimental!
The biggest challenges I needed to tackle with this makeover:
awkward, disjointed layout
updating old cabinets
minimizing the appearance of existing appliances
working around some not-cute vinyl floors and laminate countertops
BEFORE
(Really kicking myself for not taking a before photo that doesn’t look like crazy people live here, but this was snapped the day after we moved in. Anyone who has moved with a toddler in tow, will understand lol)

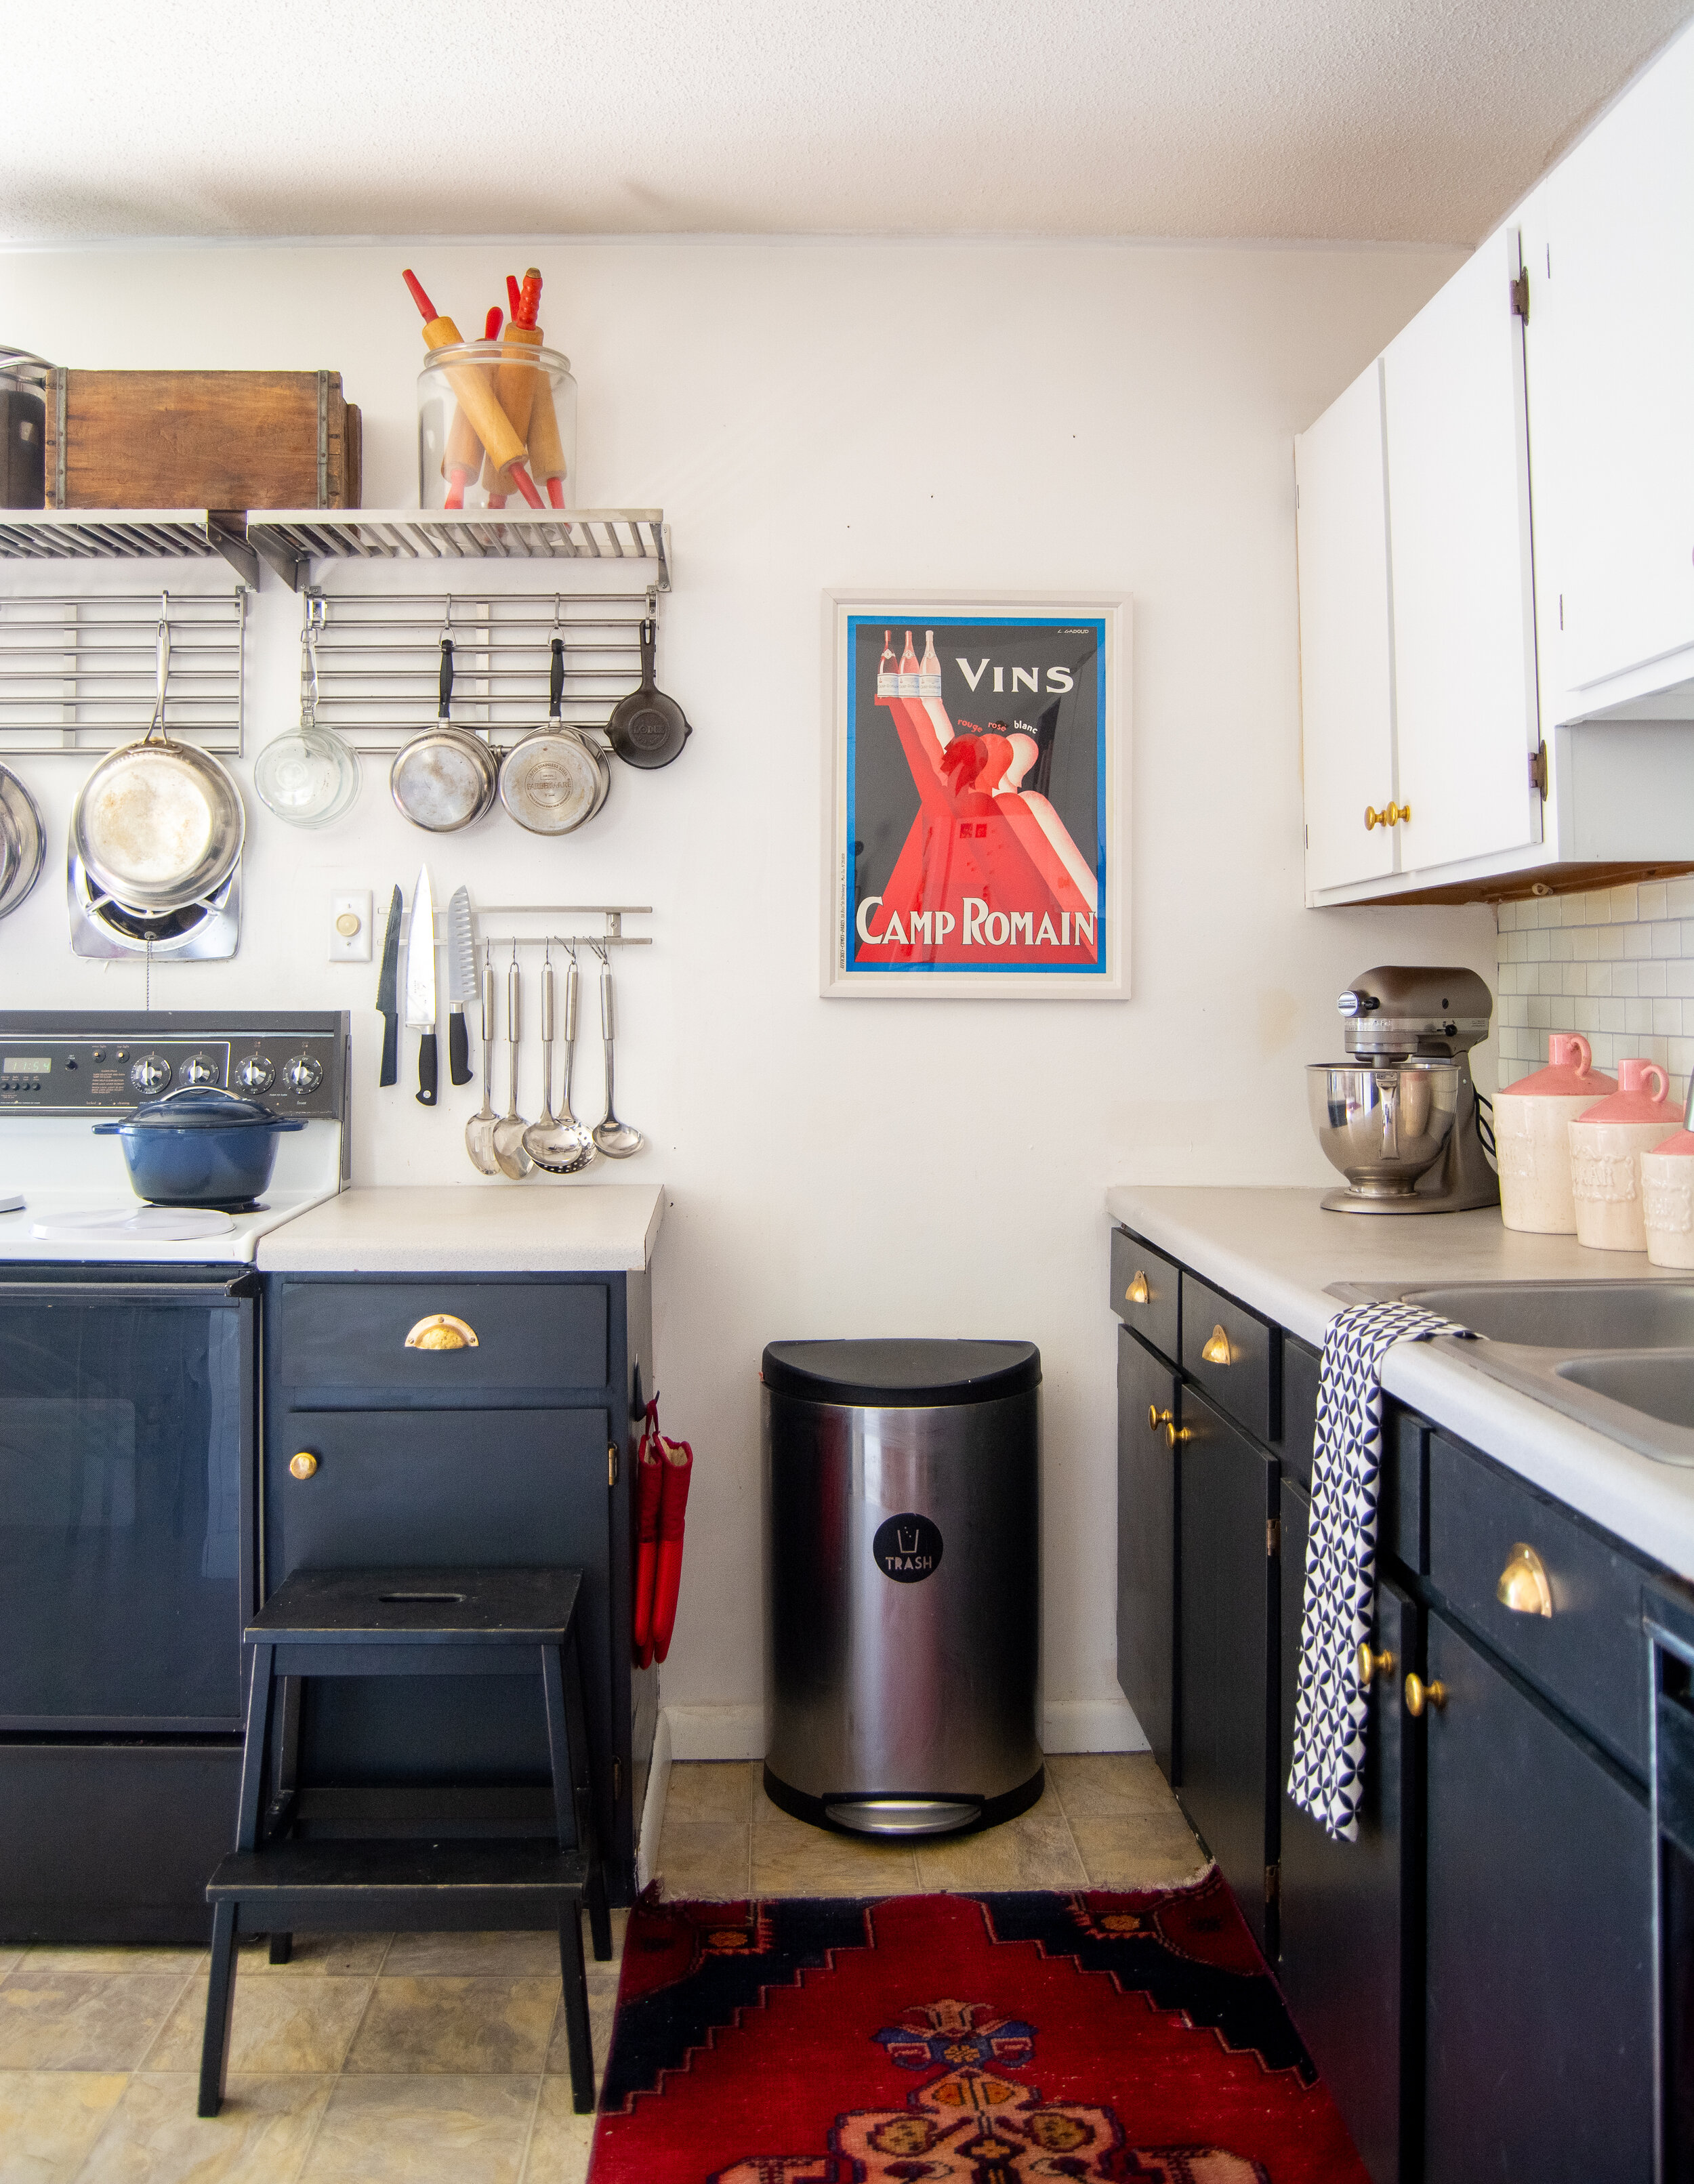
AFTER

The power of paint - For the record, I really like natural wood cabinets, but I knew paint would be the only way I could make this kitchen feel more cohesive. The appliances were mismatched, and unsightly. By painting the lowers black, I was able to blend them into the cabinets so they didn’t stick out like a sore thumb.
This post contains affiliate links, which means I make a small commission at no extra cost to you. See my full disclosure here.
Another reason for going two-toned on the cabinets was to make the gray counters and floors feel more intentional. With this gray laminate color being in the middle of the black and white, all of a sudden we had a color-story that felt more modern and updated.

Painting the cabinets - To refinish cabinets properly, you really want to strip them and spray with an enamel paint. An $800+ job like that just wasn’t in the budget, so I painted them myself using Valspars cabinet enamel (find similar here). Overall, I like this product because it doesn’t show brush or roller marks as it levels out really nicely. The downside is that it does take a long time to cure, which can be a problem if you are needing to get your kitchen back in order quickly. The label said sanding was not required for this product, so I didn’t sand prior to painting. I just painted right over the polyurethane finish and said a prayer. Overall, they have held up pretty well seeing as we are so rough on them with day to day wear and tear, but there have been some small chips and scratches on our most-used doors. And the sheen in this formula makes textured surfaces more obvious, particularly on dark colors. I didn’t notice how uneven the surface was on the lower doors below my sink, until I painted them. As far as paint chips, I did do a light sanding on the doors to my bathroom using the same paint product (different color) and haven’t noticed much of a difference in the paint staying adhered (lighting sanding vs. no sanding). So my advice is strip and sand the doors completely to ensure a smooth finish and maaaaybe this would also make the paint more durable?? Regardless, it’s really not a big deal for me to do occasional touch-ups, so this one is a win for me for this particular project!
A couple of things to consider if you do decide to paint yourself without sanding first (which is really a lot of work): chips won’t be as obvious on a darker color IF you are painting over wooden cabinets like I did however texture and scratches won’t be as obvious on a lighter color. So it’s a bit of a trade off. Texture you can’t fixed once you paint but chips can always receive a touch-up with paint.
As far as the tile - I used a peel and stick tile (same brand I used for my other bathroom makeover). I chose a tile with a gray grout to again, make the countertop feel like a part of this “updated” kitchen. The tiles have held up very well except for one spot: Above the sink gets a lot of splashing so I’ve noticed the tiniest bit of peeling at some of the edges just above the sink. It’s not coming off by any means, but there’s just a little puckering at some of the grout lines. The biggest issue here though has been the discrepancy in the shades of white. If you look behind the faucet, you will see a slightly cooler white, while the rest of the tiles are a warm white. Upon talking with the manufacturer, I learned this was a mistake on their end. It’s not something we noticed until after it was installed as you really can’t tell until the two colors are side by side. It bugs me to no end! So my advice is to order all of the tiles at once and examine the packages closely prior to installing. All that said, very happy with this solution!

For the oven, we decided to paint the sides black to match the door and lower cabinets. We used a paint specifically blended for high heat appliances and it has held up like a champ! I almost wonder if this product would be work for cabinets since it is intended to extra smooth surfaces…the only caveat being you wouldn’t get to choose your paint color. They are formulated in pure white or jet black (my cabinets are not jet black)
Oven before

The oven originally felt disjointed from the rest of the kitchen since it had no upper cabinets. To bring it all together, I added this shelf and pot rack. Now it’s no longer a massive white wall PLUS I have cookware storage right where I need it.

I originally painted the 3D tile I added to the peninsula pink, but since I added more color in adjoining rooms, I painted it back to white. It’s still going strong and has held up very well to indoor roller skating (a perk of having old vinyl floors). I will say though that this product doesn’t withstand a lot of wet paint very well. I’ve probably painted it one too many times as there are little paper fibers that have appeared on the surface from the brush bristles. My advice is to either not paint it, or use a spray paint.

Remember when I painted the fridge handle black? Well, it immediately started peeling and it drove me nuts, so I removed it. Maybe there is a primer that would make the paint adhere better, but my guess is this just gets too much use to withstand paint for the long haul. You never know until you try!

New hardware really is a total game changer. It’s the easiest way to really change up the style direction. We installed these knobs from Spearhead Collection and they have developed the slightest patina over the past year that is really quite charming. There is still a lot of polish to them. So glad I didn’t lacquer them!

The counter isn’t extended for eat-in dining on our peninsula, but I added stools anyway. It’s been nice to pull up a seat while someone is cooking, and be a part of the action. Plus, SNACKS.


This antique cupboard might feel like it doesn’t belong in this midcentury kitchen, but I find the juxtaposition really interesting. It’s also a great place for us to display our vintage glassware. Not only does the glass door add a different texture to the space, it offers the visual appeal of an open shelf with dust-free maintenance of a cabinet. That’s a win for me!

One of my favorite projects from this makeover is the mini gallery wall on the fridge. I love seeing the special memories, and the unified frames makes things feel orderly and clean to my somewhat minimalistic style.
Also, my cookbook nook always gets compliments!

And there it is. We may not be in this house much longer, but I feel really good about bringing some life back to this kitchen for the next family. Not everyone can afford a $30,000 kitchen remodel, and my hope is that I’ve inspired everyone to see the potential for anything they don’t like in their home, no matter the budget!
See more of this project here
