How to Refinish Kitchen Cabinets - One Room Challenge Fall 2021 - Hausmatter Interiors - Week 6
It’s week 6 of the One Room Challenge!
In cased you missed it, here’s previous updates:
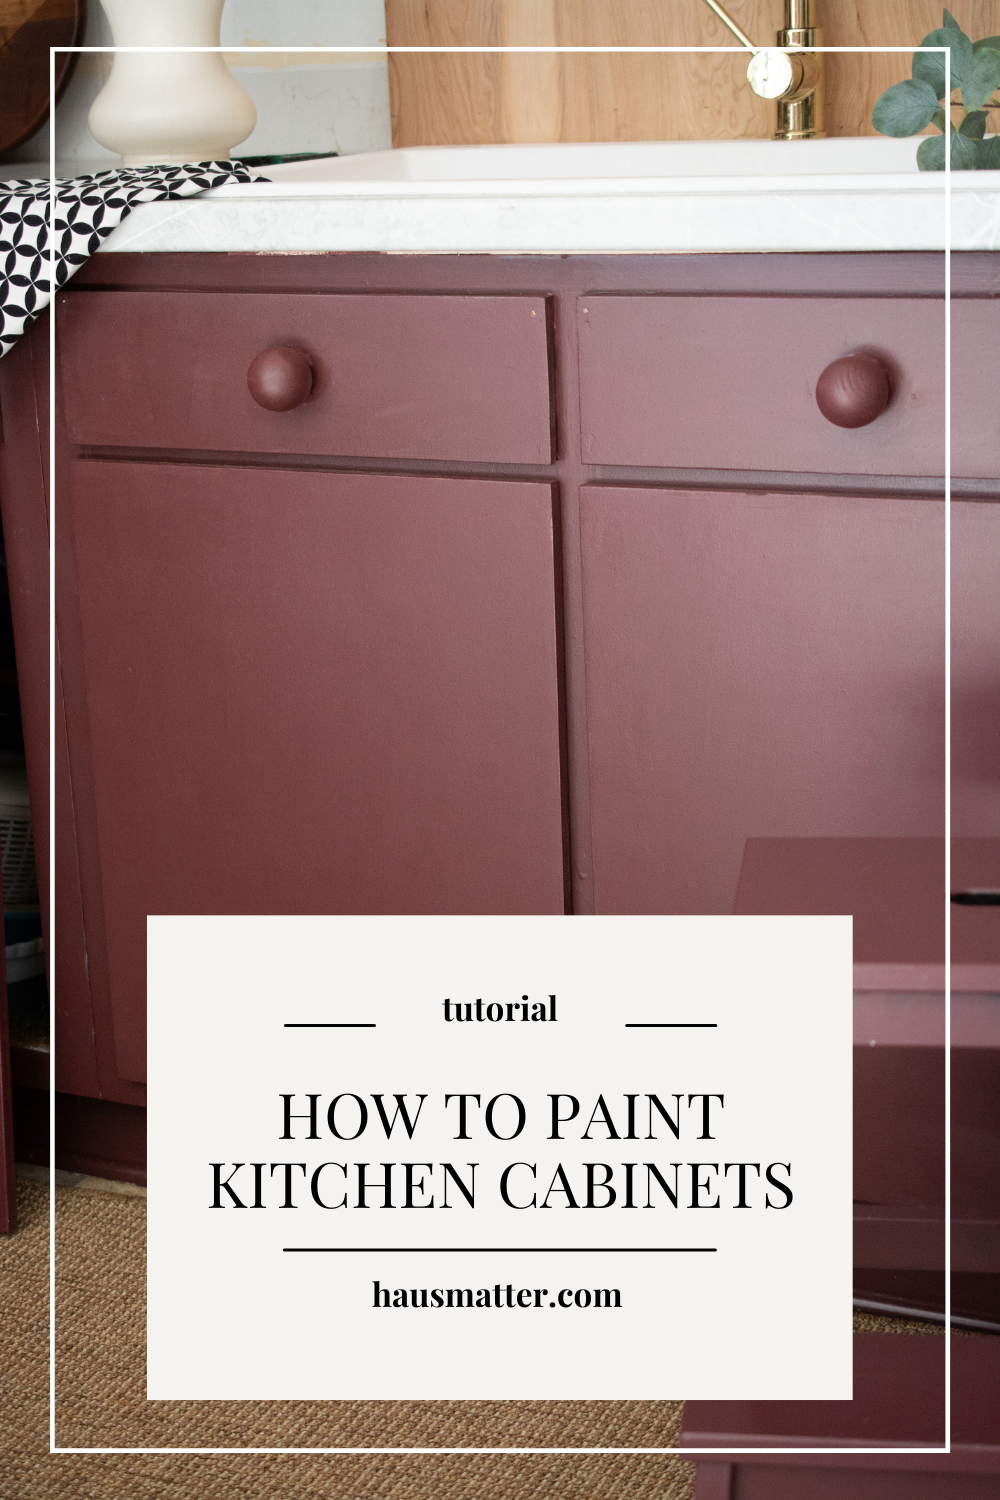
The previous two weeks, things have felt stuck. This week, WE ARE ROLLING, BABY! The countertops arrived, which allowed me to refinish the cabinets and install the Signature Hardware sink and faucet. We accomplished so much this week. The paint is literally drying as I write this, haha!

The countertop
We installed this gorgeous Formica laminate countertop and it’s even more beautiful than expected. I’m so pleased with it! It has a matte finish which makes it feel like a honed stone. The veining almost feels like creases in leather to me.
We have not installed the tile Riad Tile backsplash yes, but I already like the way it looks against this light gray…
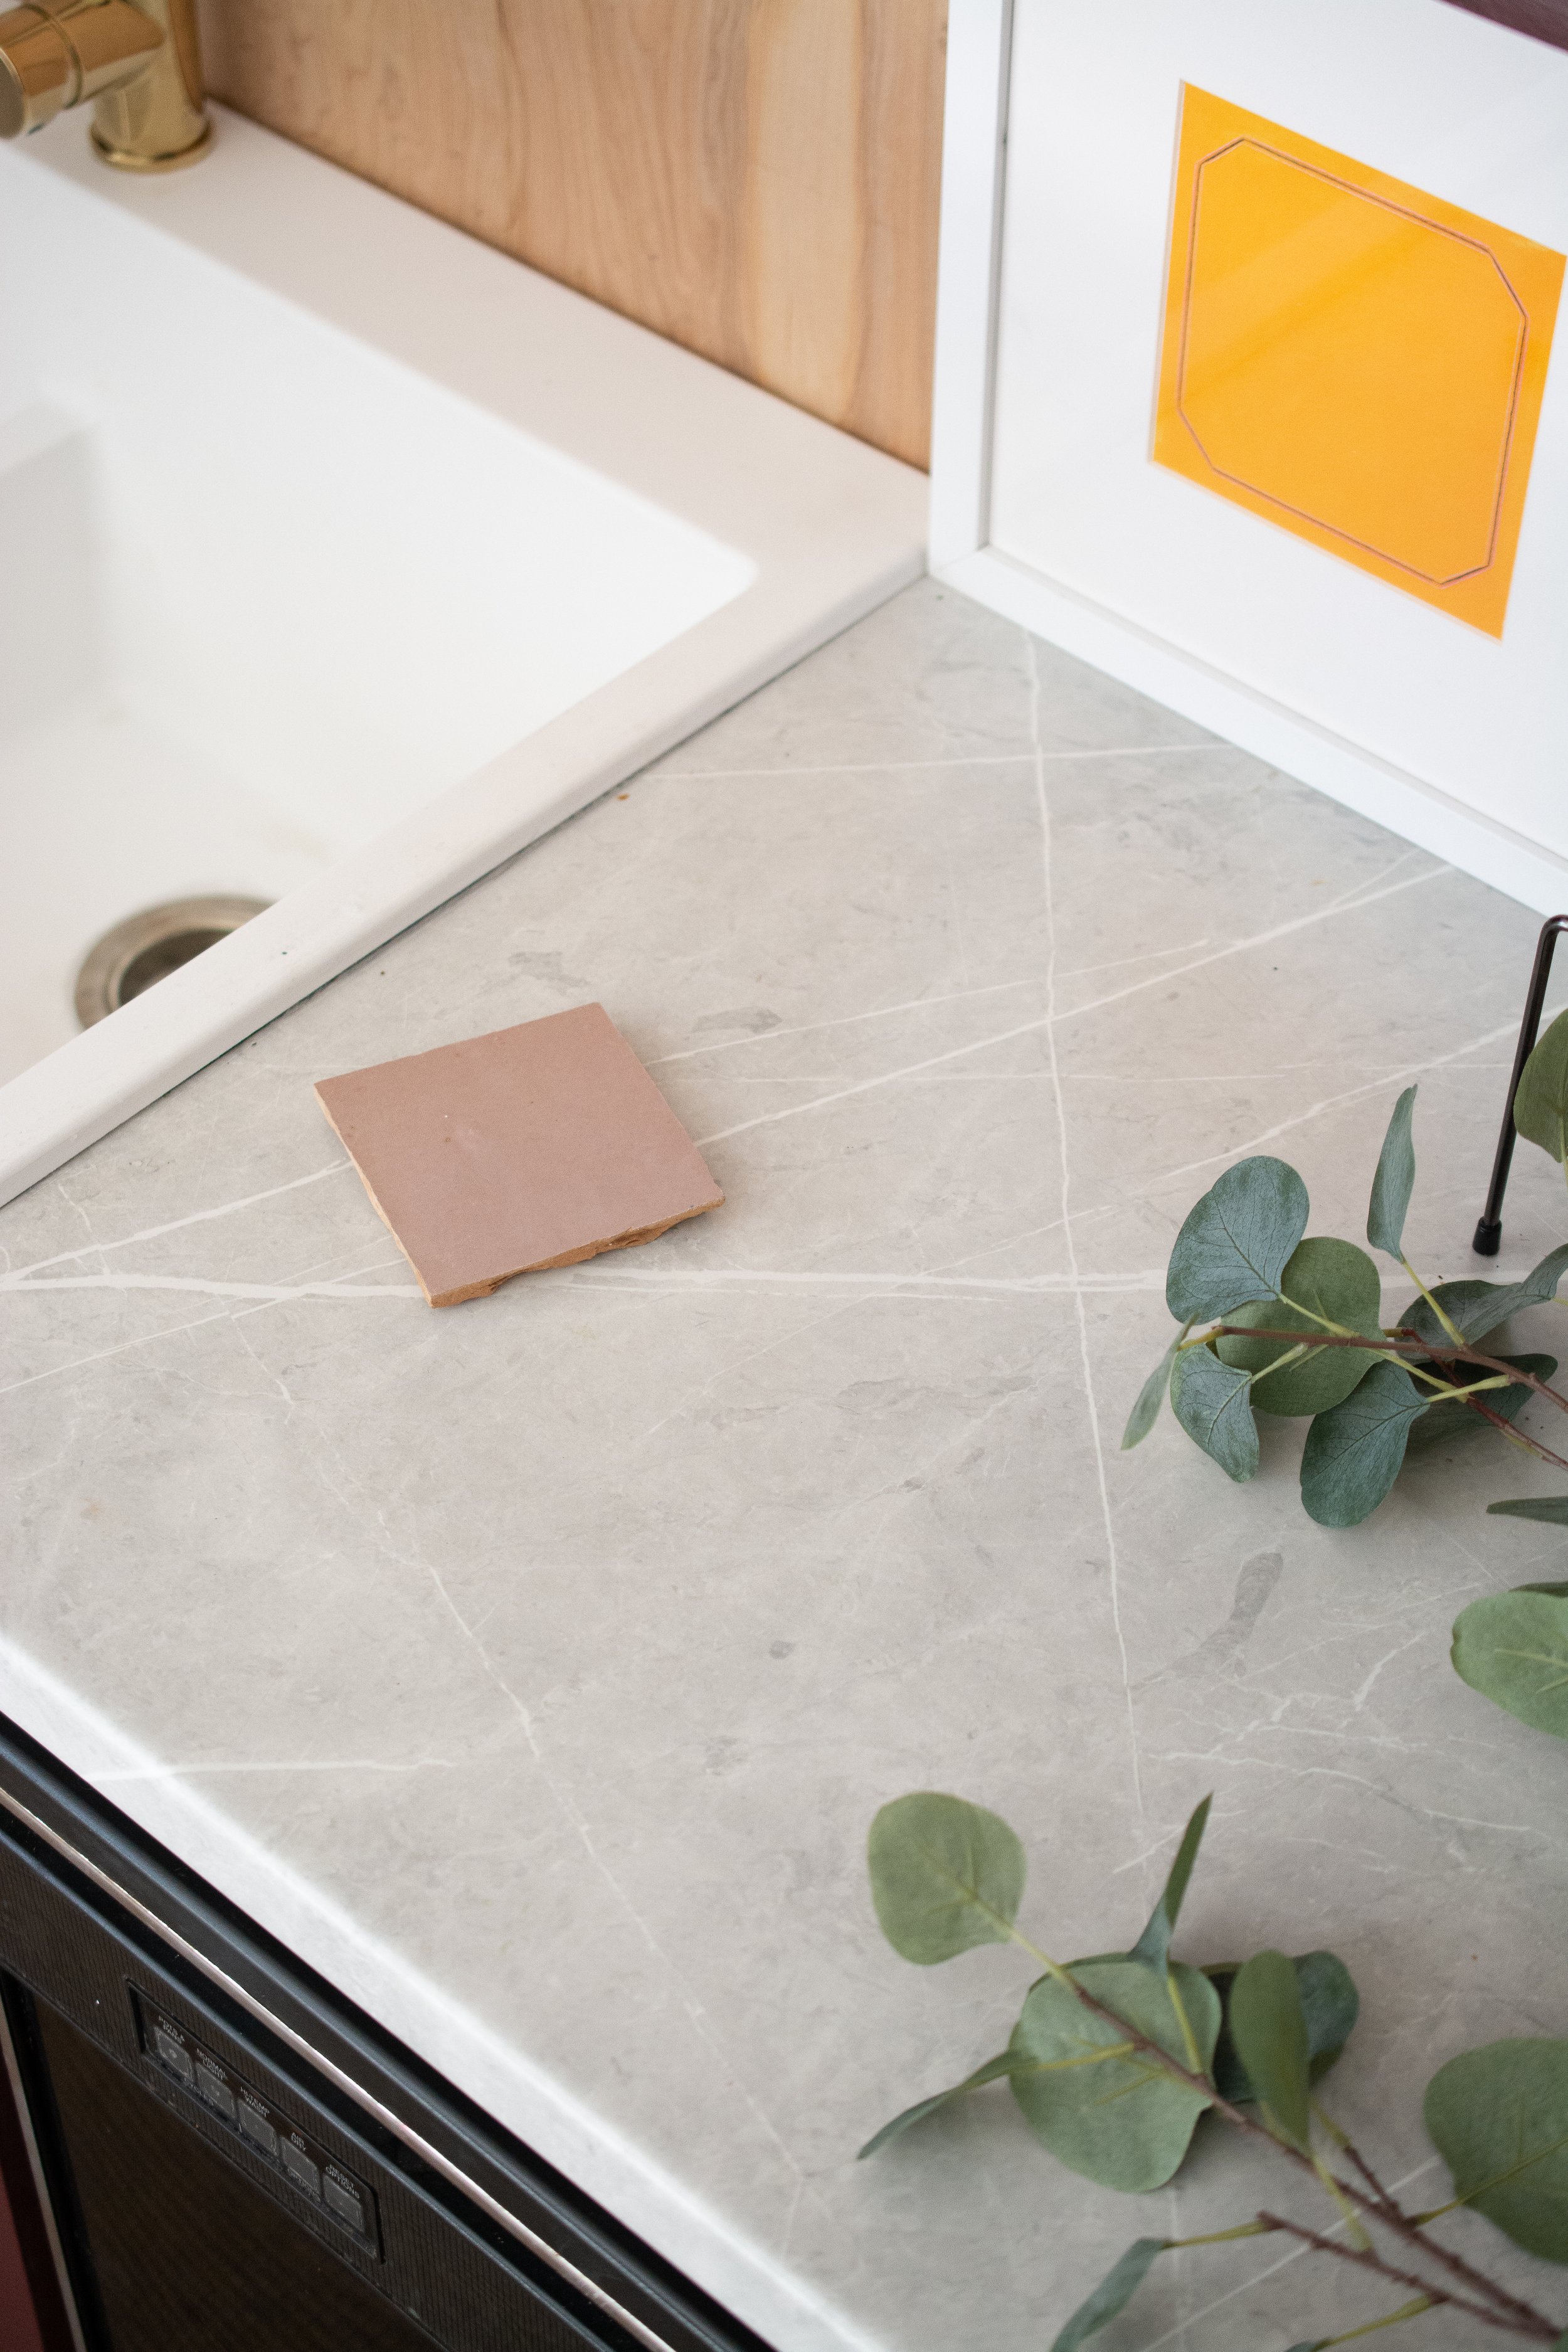
Formica laminate countertop

I originally thought I wanted black here, but then realized the room was lacking metallic finishes. With this faucet being the singular moment of bling in the room, it really feels like the crown jewel!

And I’m so glad I opted for the pull-down. It’s gotten so much use already with all the painting we’ve been doing! (More on that below)

Signature Hardware Ridgeway polished brass pull down faucet
Confession: I’ve only ever had the stainless steel drop in sinks you get for free with the purchase of a countertop from your local big box store. Not my fault, being these were all rentals….but still. I feel like I’m in heaven washing dishes here. Can I say that? LOL


How to refinish kitchen cabinets
This isn’t my first time refinishing kitchen cabinets, but it is the first time I’ve done it correctly. So I thought I would share how I did it - the quickest way - with long-lasting results.

how to refinish kitchen cabinets
This post contains affiliate links, which means I make a small commission at no extra cost to you. See my full disclosure here
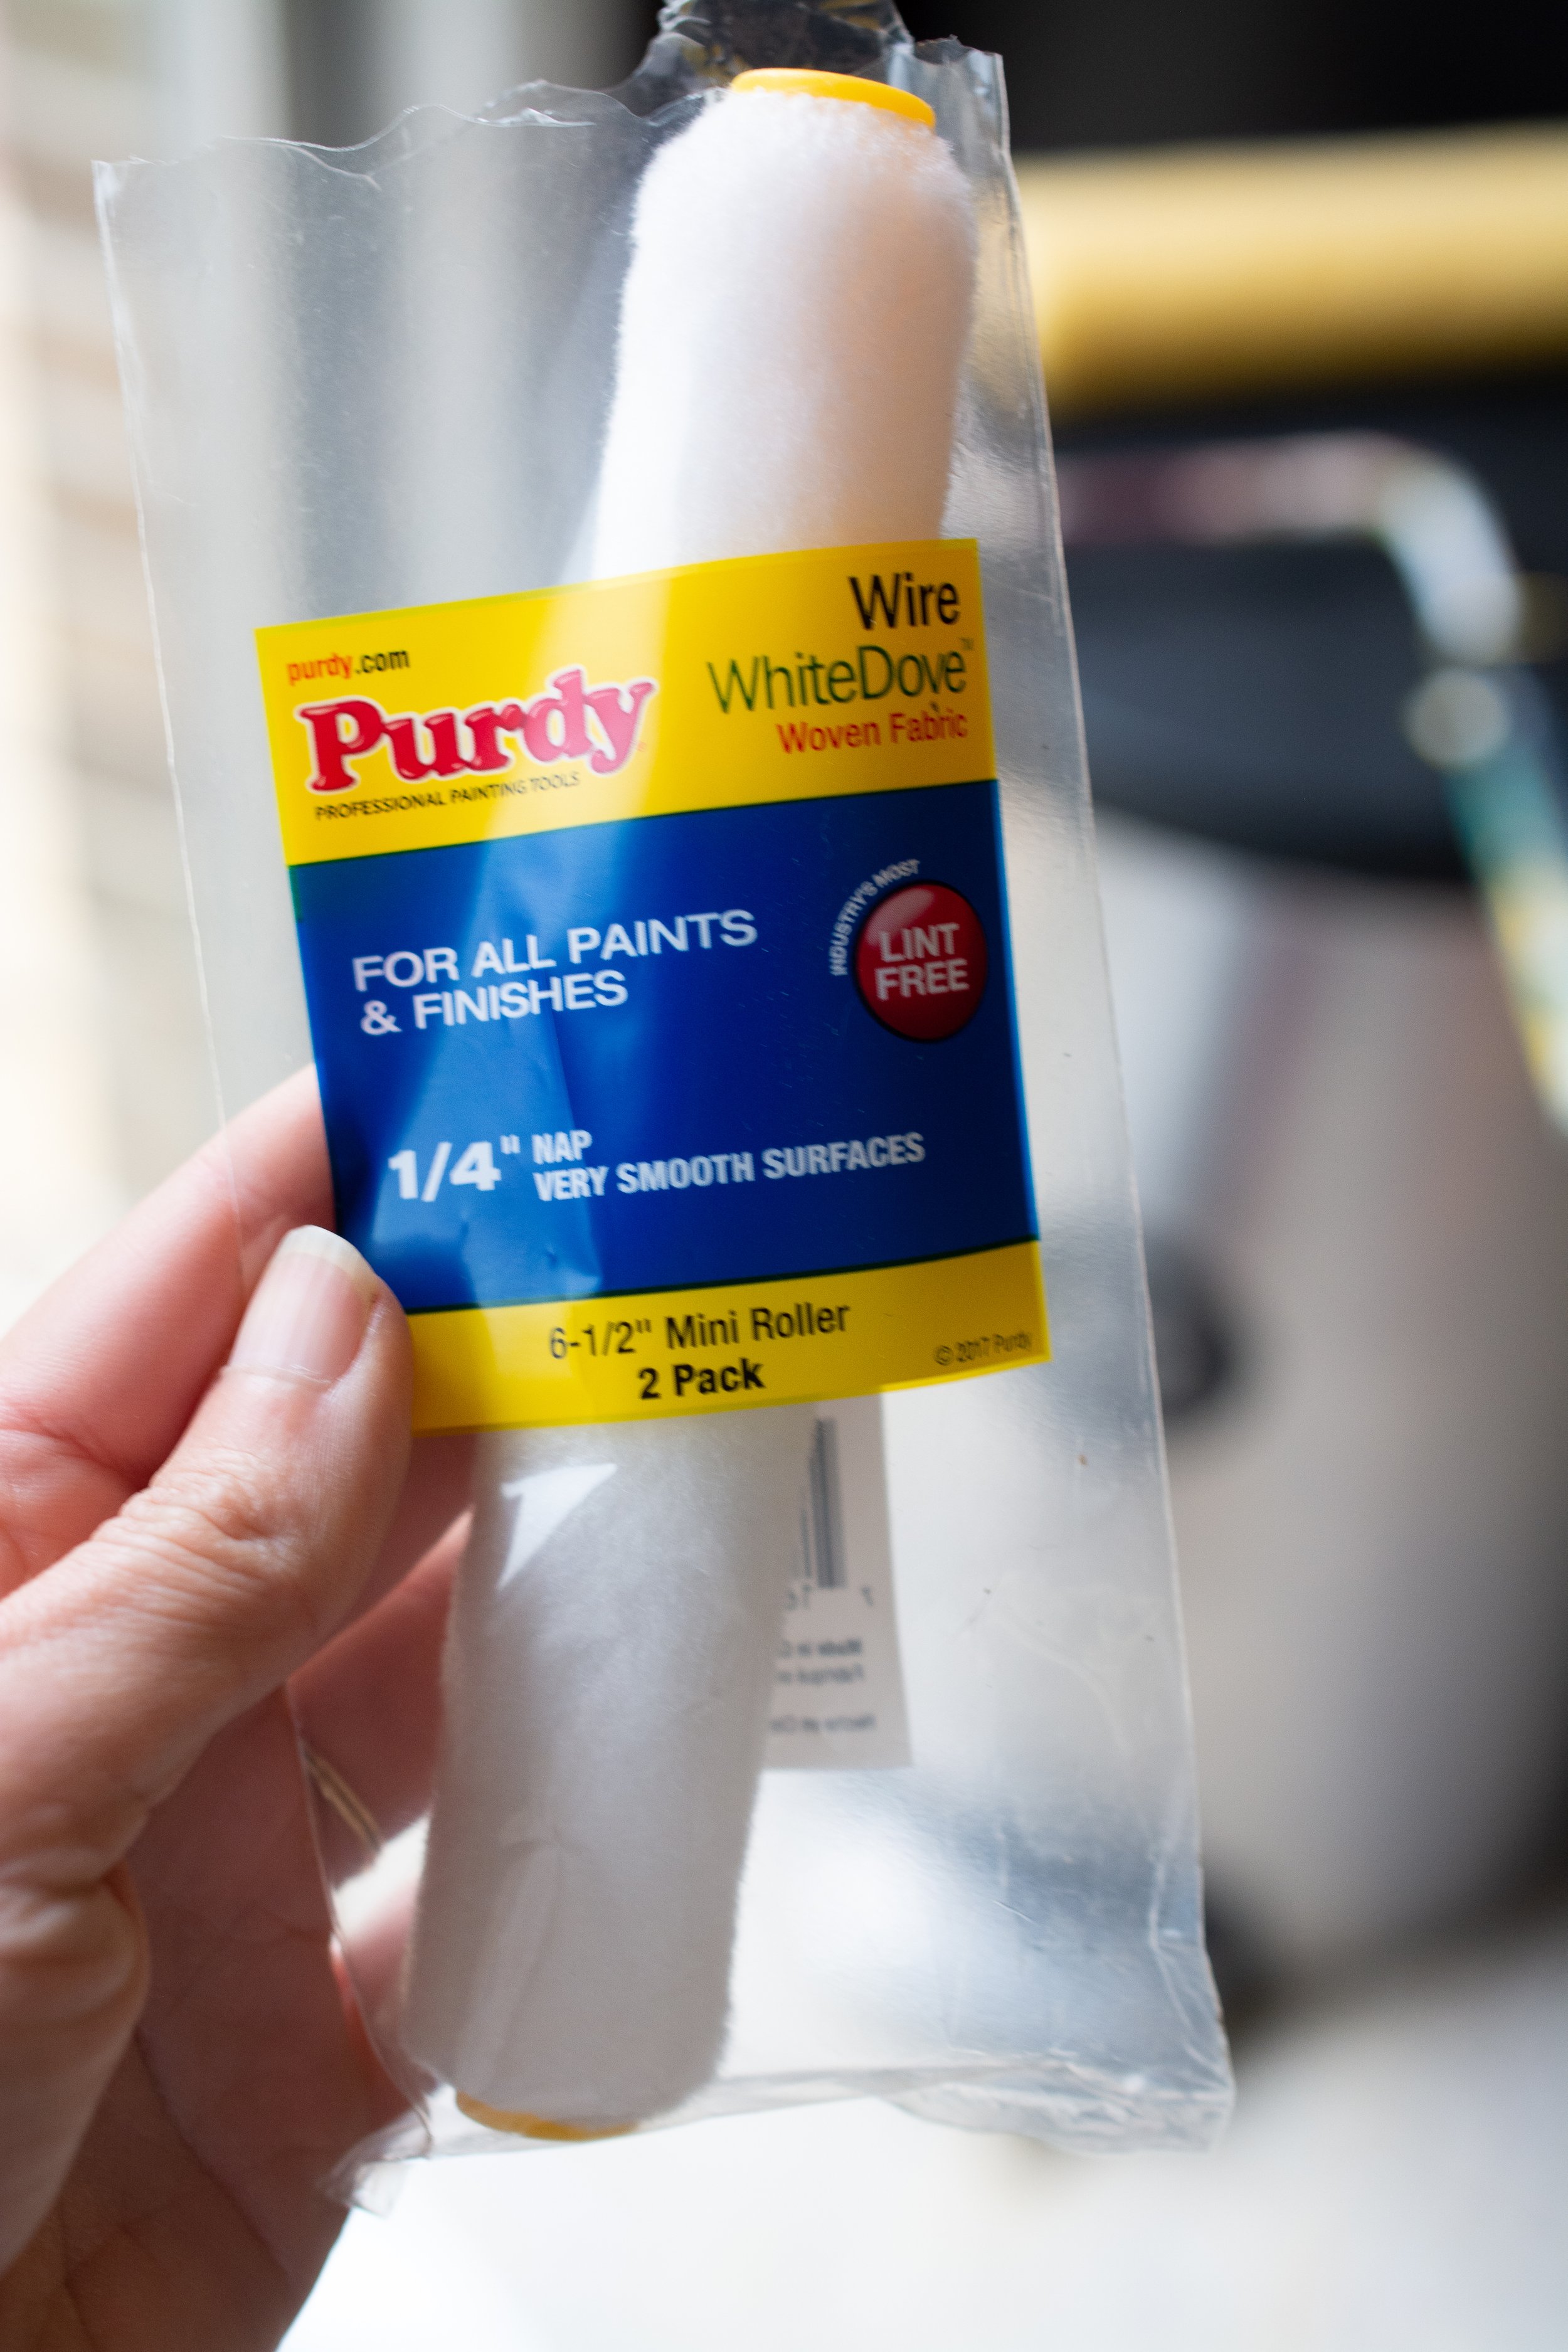
Materials needed:
protective mask (for particulate) and eye protection
Valspar Cabinet Enamel (satin finish)
#1. The first thing you will want to do is fill in any unwanted holes, particularly if you are switching up your hardware or hinges.

how to refinish kitchen cabinets
#2. If you remember back to week 4, I spent a lot of effort trying to remove the cabinet doors with a paint stripper. I think this option is probably a good one for people trying to strip lead based paint, or delicate, antique surfaces with nooks and crannies. For me, I was stripping flat-front, wooden cabinets, so there was a much easier way. Enter: rotary sander with 36 grit sand paper. It blasted through layers of polyurethane and paint in no time. You really don’t want to skip this step as it’s not only about stripping paint, but creating a smooth surface as well. Your paint is either going to be a satin or semi-gloss sheen, which means it will highlight texture more than your average flat or eggshell paint. You want to spend some time on this step!

how to refinish kitchen cabinets
Take your project outside. This is going to get messy. Make sure you are wearing your mask for dust and particles. Go over your surface in a circular motion until the raw wood is exposed. If you are sanding a veneer, make sure you don’t sand longer than you need to as it can go destroy it, exposing the particle board underneath.
What I love about this stage, is the sander is going to pack those fine wood shavings into any little spots you’ve puttied on your wood surface, making them perfectly smooth once you are done. This would be so difficult to do by hand!
Once you are finished, use a tack cloth to go over every square inch of the surface prior to painting.

how to refinish kitchen cabinets
#3. Paint. I used a Purdy 1/4” nap paint roller for very smooth surfaces. This is very important as it is going to prevent you from having any craters in your finish.
how to refinish kitchen cabinets
I did not use a primer. Instead, I used Valspar cabinet enamel which already has the primer included. It says you don’t need to sand prior to using it, but I can say from experience, you absolutely do. Sanding the surface is going to not only give you a smoother finish later, but it is going to give the paint something grip on to. Because I am using a dark color, I chose the satin finish. This will be more forgiving over the semi-gloss should there be any errors in the surface. IMPORTANT: Make sure you mix the can thoroughly as it will leave glossy streaks on your cabinets if you do not.

how to refinish kitchen cabinets
Get painting. This is the fun part! Make sure you are in an area free of debris as your paint is going to take longer to dry than most interior latex paints.
The color here is much lighter than it is once dry.

how to refinish kitchen cabinets that last
As you can see, the result is very close to a factory finish.
The number of coats you will need to do will be dependent on your paint color. Mine took two coats. White paint colors usually take three. I like to put my last coat on after they’ve been installed just to touch up any dings that occur from hinge installation.

how to refinish kitchen cabinets with lasting results
And the doors can be wiped easily - a must for kitchens!

how to refinish kitchen cabinets the right way
Left to do:
remove popcorn ceiling
paint walls
install mural
install dining chandelier
paint floor
order table and have plastic cut to protect the top
order chairs or repaint old chairs
order drapes and install
finalize dining room art selection
source styling accessories
check with landlord on countertop replacement
strip cabinets
paint cabinets
fill in old hardware holes
paint new cabinet hardware
install hidden cabinet hinges
make art selections for kitchen
install tile
install kitchen wall sconces
figure out a way to hang the heavy mirror
create art box for range exhaust
customize the shelving unit and place order ASAP
Paint fridge
Order rug and accessories for styling
install art
install new countertop
install new sink and faucet
install wall shelves
Please take a moment to visit my sponsors for this project