How to make a fabric paneled wall - Spring 2021 ONE ROOM CHALLENGE WEEK 5
How to create a pleated plaid wall…SAID NO ONE EVER. LOL. Before you think I’m crazy, hang with me.

It’s week 5 of the One Room Challenge! This week, I wanted to create a budget-friendly, temporary feature wall for the bed. Something to elongate our 8 foot walls and create some depth. I ended up landing on fabric! But because this wall has sconces, I didn’t want to just stretch the fabric over batting like a typical upholstery project. I can’t sew, like…not even one bit, so making little hemmed edges and openings for all the sconces was never going to happen. What I landed on was pleats and I was able to achieve this with inexpensive quilting fabric! This allowed me to work around the lighting and didn’t require any batting to mimic that cushy-fluffy look. It gives us the look of wallpaper with the option to take it with us when we move!
This project is tedious, but if you can iron, you can do it! Let’s get started.
Materials:
Trim of your choice with wood strips for the backing in matching width. (this will make sense in a moment). We used 1 5/8”
Quilting fabric, or other lightweight fabric (upholstery weight will NOT work for this). I used about 11 yards. I figured that each pleated section of 45” fabric would compress to about 16” of width, so you need a lot. One note on pattern: small-scale is best as anything with a large print will become distorted once pleated. A small floral, paisley, polka dot, solid etc. will produce the best result. I liked using a plaid because I knew I could still see the pattern if I made my creases on the repeats. Because it was very grid-like, it was less forgiving though!!
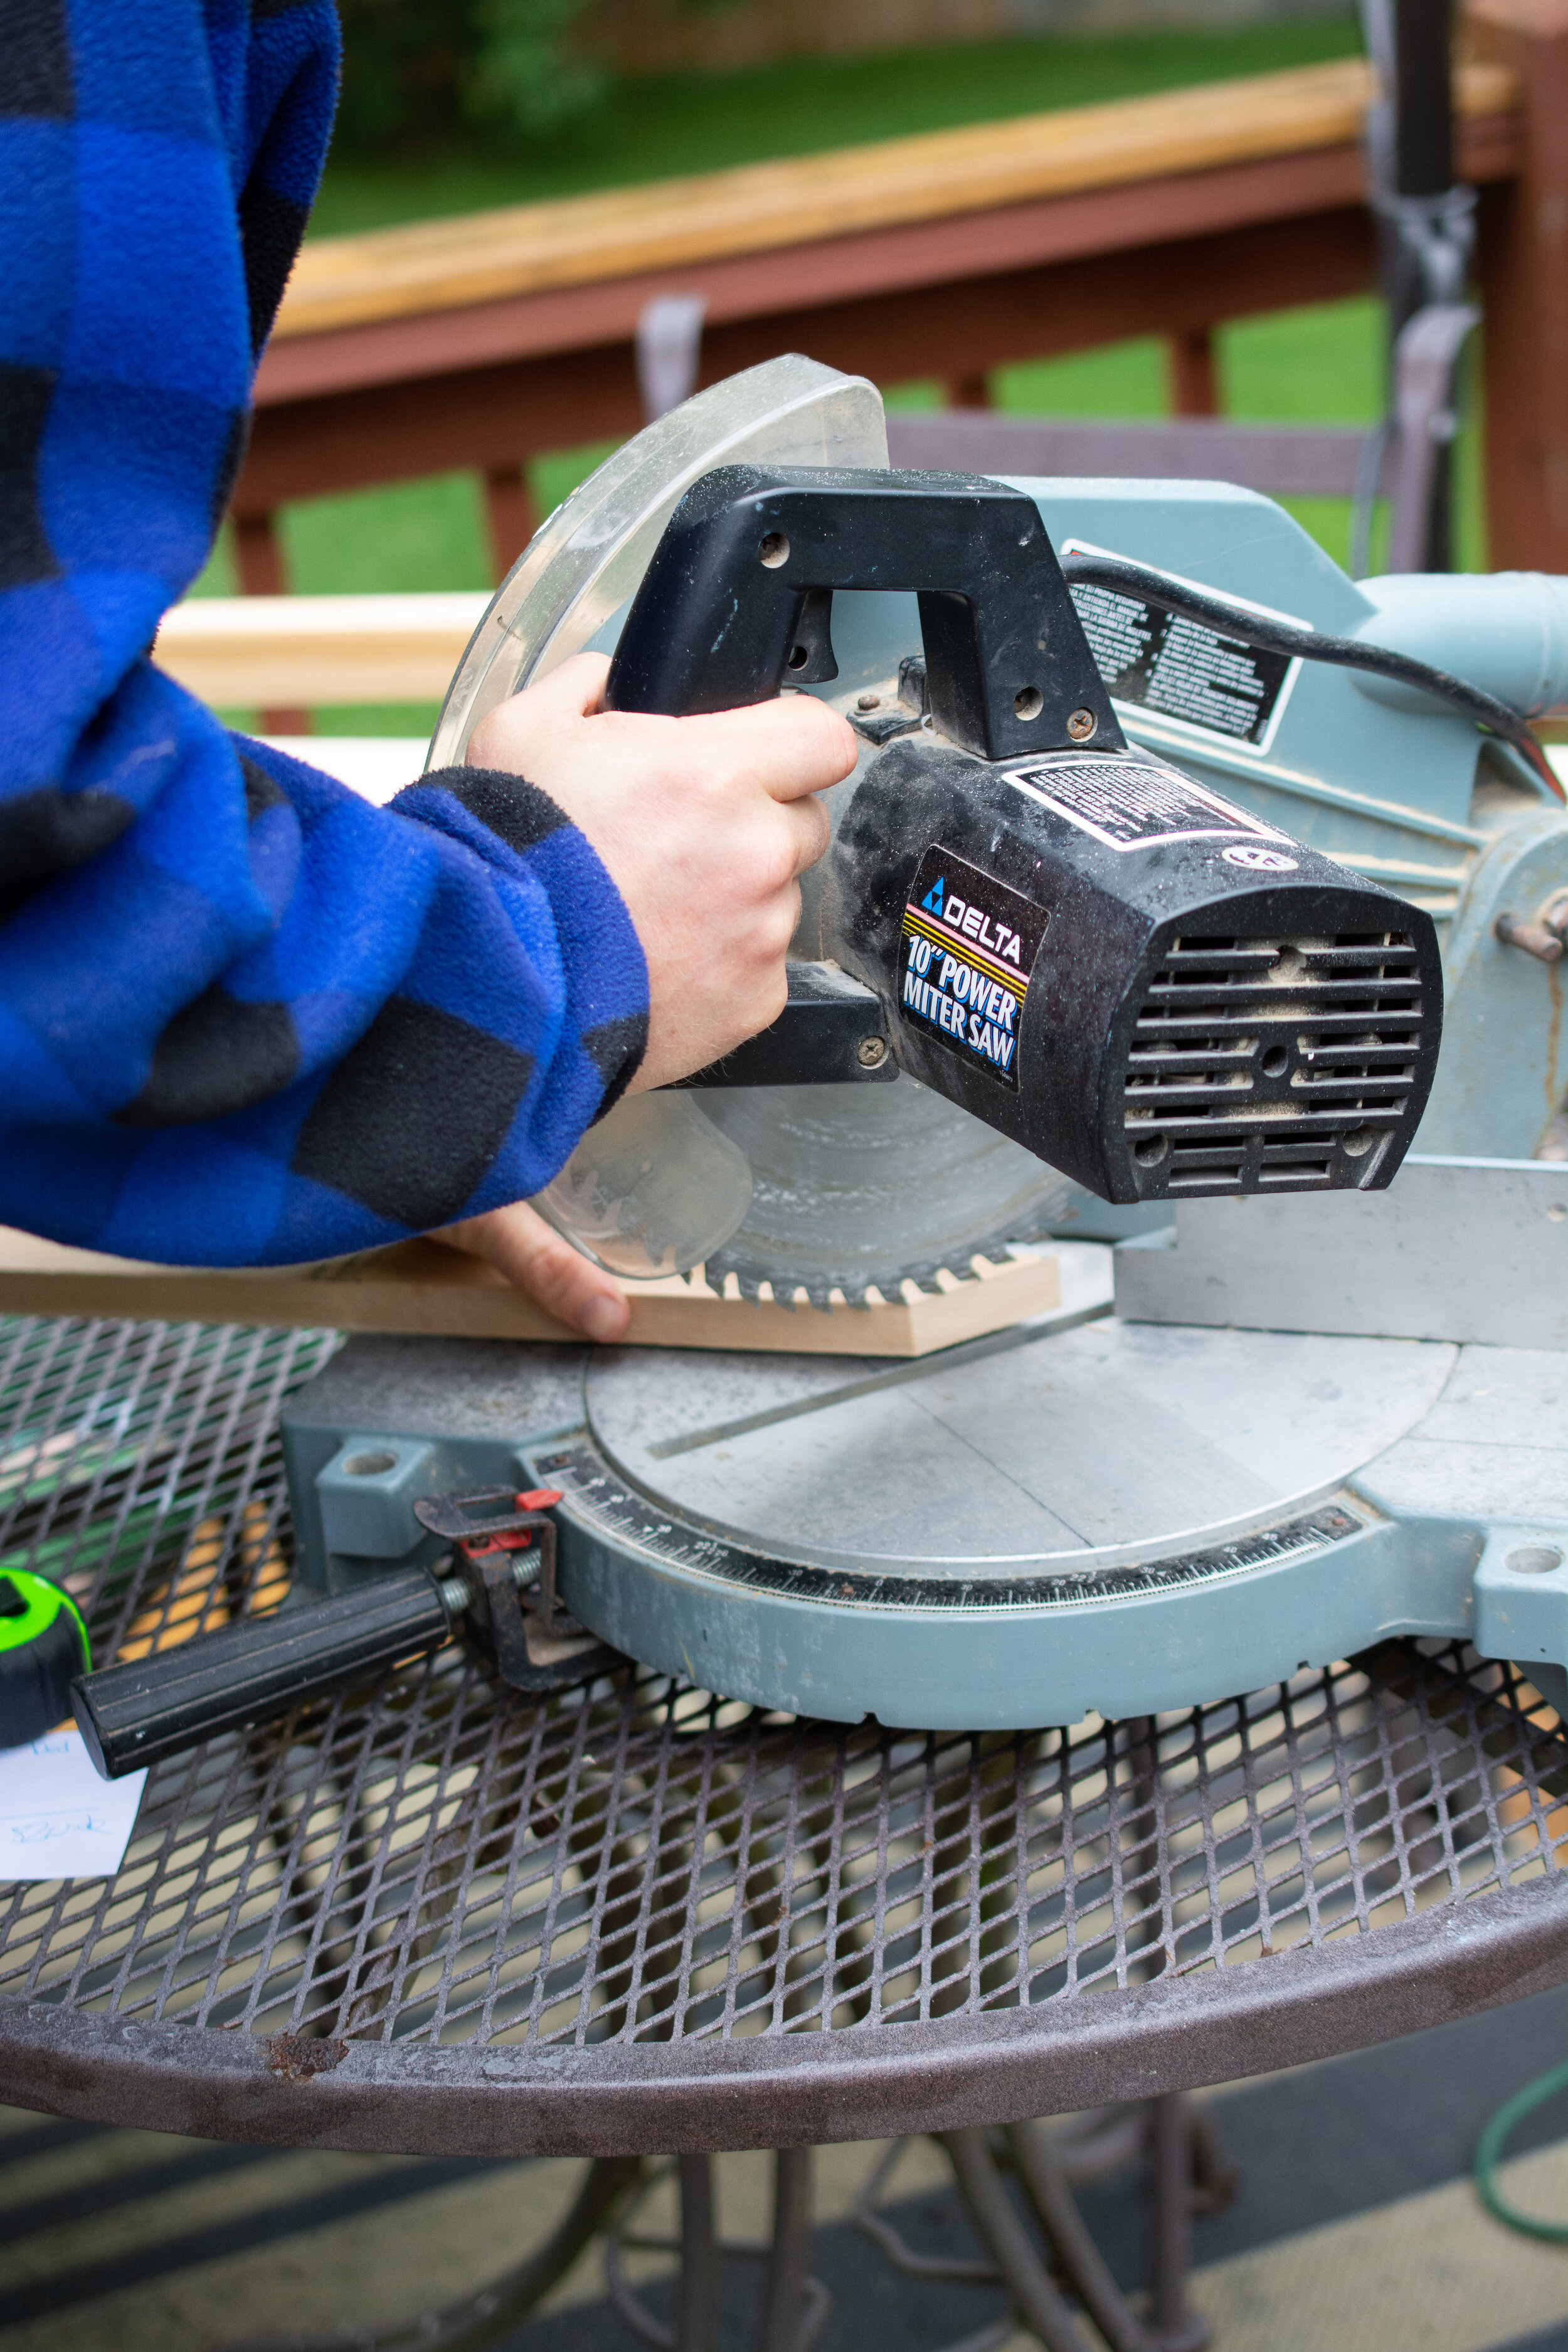
Miter saw
Nail gun
Staple gun
Paint
Iron
How to
We ended up going with about 76x80” total dimensions for this wall. I know wood is expensive right now so don’t worry about getting the best-looking pieces for the backplate as it won’t be seen.
This is a picture of the trim we used.

decorative trim

trim for backing
We used a miter saw to cut 45 degree angles on our back plate and decorative trim.
I then painted them a high gloss white. Once they are up, it will be really hard to do any touch-ups, so make sure to give them a few coats.

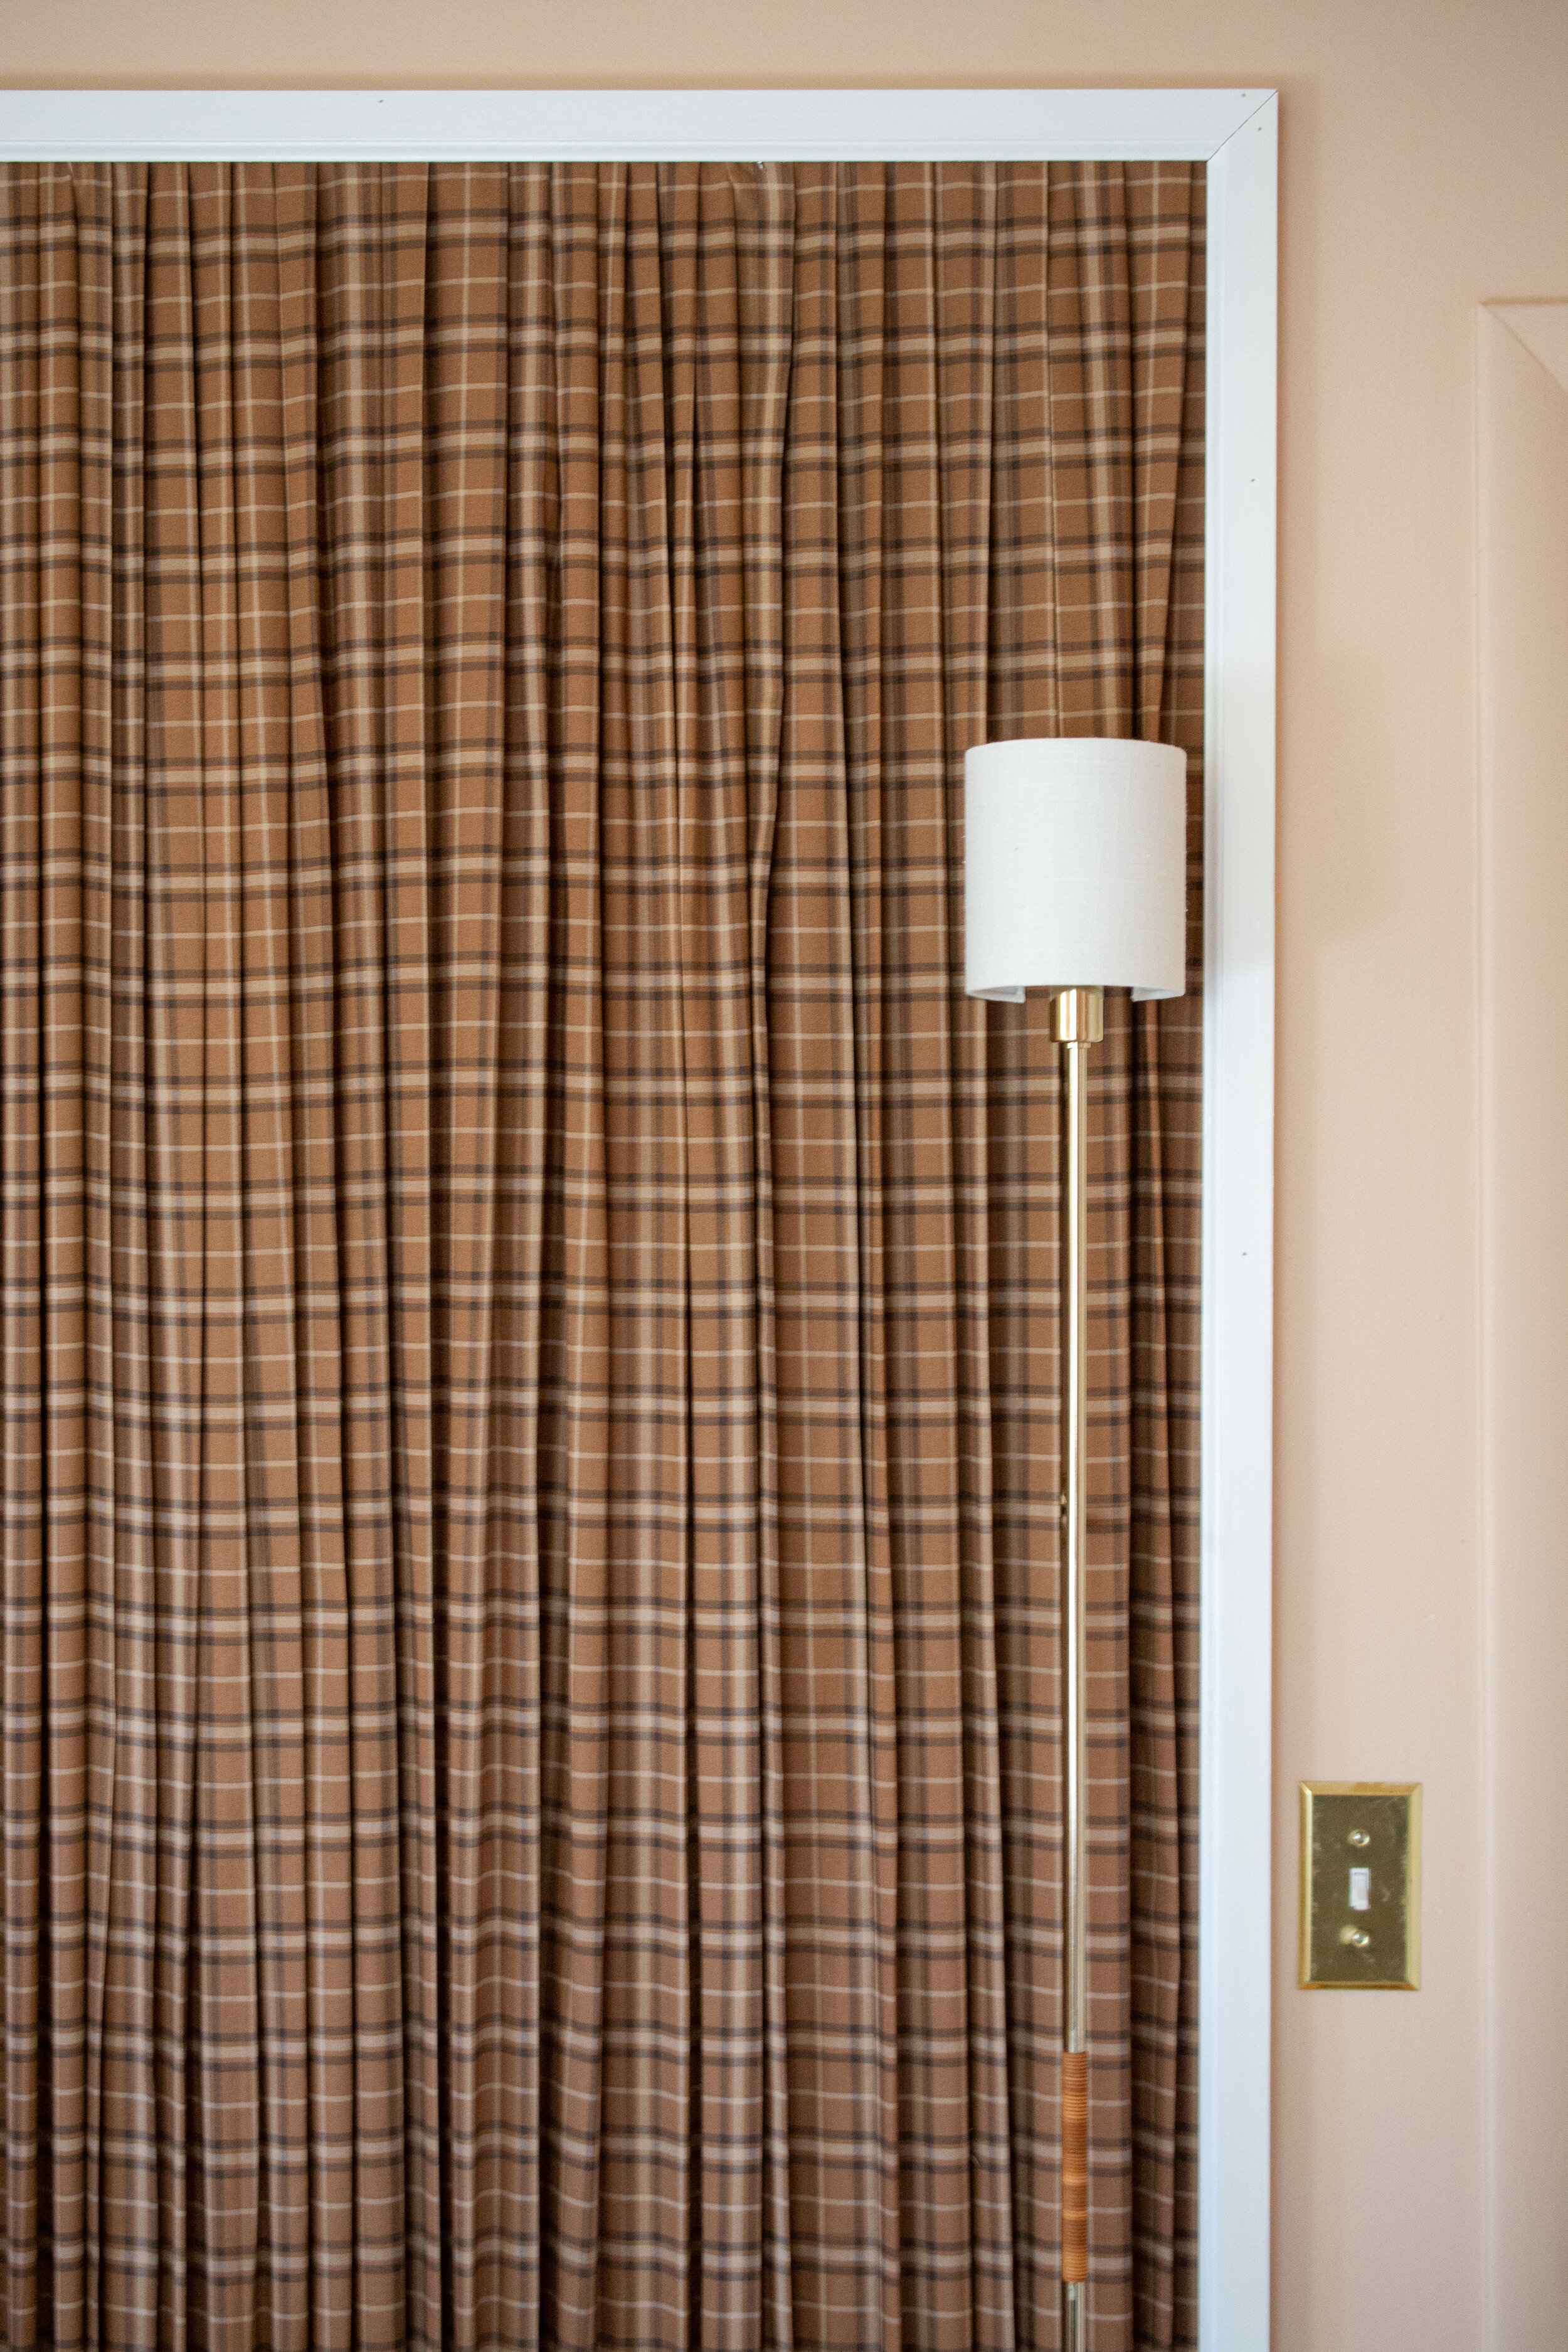
We then used the nail gun to attach the flat, squared edge pieces to the wall. This is the back plate. I painted them all, but only the sides will be visible once complete. We went ahead and installed our light fixtures at this point so that we could work around them once we got to the fabric-stage.

Now onto fabric. I waited until this went on sale and was able to get it all for around $67. I chose plaid (or tartan to be precise 🤓), which is a pattern that made it harder and easier in some ways. You will see why in the next step!

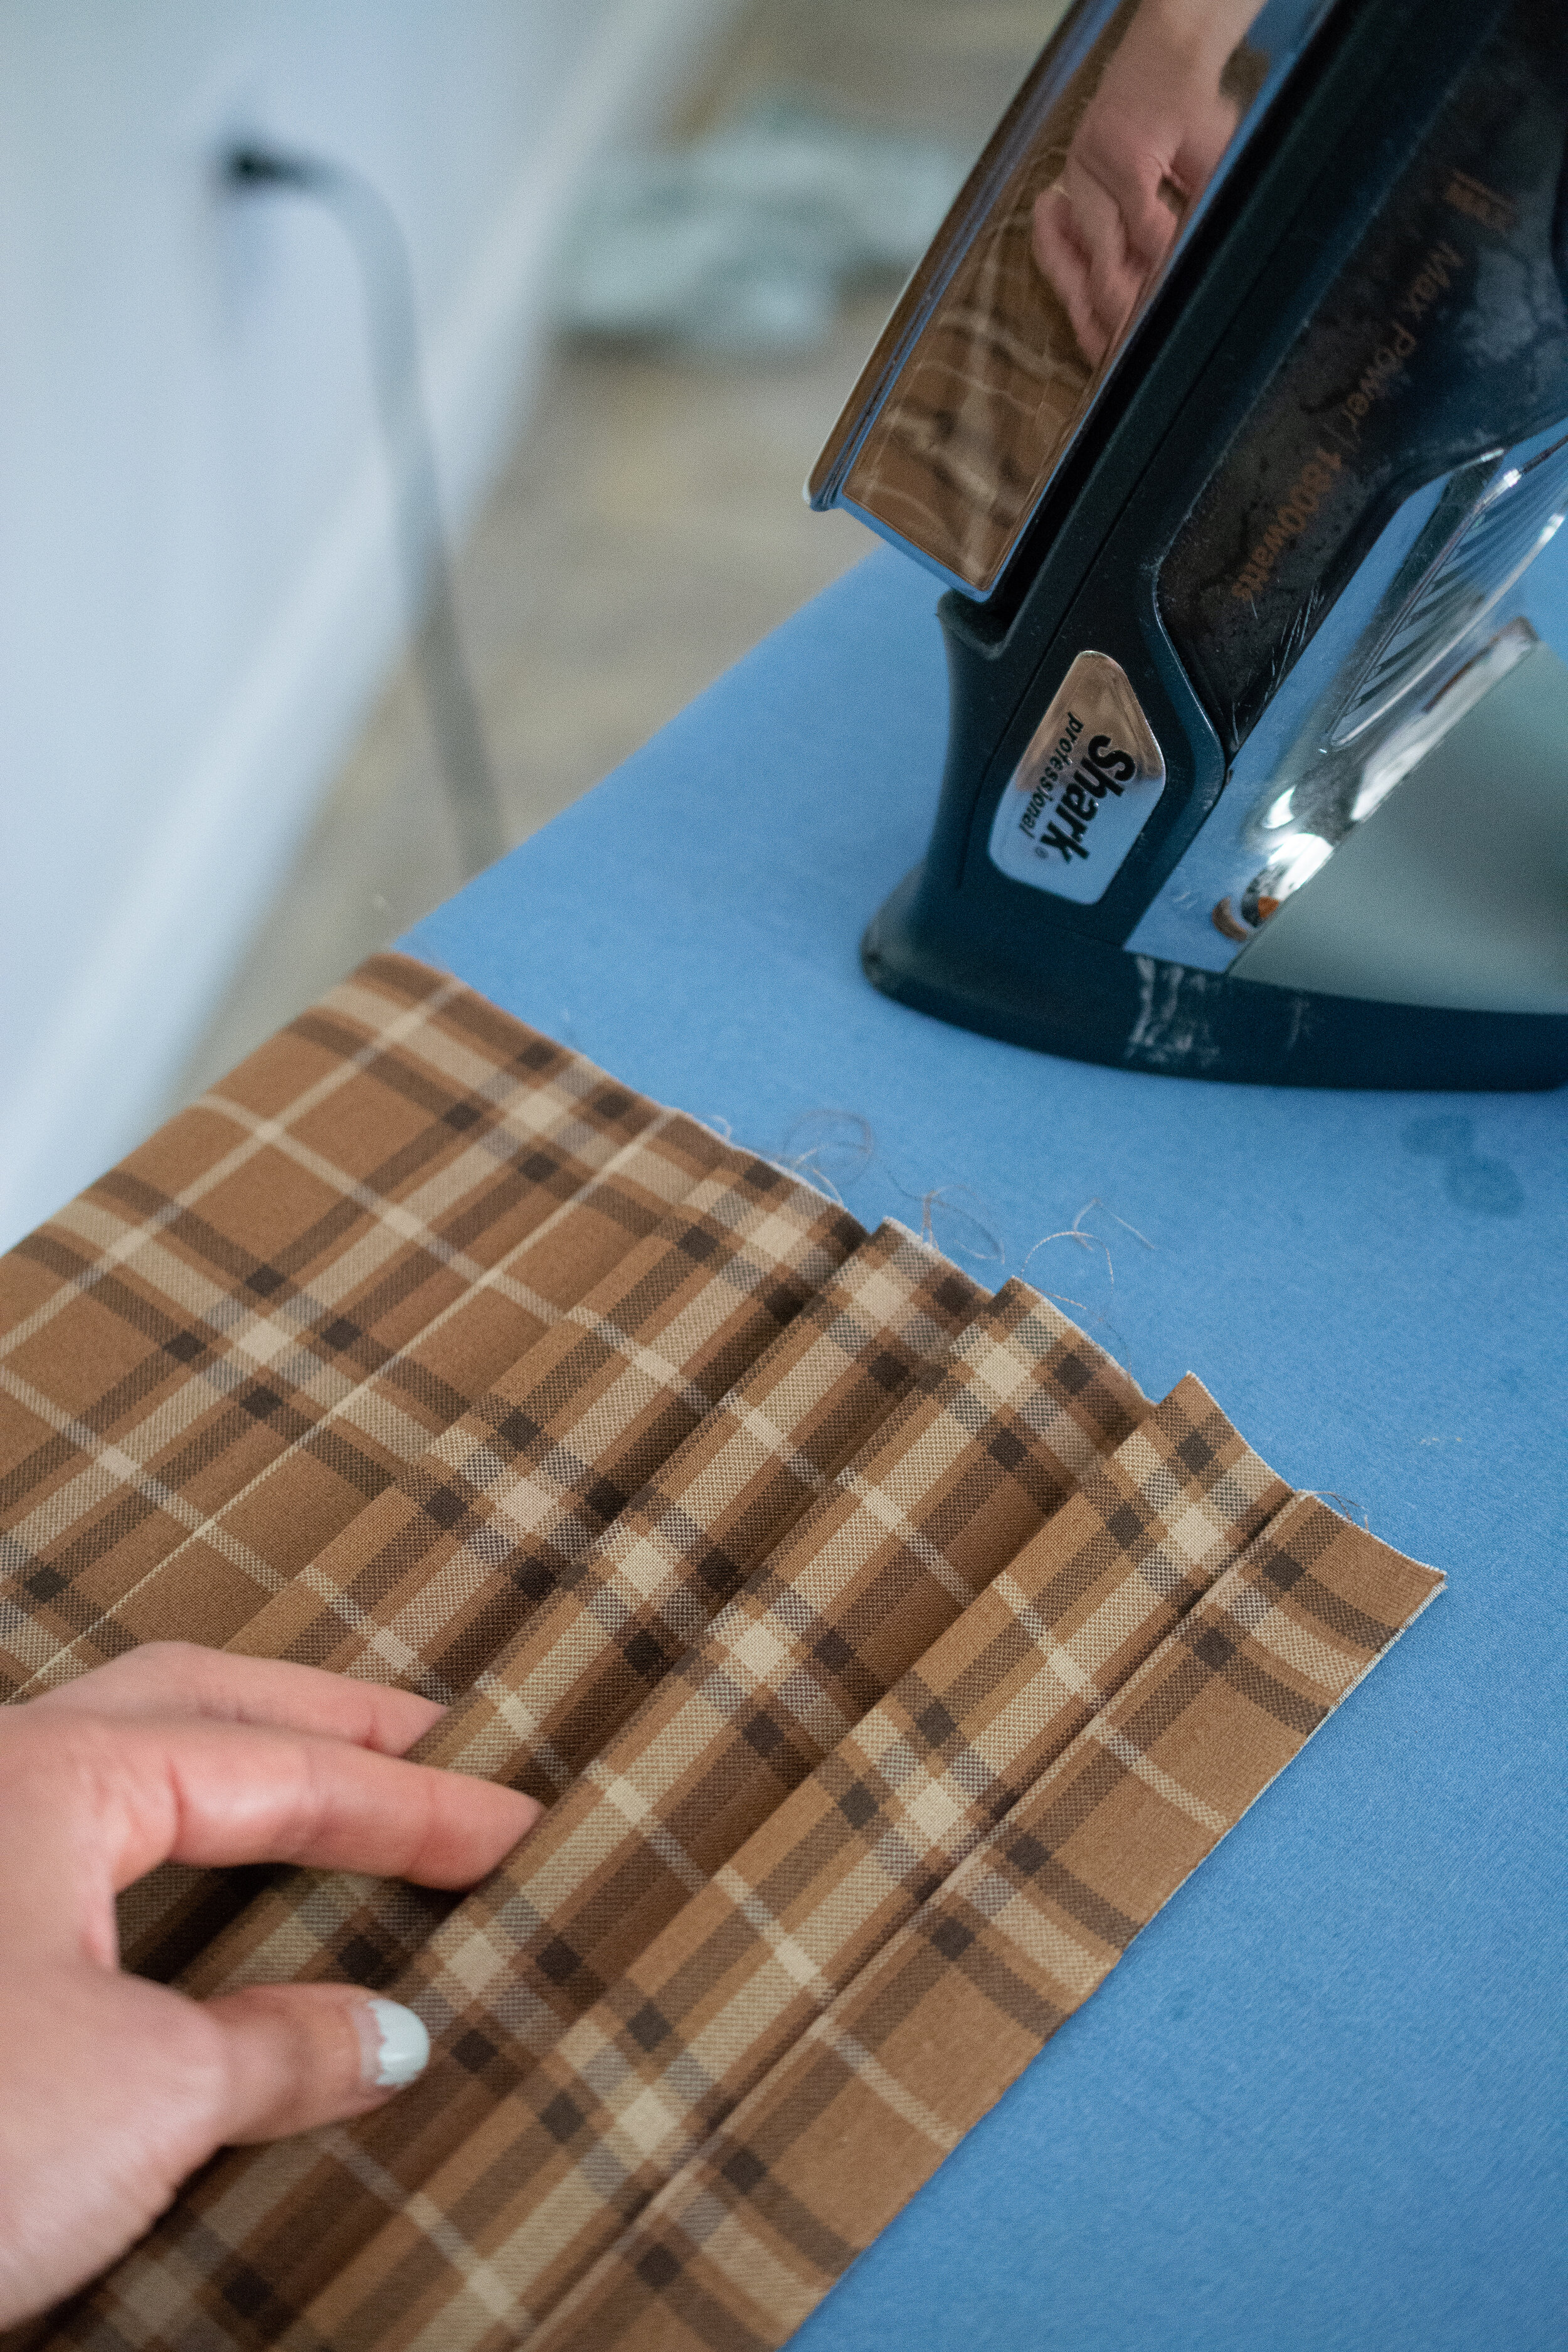
I then began making pleats. Soooo many pleats. You guys, this is the part that really tests your patience. I’ve never ironed so much in my life! So with the plaid, it helped because I was able to use the lines as a level for my creases, but it also shows any mistakes much more, so I recommend a floral if you don’t want to worry about precision here.
My ironing mantra that evolved as I grew tired (in the voice of Mary Poppins)
Practically perfect plaid pleats
perfect plaid pleats
plaid pleats
pleats
Okay, let’s just get this done already! I’m never ironing again.
I originally planned to use starch to stiffen the fabric because I wanted it to have that pressed, flat-look. After looking at the ingredients, I opted not to use it as I am very sensitive to chemicals and this was going to be right by our heads. The result ended up being more wavy in the middle and less kilt-like. And the looseness definitely helps hides any ironing-errors. I tried doing a few sections without ironing at all, at this point, because I wasn’t sure it was even necessary given the result. It is. I helps so much when it comes to the stapling stage. At least for plaid. I think you could use a dowel rod to make your pleats even on the top and bottom, but it would be so much looser overall. The iron really helps ensure an even, flatter look all the way down.

(And now for a series of bad photos, using a flash)
We began stapling the fabric to the backplate, making sure the pattern lined up between sections.

You can see we installed a couple of pieces of wood in the middle. This is because we plan to put a mirror overtop and didn’t want it to press the entire thing down against the wall in the middle (Another thing that will make more sense later)

So you can see how the pleats begin to relax towards the middle. Stapling the fabric at the bottom eventually helps everything lay flatter.

(At this point, Andy seemed to have ditched his shirt. This project will make you sweat LOL.)
We then attached our decorative trim over the top of the backplate using our nail gun.
You can also see here how there is a strip of fabric just to the right of the sconce. All of the cuts I made on the fabric are not hemmed, but it’s okay because they are hidden behind pleats 🙌

Everything tucked in and covered with trim.

Here you can see the two pieces of trim sandwiched together nicely. It feels like a shadowbox!

Aaaaaand your prize is… A luxurious, hotel-esque feature wall! Total cost was about $126.

Next week, I will be assembling the bed for this wall so much of it will be covered. For now, I’m taking in the beauty of our work and using it as a backdrop for whole-body photo sessions, of course. LOL

One last peek at the light fixture in front of it…

To-do
Paint
Finalize ceiling light: I am deciding between two on opposite ends of modern/traditional so they could really change the entire look of the room. This is a big decision. Follow along in my instagram stories to weigh in!
Order pillows from Motif Pillows
Design roman shades and have them custom-made. This might take awhile so I need to hop to it.
Source a stool for the secretary desk I’m converting to a vanity. Something modern to balance it.
Order sconce from Modern Lantern
Make shades for sconces on either side of bed.
Convert a bar-stool into a bedside table
Purchase accessories. I’ll be modernizing the look of some vintage pieces.
DIY wall treatment above bed
Remove popcorn ceiling
Order fabric for upholstery
Order bed
Assemble bed
Modernize some vintage sculptural art for the wall
Figure out mirror situation for vanity desk.
Finalize floor-plan
install window treatments
Install lighting
Paint window trim
Style room
Photograph
Never miss a beat! Follow along…