How to remove popcorn ceilings - One Room Challenge- WEEK 4
It’s the halfway point of the One Room Challenge!

In case you missed it, here are the links to the previous weeks:
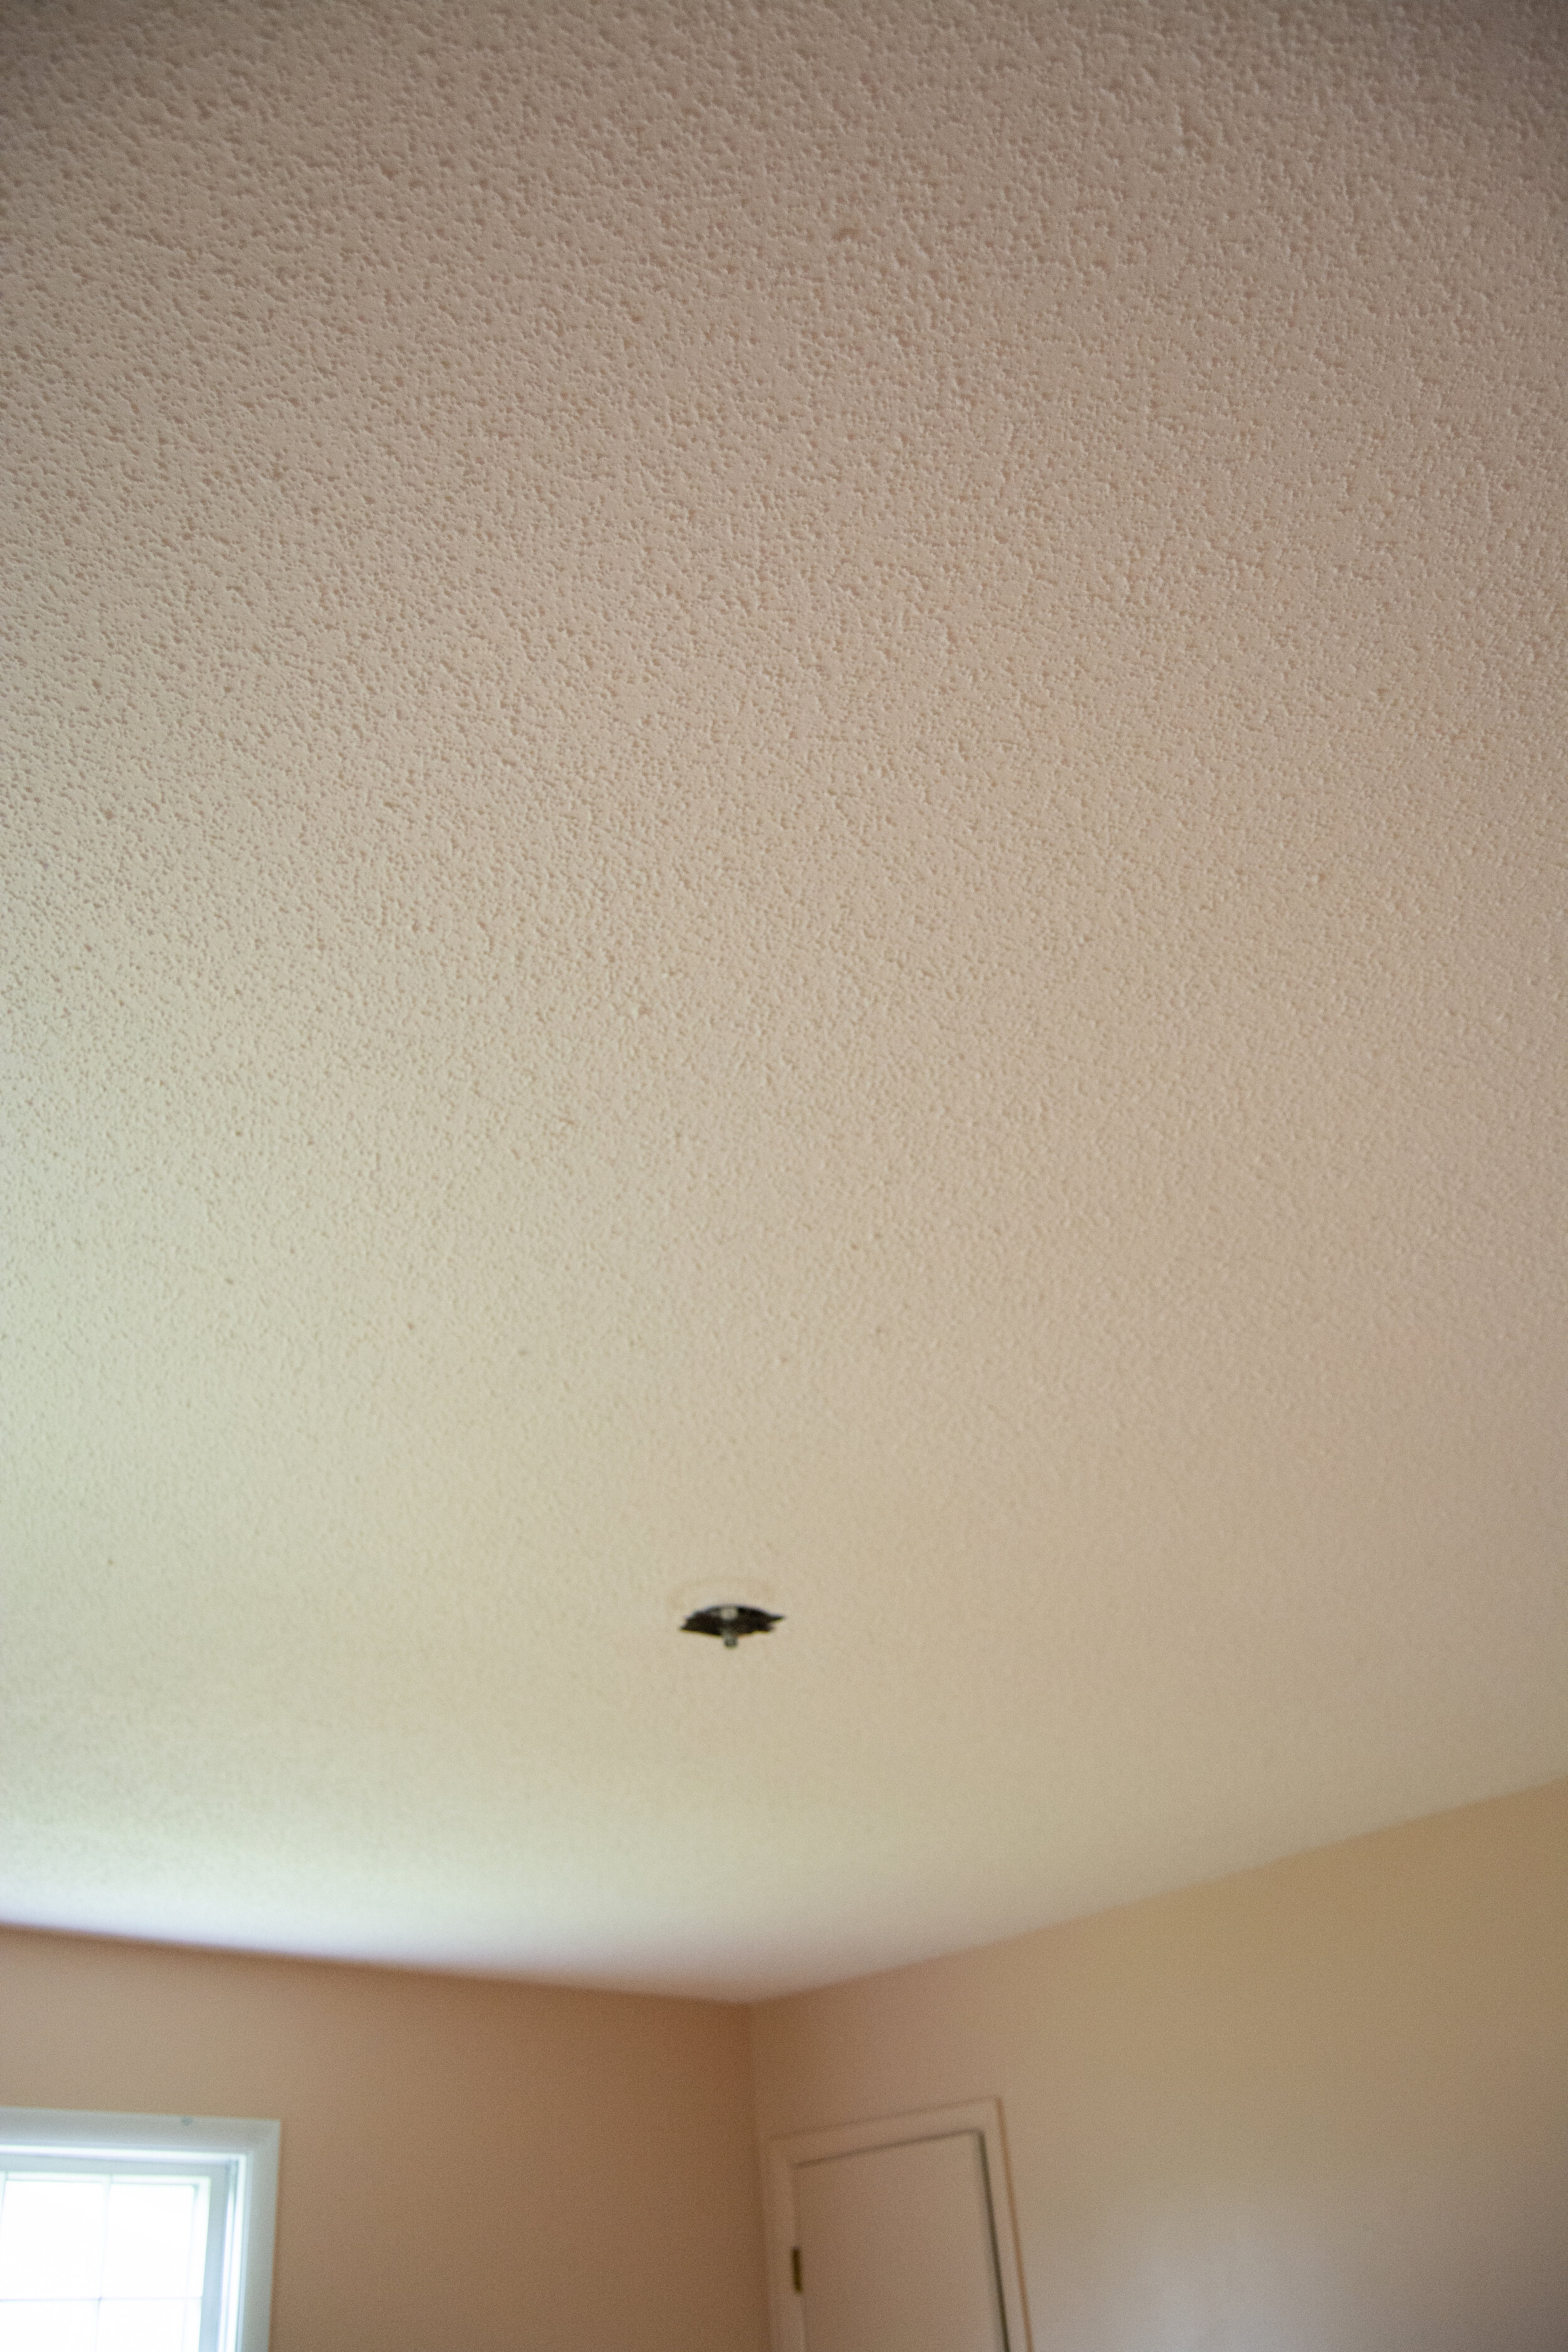
I keep waiting for popcorn ceilings to make a come back. Not because I love them, but because I’m tired of removing them LOL.
This wan’t something I had planned to do in this room, but since I have been investing so much effort into the rest of the design, I really just had to. And, of course, now that it’s behind me, it was worth it. So I thought I would give some tips and insight into how I did it. I can’t really call it a tutorial per-say, but in all of the rooms I’ve tackled this task, I think I have it down now. Lord help me.

How to remove popcorn texture from a ceiling
Tip #1
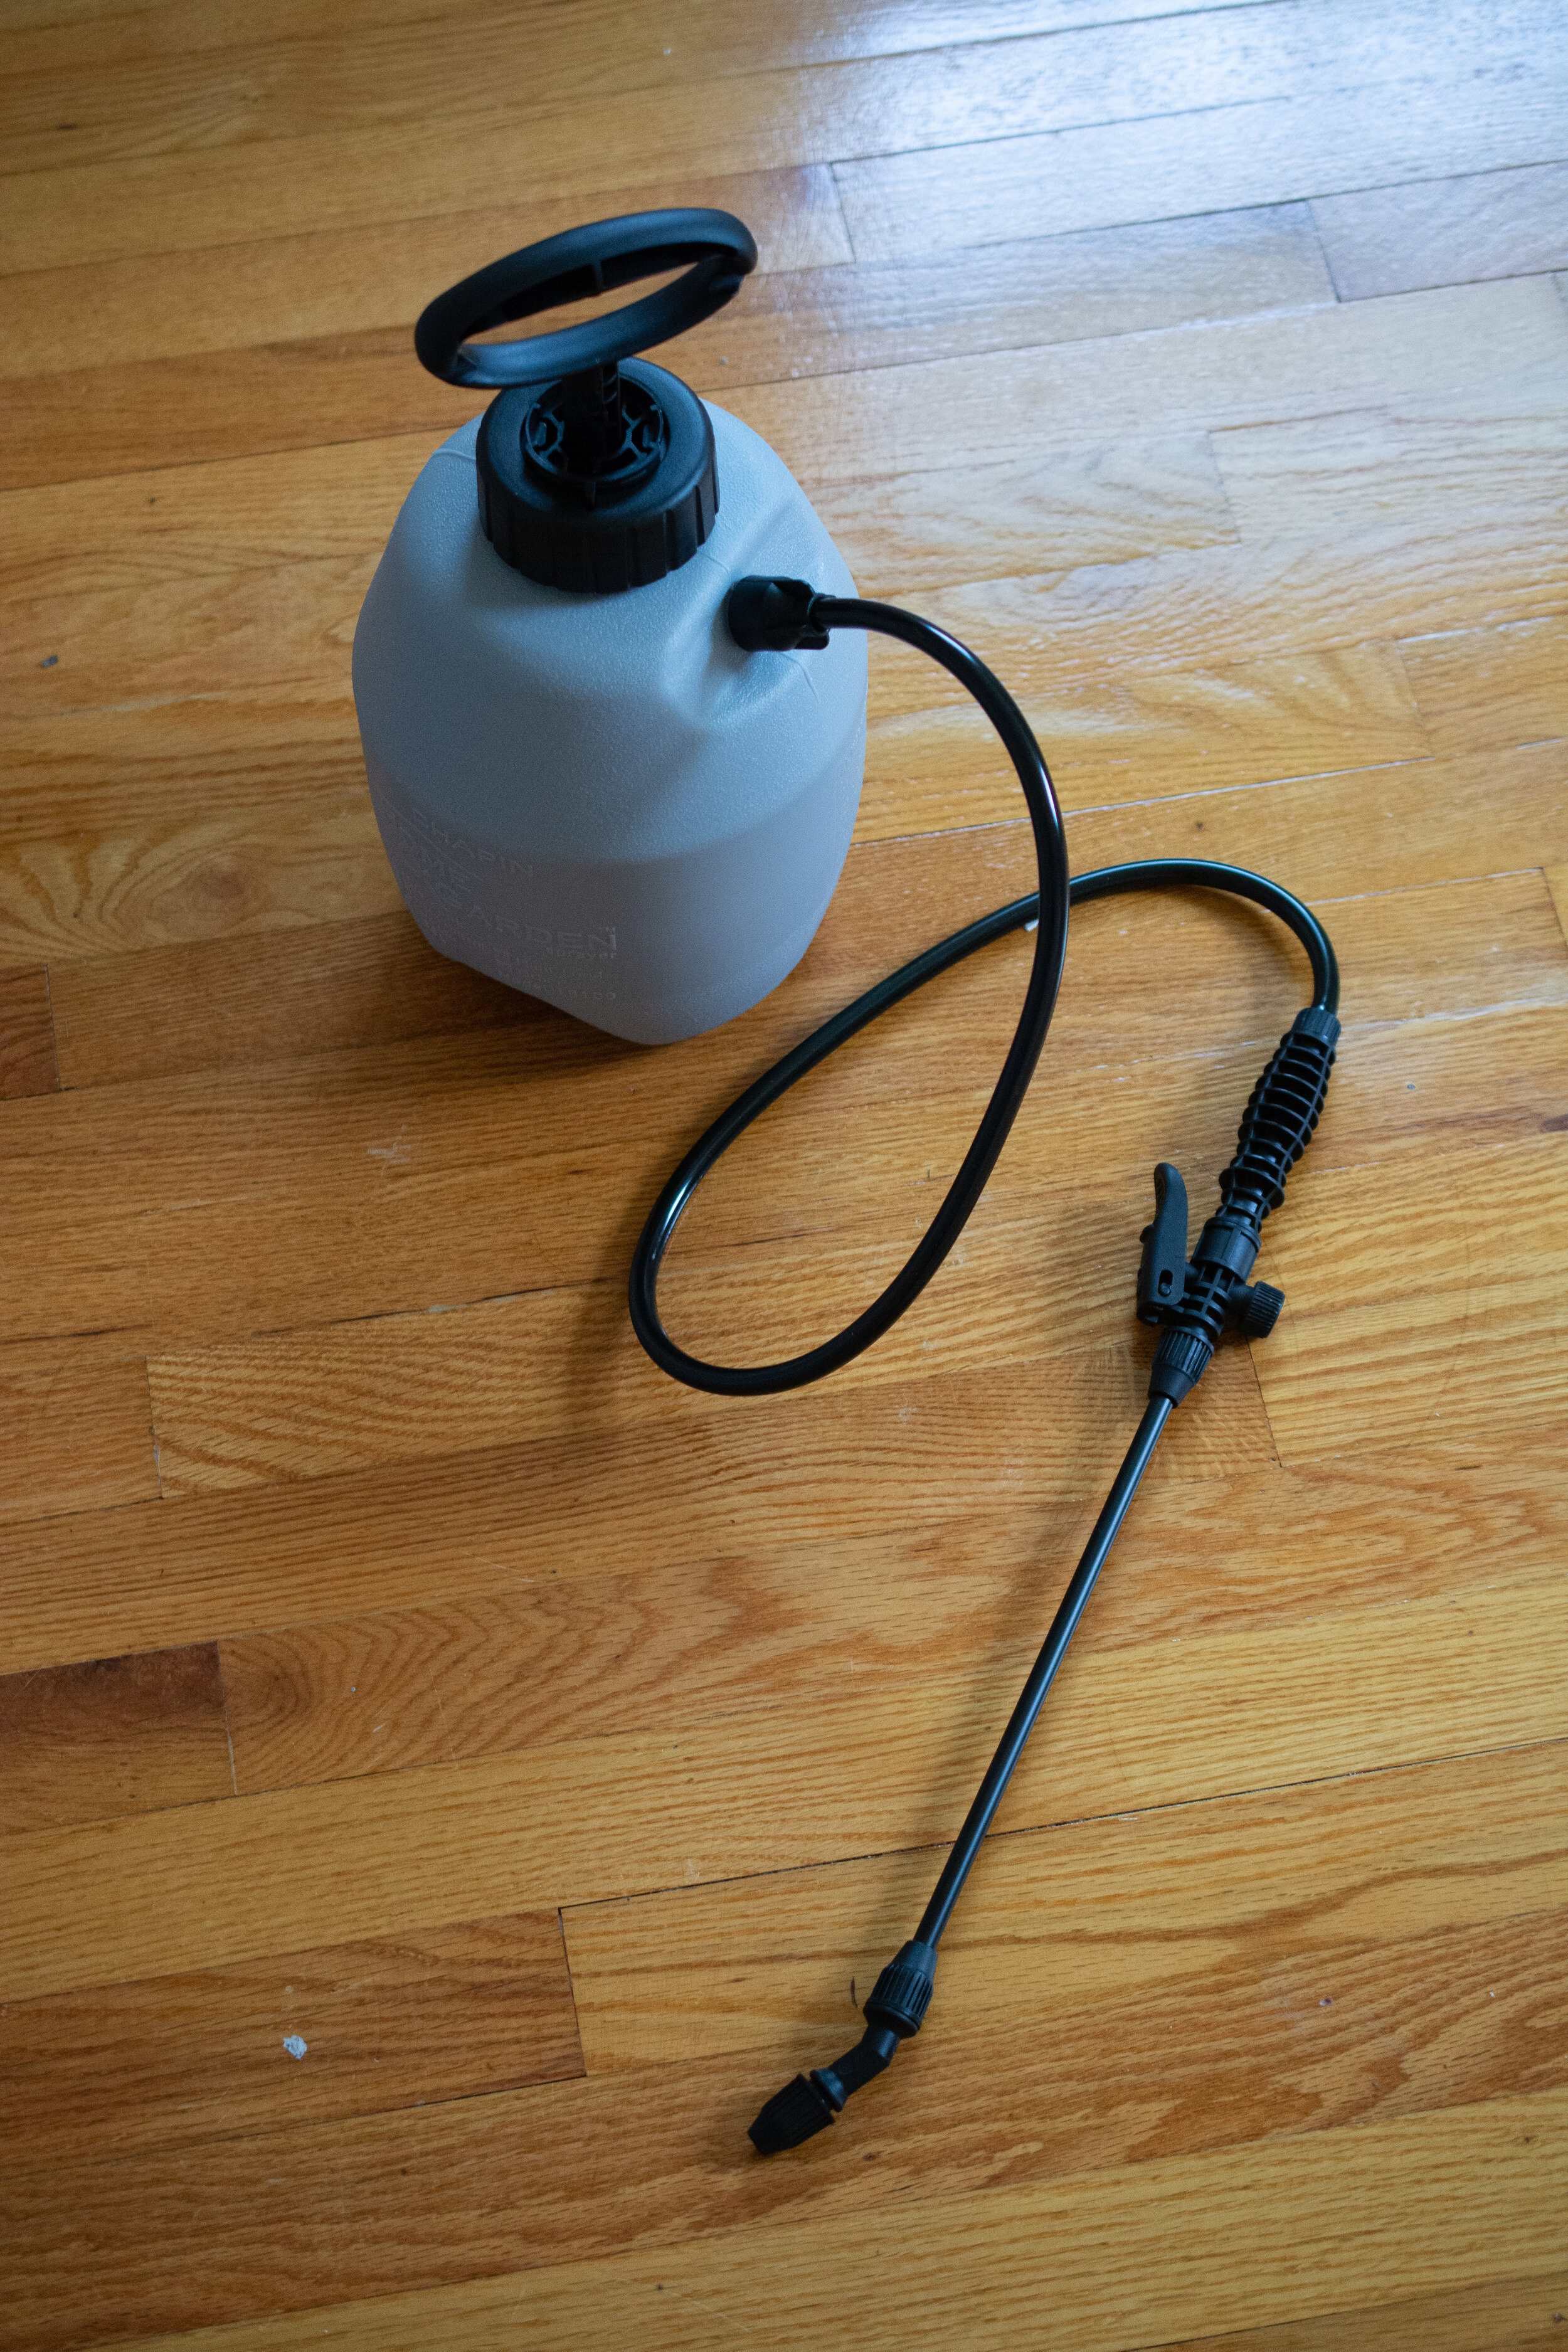
Invest in a good sprayer. I found this one at my local hardware supply. This makes all the difference and I’ll explain why in a moment…
Tip #2 Wear proper gear. Safety glasses, a mask for vapors/debris and yes, a shower cap, because if you don’t, you will be picking this stuff out of your hair for days.

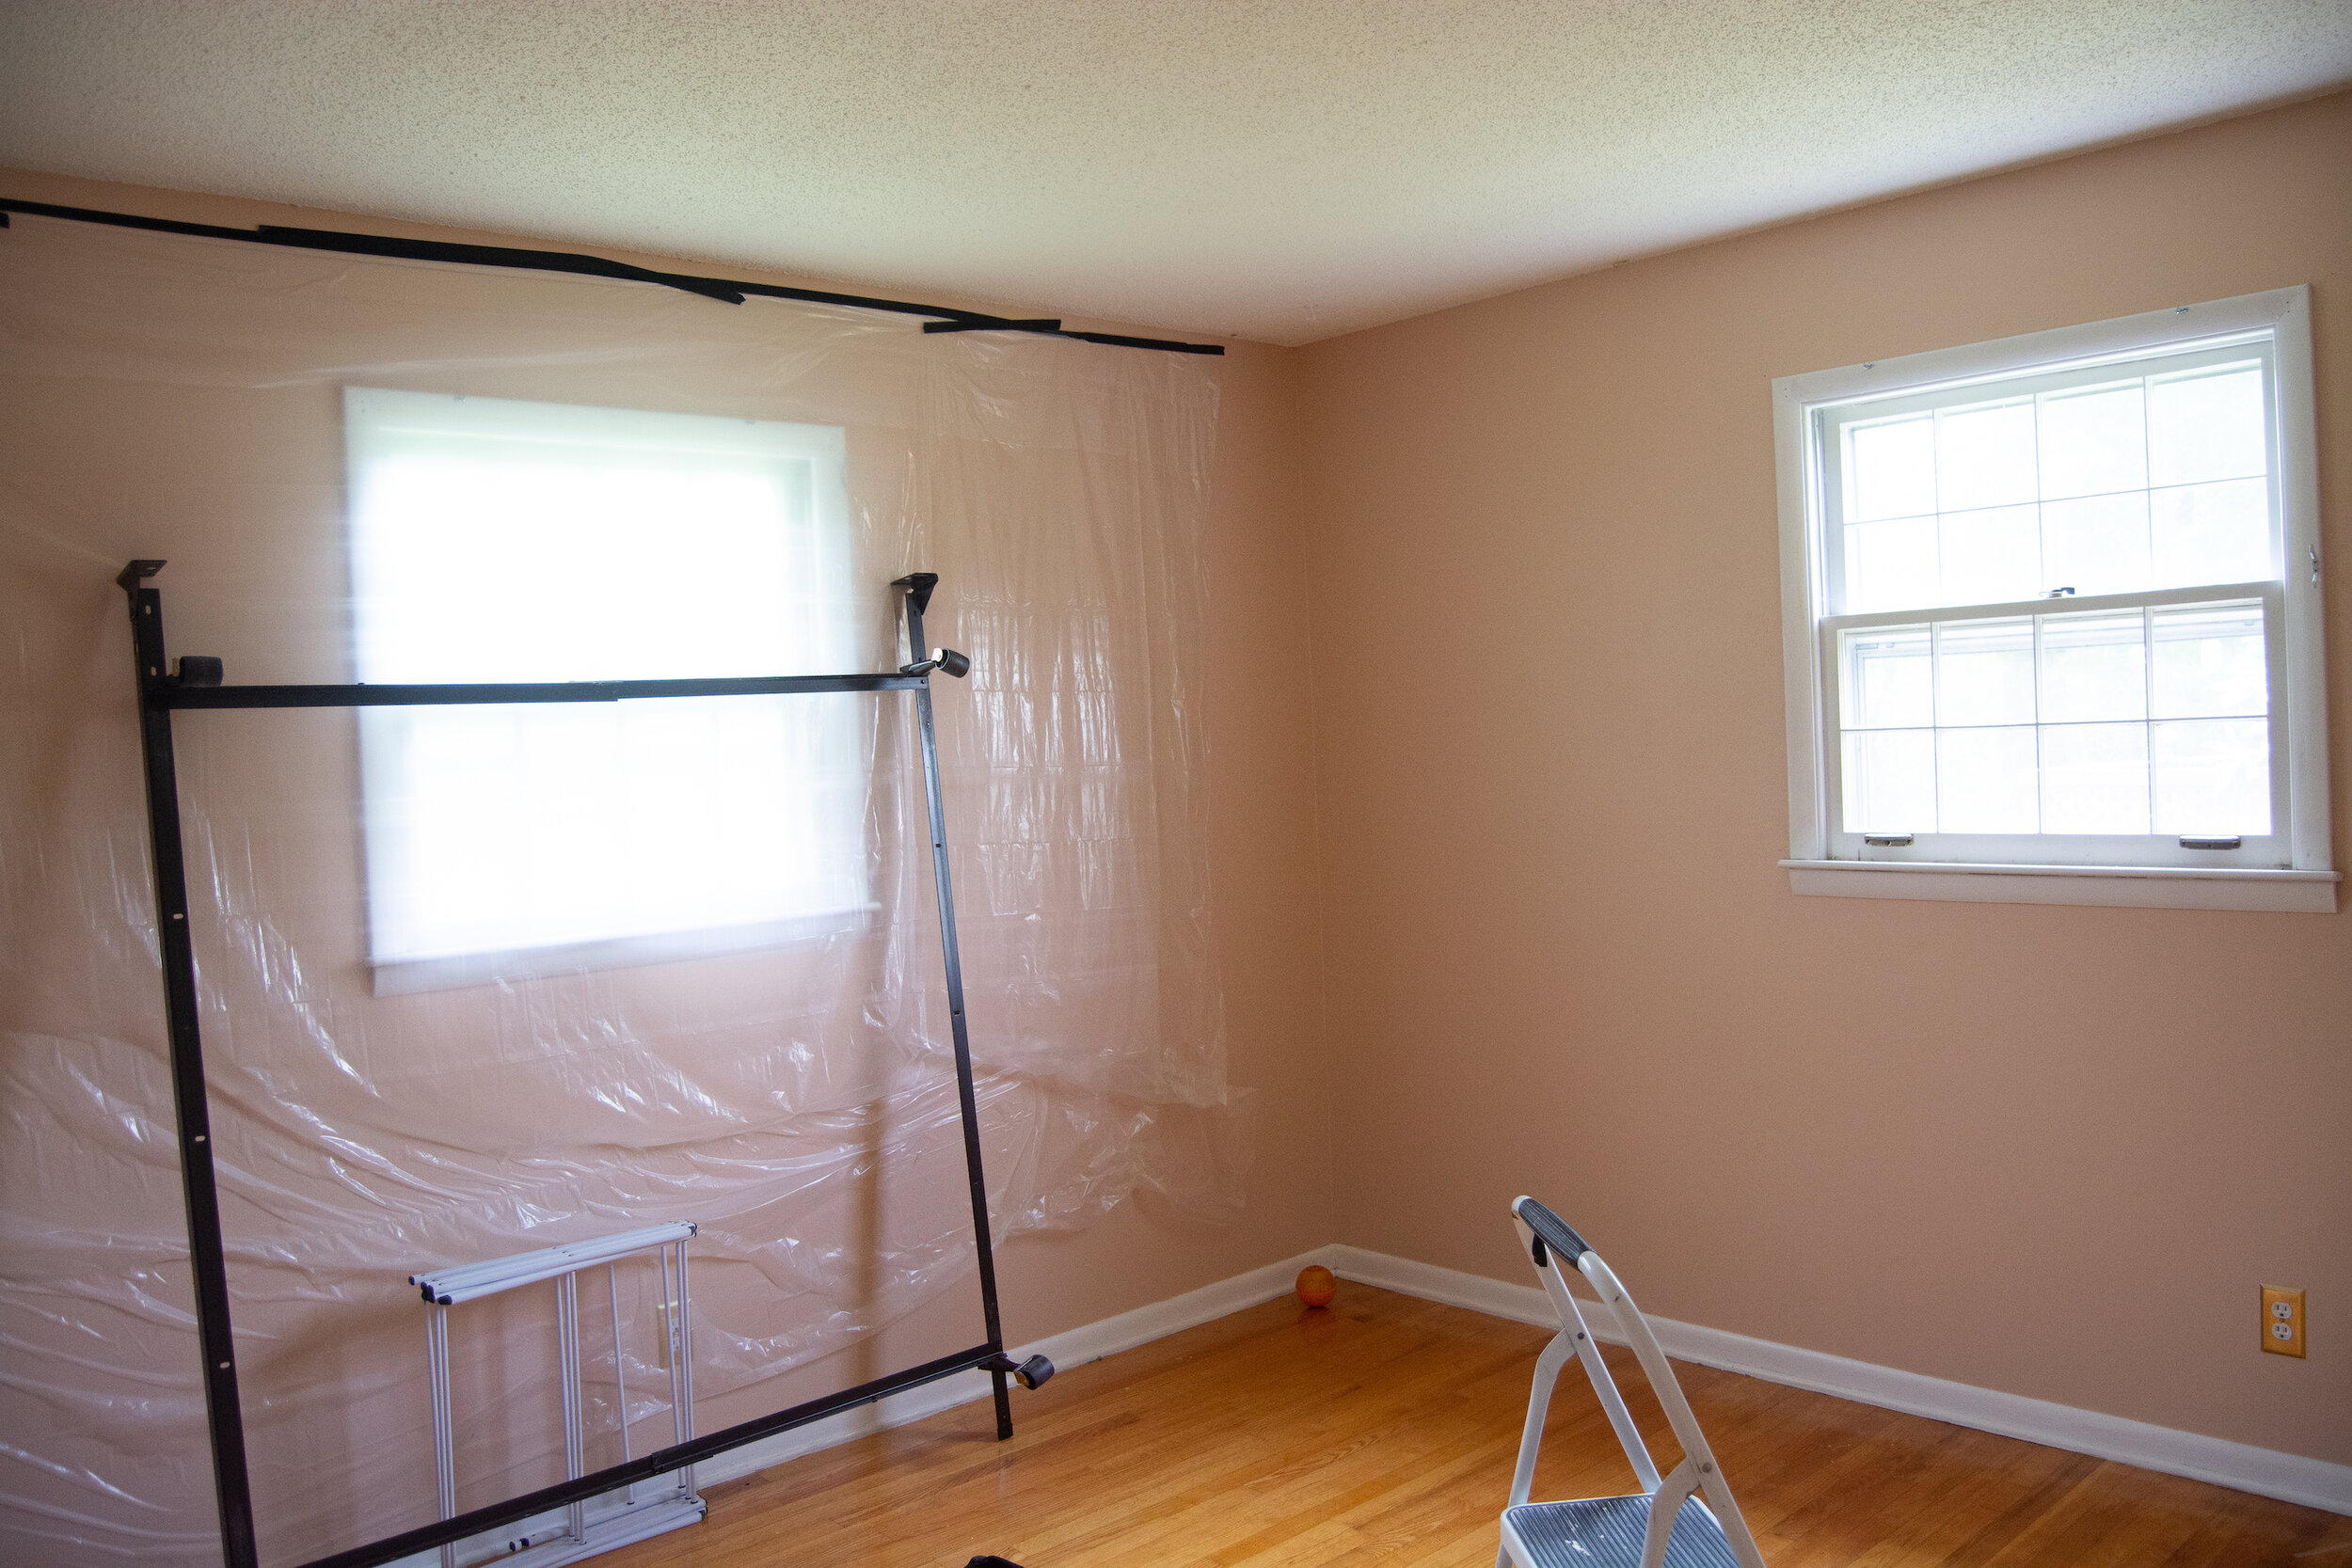
Tip #3 Remove everything from the room and use a plastic drop cloth on the walls and floor. Make sure you remove it all - even the art on the wall. Inevitably, I always end up stepping on the drop cloths in my delirium and they come down. It’s going to get messy in here!
Steps
Fill your sprayer with a solution of:
Warm water
teaspoon of dish liquid
1 cup white vinegar
Start with about a 2 foot strip in your room and saturate it with the solution. This is where your sprayer comes in. You don’t want to be pulling a nozzle at each pass. This type of sprayer makes it sooo much easier because it continuously sprays and can be used with one hand.

Wait 15 minutes. Then go back over it with the sprayer once more. After this second pass, you are ready to start scraping right away. You do not need to wait the additional 15 minutes. In fact, you really need to be ready to scrape after this spray as this is the one that ends up doing the trick.

Use a 12-14” scraper like this one available at your local hardware store. I tried taping mine to a shop vac because I saw others have success with this method. Ultimately, I ditched it because it didn’t end up working for me. I think maybe I didn’t have the right vacuum attachment. Not a huge deal as the clean-up is really the easiest part of this whole ordeal. Since you have the drop cloth on the floor, you will simply fold it all up and throw it away once you’re done.

The first pass at scraping is really the trickiest. Use the corner of the scraper to gently get a starting point. Once you have broken the barrier, it will start coming off like butter. The key is to do it gently. You don’t want to hack into the drywall on the other side!

Did I mention this would be messy?

At this point, you’ll be wondering how you got yourself into this mess in the first place, but keep going - you are almost there! Have someone draw you a hot bath; you are going to be sore as hell tomorrow.
Once you have the popcorn down, use an exacto knife or box cutter to clear away any leftover bits on the edges where it meets the walls. Then use an orbital sander with the lightest grit to remove any rough spots on the ceiling. You may need to use some spackle if there are any holes. At this point, you are technically supposed to mud the walls, but I never do. I find that if I am gentle enough with my scraping, and I sand it thoroughly, it is pretty gosh darn smooth. Using a flat interior paint on the ceiling is also going to help hide any blemishes. One thing to note; it’s hard to see them before you paint, but once the paint goes on, you will notice them. This is why you really want to make sure you sand. Run your fingers over to check for texture, inspecting closely before painting.

Now onto the reward!
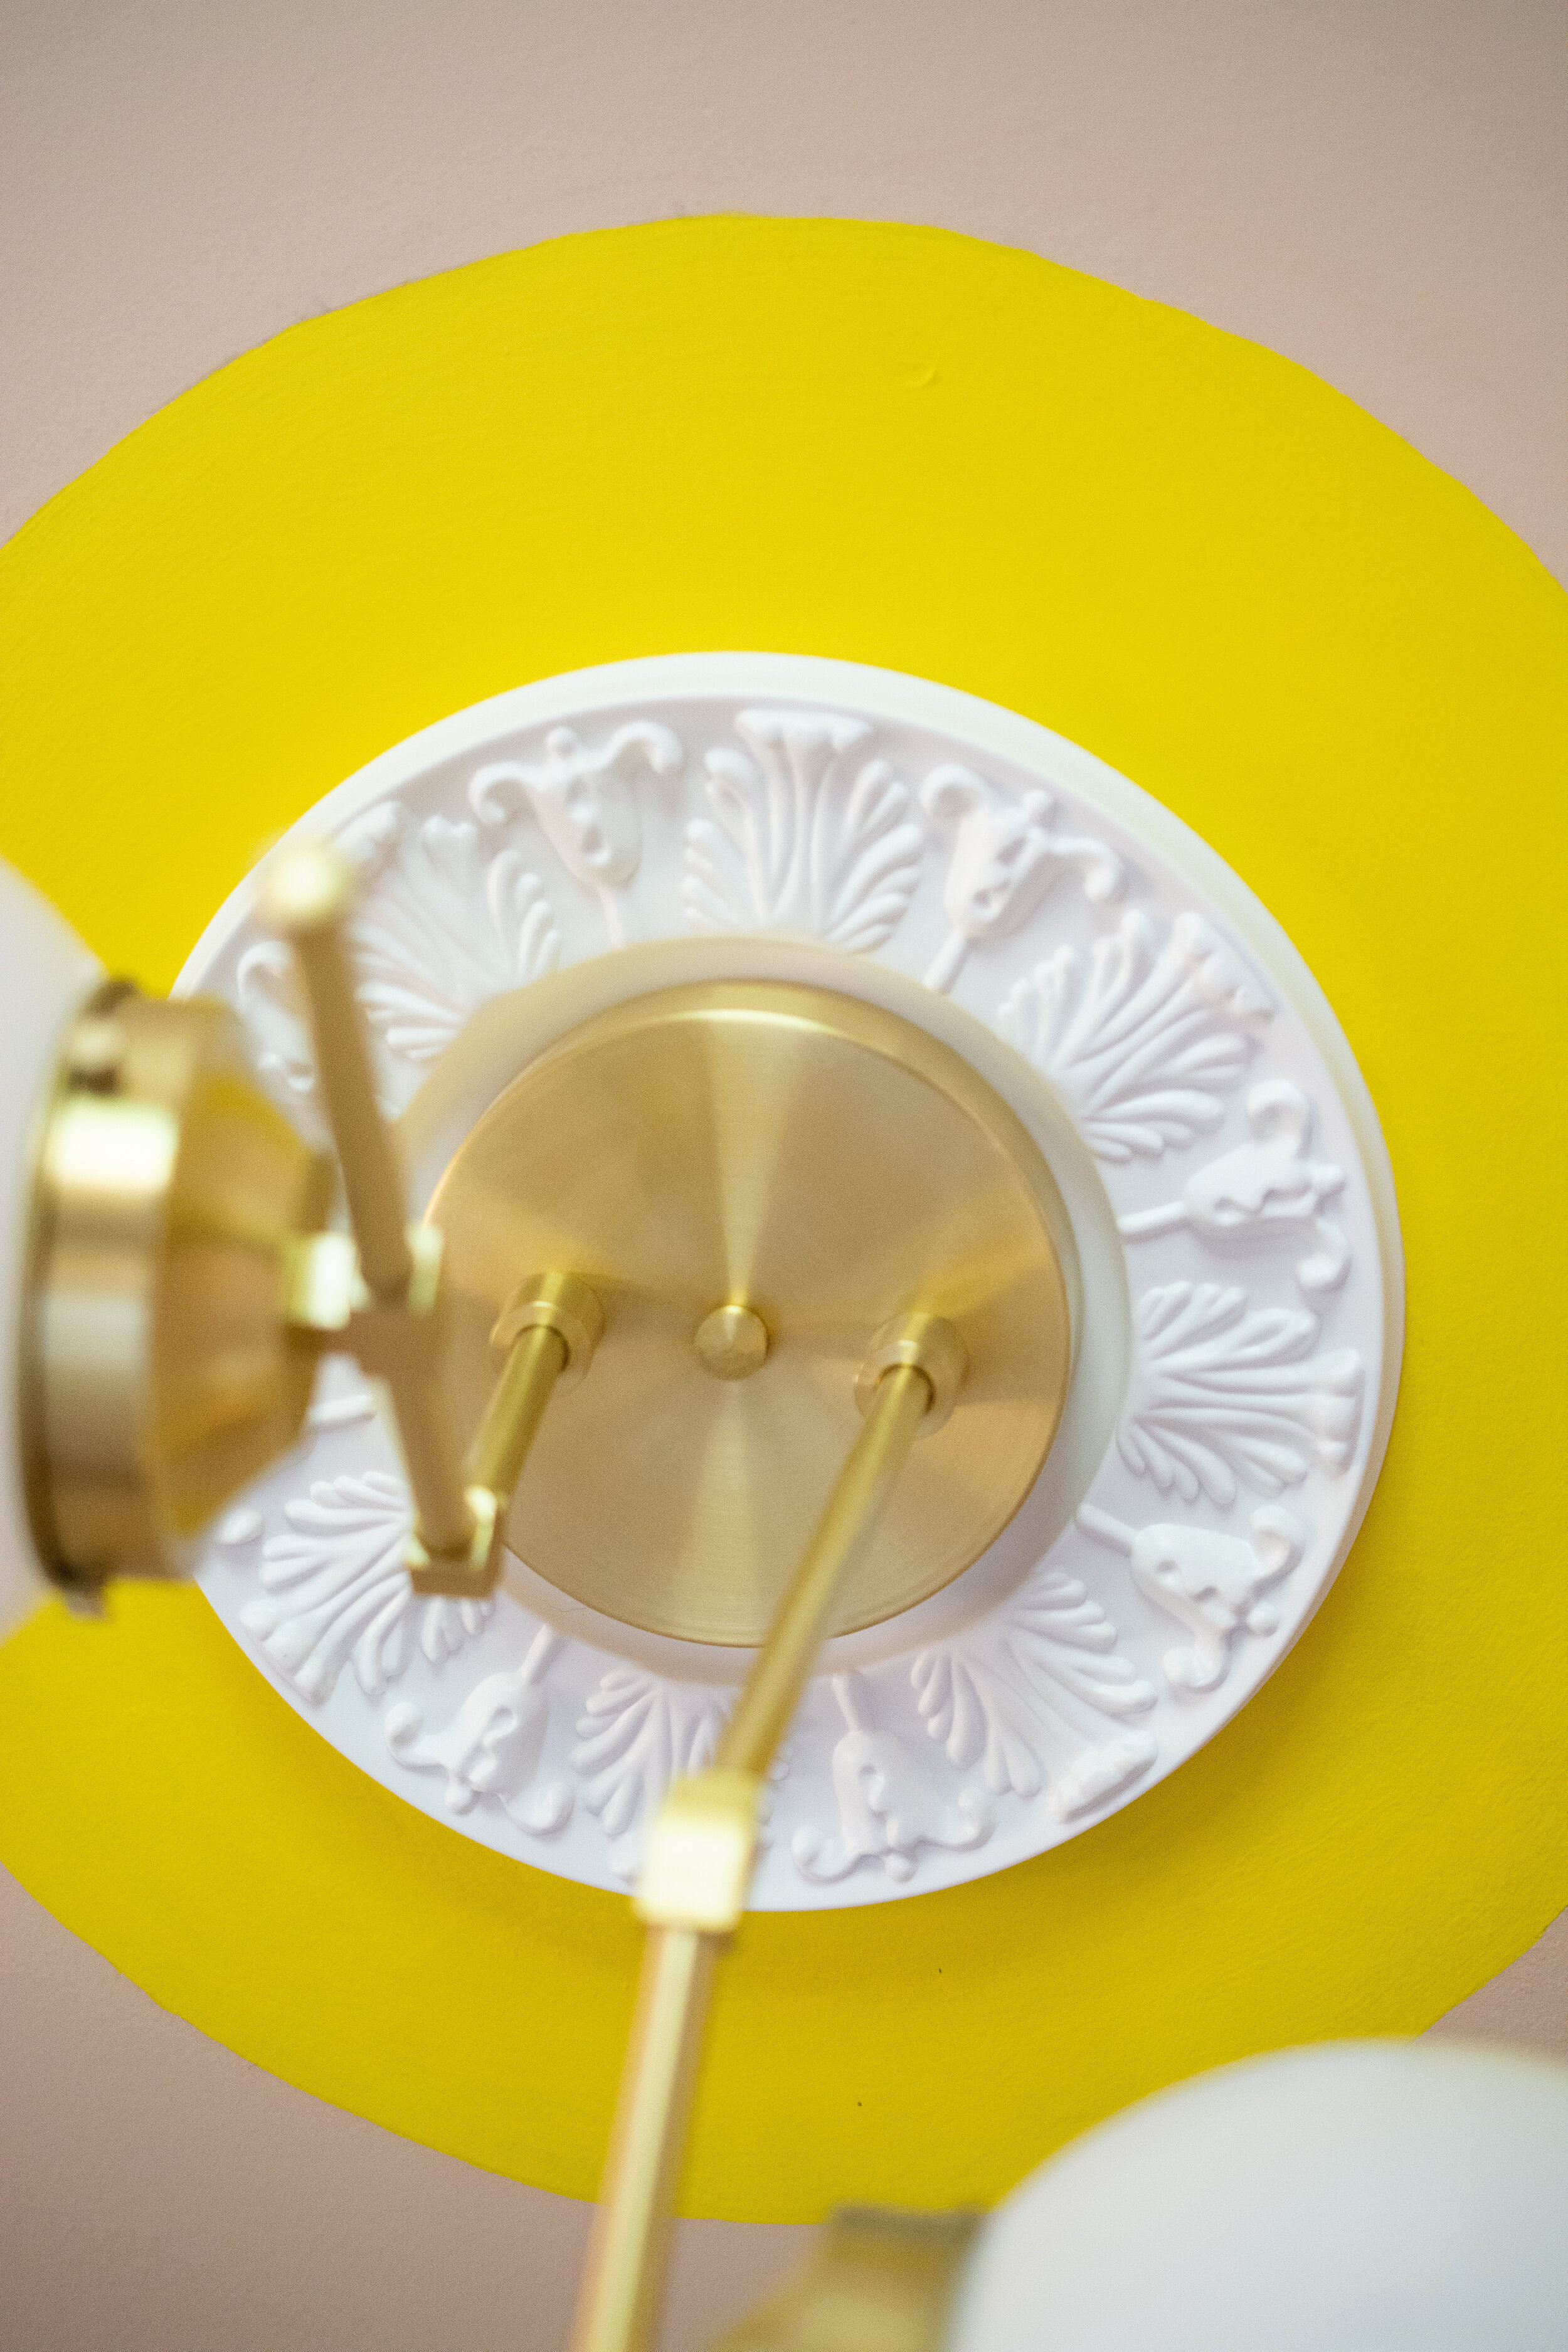
I decided to paint the ceiling the same color as the walls (I’ll explain why later), but I wanted to do something fun around the ceiling light. Something unexpected! This room is going to be filled with traditional elements, so this was a way for me to really shake things up!
In my instagram stories, I asked you which of these two colors you liked for this project:
Sherwin Williams Cadence
Sherwin Williams Romantic Mauve

Slightly more of you said mauve and a handful of you messaged me privately to suggest I use them both! I feel you! This was such a tough decision because I liked them both equally. Ultimately, I landed on the yellow because I will be bringing the mauve in with my accessories and I really wanted this color to be a single moment in the room that wasn’t repeated elsewhere. I didn’t want it to make sense. It is meant to challenge the viewer in an otherwise cohesive room. The important thing to note here, is it’s not a good-bye to mauve, it’s see you later.
This yellow takes everything you expect from a traditional room, and slaps it sideways.

The vintage-looking medallion with this modern fixture from Illuminate Vintage really encompasses the Edwardian Modern feeling I’ve been going for in this space.
Mustard, goldenrod…almost any other shade of yellow would have felt predictable with this putty pink but this highlighter yellow makes no apologies.

How to paint a circle around the ceiling light
I made the painted circle on the ceiling by using a lamp shade to trace the circle. I found this was the easiest method to achieve a perfect circle as it allowed me find the center by holding the spider fitting over the light opening on the ceiling. Luckily, I happen to have a hoard of lamp shades in various sizes.
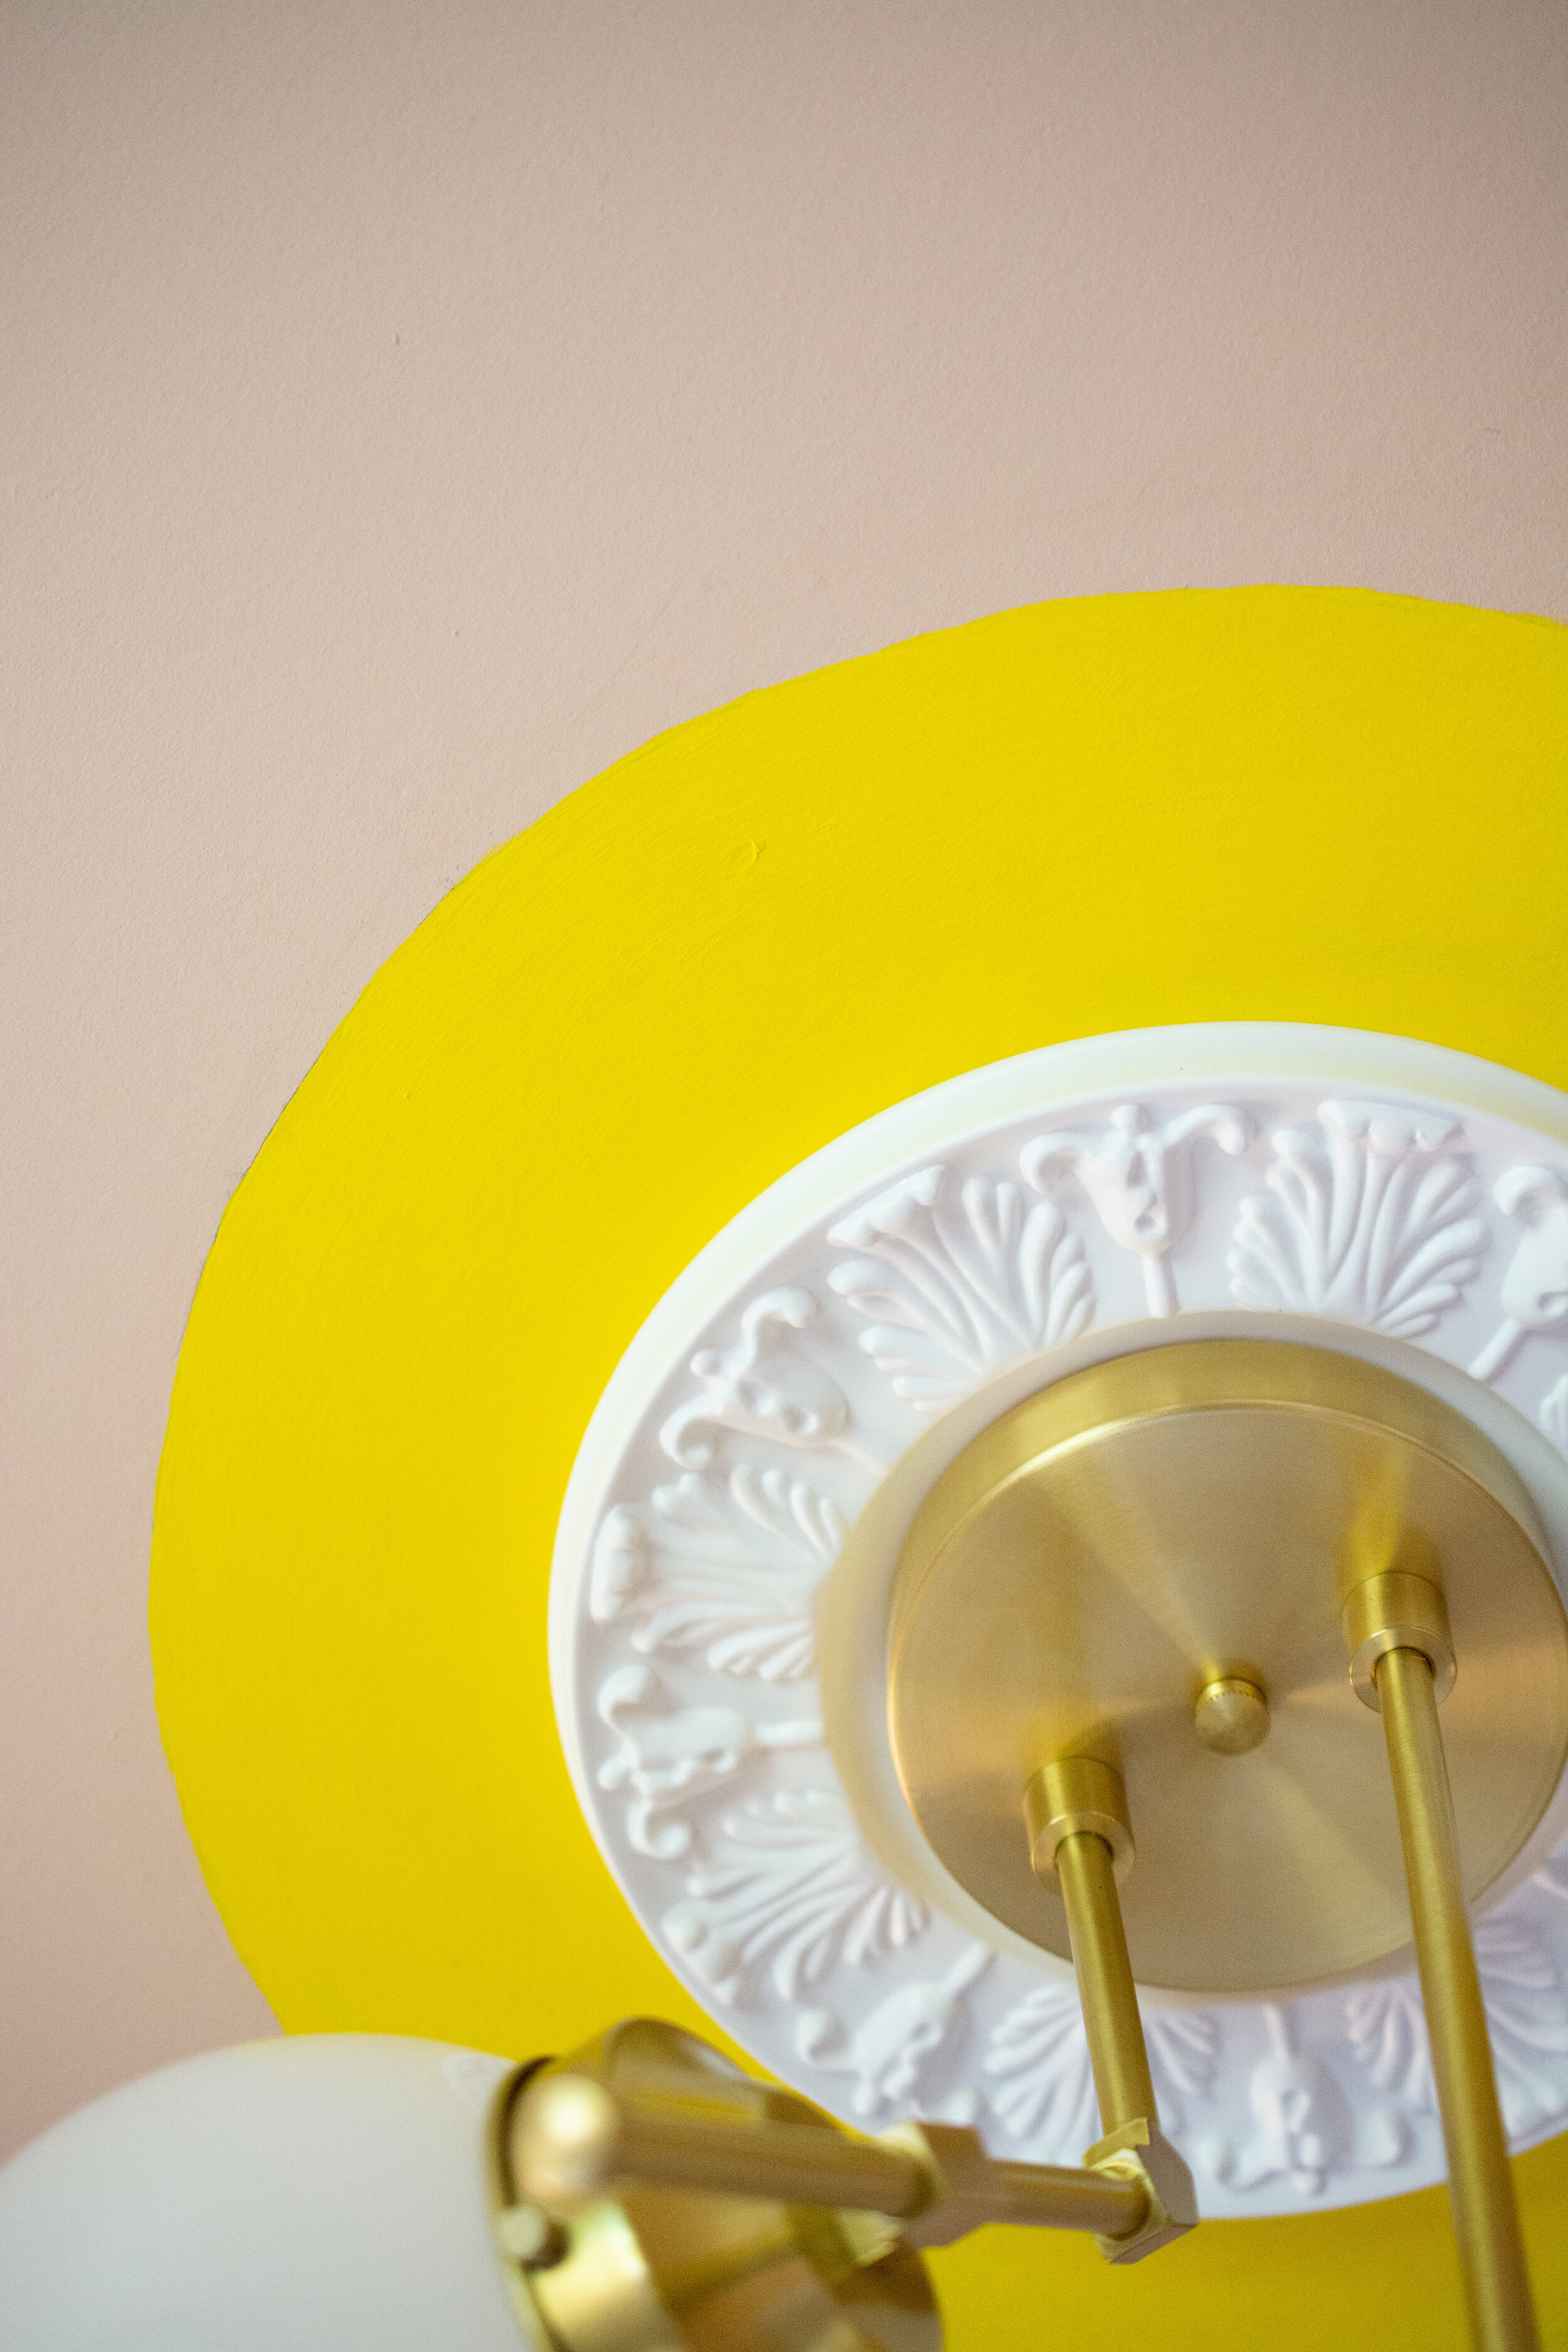
I then used a pencil to draw around it.
Using an angled, sponge crafting brush, and a steady hand, I filled it in. It took about three coats.

Whew! I hope the hardest part is behind me. It was definitely the messiest! I was so happy to wake up to this happy color this morning. I don’t miss that popcorn one bit.
To-do
Paint
Finalize ceiling light: I am deciding between two on opposite ends of modern/traditional so they could really change the entire look of the room. This is a big decision. Follow along in my instagram stories to weigh in!
Order pillows from Motif Pillows
Design roman shades and have them custom-made. This might take awhile so I need to hop to it.
Source a stool for the secretary desk I’m converting to a vanity. Something modern to balance it.
Order sconce from Modern Lantern
Make shades for sconces on either side of bed.
Convert a bar-stool into a bedside table
Purchase accessories. I’ll be modernizing the look of some vintage pieces.
DIY wall treatment above bed
Remove popcorn ceiling
Order fabric for upholstery
Order bed
Assemble bed
Modernize some vintage sculptural art for the wall
Figure out mirror situation for vanity desk.
Finalize floor-plan
install window treatments
Install lighting
Paint window trim
Style room
Photograph